

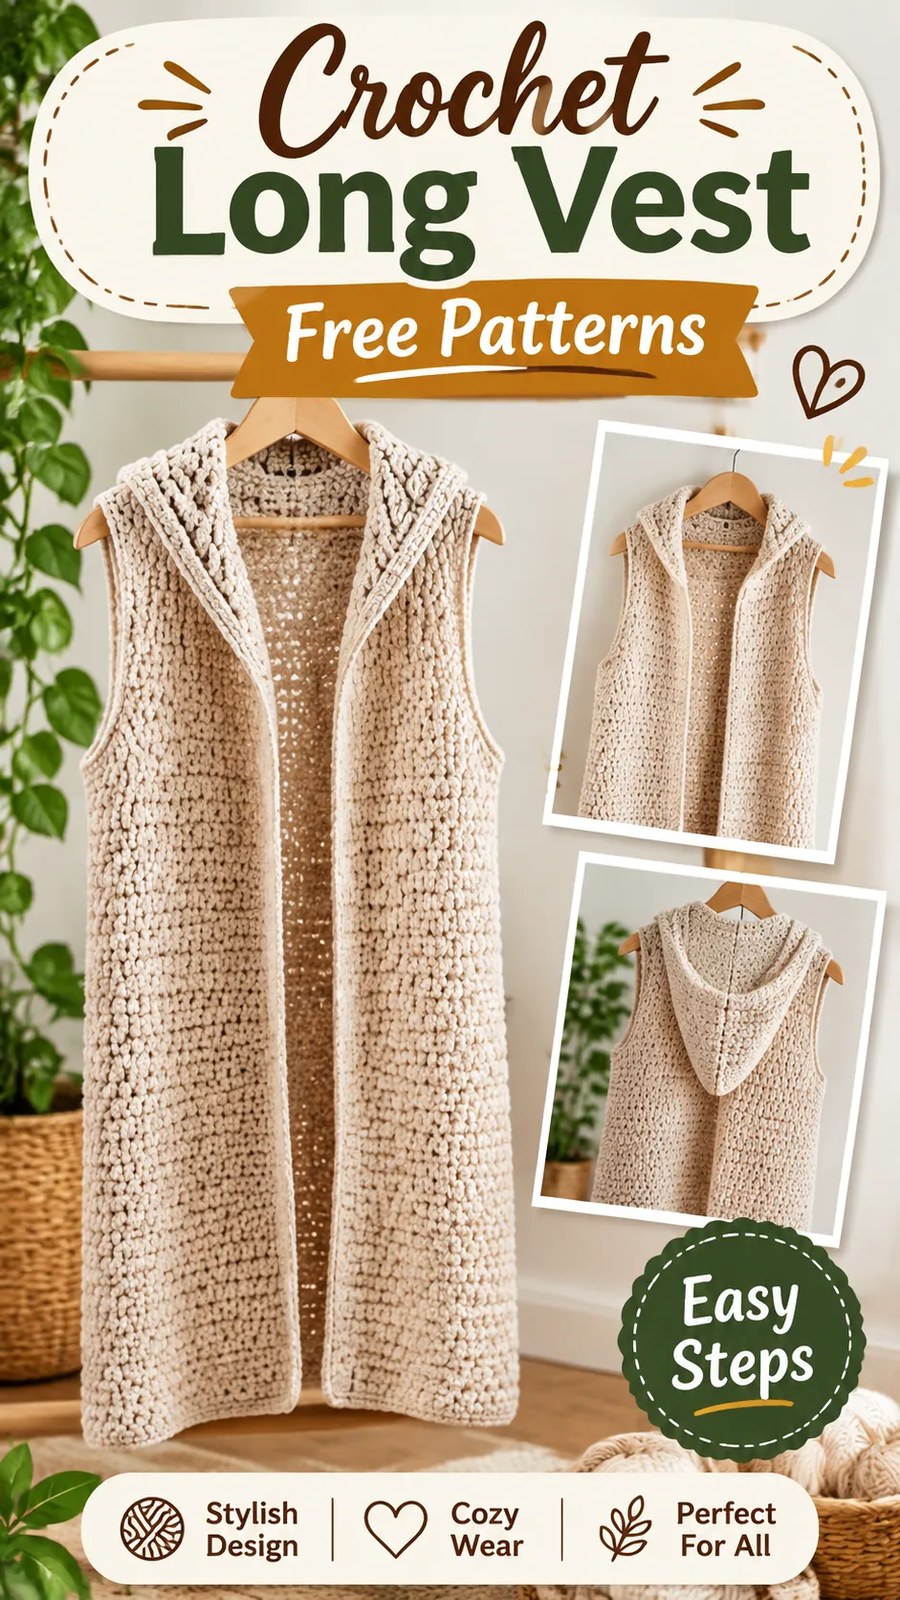
At the suggested row gauge, the side seam corresponds to approximately 89 rows. Leave the upper 30 rows unseamed to create the armhole opening.
The finished armhole opening should be approximately 8.5 inches / 21.5 cm high. If you prefer a deeper opening, shorten the side seams before joining.
Part 5: Crochet the Front Opening and Neckline Border
The edging is an important feature of this long crochet vest. It frames the open front, adds structure to the garment, and creates the soft collar effect.
Join the yarn at the lower front corner of the right panel with the RS facing you.
Border Round 1: Ch 1. Work sc evenly up the first front edge, across the exposed neckline and back-neck edge, and down the opposite front edge. Work approximately 1 sc in each row end along vertical edges and 1 sc in each stitch across horizontal edges. At the back-neck corners, work 3 sc into the corner spaces to help the edging turn smoothly. Adjust the number of sc slightly where necessary to prevent rippling or puckering. Join with a sl st to the first sc.
Border Round 2: Ch 1. Work 1 sc in each stitch around. Work 3 sc in each marked turning corner where needed to maintain a smooth shape. Join with a sl st to the first sc.
Border Round 3: Ch 1. Work 1 sc in each stitch around. Join with a sl st to the first sc.
Border Round 4: Ch 1. Work 1 dc in each stitch around. Join with a sl st to the first dc.
Border Round 5: Ch 1. Work 1 dc in each stitch around. Join with a sl st to the first dc.
Fasten off and weave in the ends. The resulting border should be slightly wider and more substantial than the main fabric.
For a softer, more flexible collar, use the same hook throughout. For a firmer edge, use a hook 0.5 mm smaller, provided the stitches do not become too tight.
Part 6: Finish the Armhole Edges
To give the armholes a neat appearance, crochet a simple single crochet edging around each opening.
- Join the yarn at the bottom of one armhole with the RS facing you.
- Ch 1 and work sc evenly around the opening.
- Distribute the stitches evenly along the vertical row ends and shoulder edge.
- Avoid adding too many stitches, as this can cause the armhole to flare.
- Join with a sl st to the first sc.
- Work one more round of sc if you prefer a thicker finish.
- Fasten off and repeat for the second armhole.
Lay the vest flat and compare both armhole borders. They should have approximately the same depth and stitch density.
Part 7: Bottom Hem and Final Details
The bottom edge can be left as it is for a simple straight silhouette, or finished with an additional single crochet round for a more polished appearance.
To add a bottom border, join the yarn at one lower corner and work 1 sc in each stitch across the hem, placing stitches evenly along any seam transitions. Join and fasten off.
Check the front edges, neckline, shoulders, and side seams. Weave in all remaining yarn tails on the WS, taking care not to create bulky knots or pull the fabric out of shape.
The long textured crochet vest is now ready for blocking and final styling.
Customize Your Long Crochet Vest for a Perfect Fit
One of the advantages of making a crochet vest from separate panels is the freedom to adjust its proportions. You can create a shorter everyday vest, a dramatic ankle-length layering piece, or a wider design with a relaxed oversized fit.
How to Measure for Your Crochet Vest
Before choosing a size, take a few basic body measurements. Wear lightweight clothing while measuring so that the finished vest will fit comfortably over your usual outfits.
- Bust: Measure around the fullest part of the chest.
- Body length: Measure from the shoulder near the neckline to your preferred hem position.
- Armhole depth: Measure from the shoulder down to the desired underarm position.
- Shoulder width: Measure across the upper back from shoulder point to shoulder point.
Choose a finished garment measurement approximately 4 to 6 inches / 10 to 15 cm larger than your body bust measurement for a comfortable layering fit. Since the front remains open, you can also wear the vest with more or less space between the two front panels.
Adjust the Width
The stitch pattern uses an odd number of stitches for each panel. To make a wider vest, add 2 stitches to the back panel and 1 stitch to each front panel for a small increase in total width. At the stated gauge, this adds approximately 1 inch / 2.5 cm to the overall circumference.
For larger adjustments, repeat the increase as many times as necessary, keeping each panel at an odd stitch count. Always check the shoulder placement and armhole measurements before joining.
Adjust the Length
The suggested body length is 34 inches / 86.5 cm. To make a shorter vest, work fewer rows in all three panels. To make a longer vest, add the same number of rows to the back and front panels.
At the recommended row gauge, approximately 3.5 rows equal 1 inch / 2.5 cm. For example, adding 14 rows creates approximately 4 additional inches / 10 cm of length.
Remember that increasing the body length may also require adjusting the side seam length so that the armholes remain the same depth.
Create Different Collar Styles
The five-round border creates a simple raised neckline. You can personalize it in several ways:
- Wide shawl collar: Add additional rows of dc along the front opening and neckline.
- Soft folded collar: Use a flexible yarn and a slightly relaxed tension so the border folds naturally.
- Minimal edging: Work only two rounds of sc for a cleaner, narrower finish.
- Contrasting border: Use a second color for the final two edging rounds.
Crochet Insight: Keep the Texture Consistent
The alternating single crochet and double crochet stitches are responsible for the vest’s dimensional appearance. Check your stitch placement at the beginning of every row. Accidentally working two identical stitches together can interrupt the textured pattern and make the fabric look uneven.
Common Crochet Vest Mistakes and How to Fix Them
Garment projects involve several measurements and construction stages. A little preparation can prevent the most common problems and help your finished vest maintain a neat, comfortable shape.
Uneven Panel Widths
If the back and front panels do not measure the expected width, check your stitch count and gauge. Count the stitches after every few rows, especially if you are new to lemon peel stitch.
Make sure the first and last stitches are worked consistently. Missing an edge stitch can gradually reduce the panel width.
Armholes That Feel Too Tight
Armholes that are too small can restrict movement when the vest is worn over a sweater. Before completing the side seams, try the vest on over the type of clothing you plan to wear underneath it.
If the opening feels restrictive, undo a small section of the side seam and create a deeper armhole. Keep the adjustment identical on both sides.
A Wavy Front Border
If the edging becomes wavy, you may have added too many stitches along the vertical row ends. Remove the border and work fewer stitches in the affected sections.
If the edge pulls inward, add a few more stitches evenly along the row ends. The goal is a smooth, relaxed border without stretching or gathering the main fabric.
Shoulder Seams That Do Not Match
Count the shoulder stitches before sewing the panels together. Both seams must use the same number of stitches and should begin at corresponding outer edges.
Use removable stitch markers to identify the shoulder seam positions before joining. This simple step makes it easier to keep the neckline centered.
A Stiff or Heavy Fabric
If the fabric feels too stiff, your tension may be too tight or the yarn may be unsuitable for a drapey garment. Try a slightly larger hook and make another gauge swatch before continuing.
For a particularly heavy long vest, consider using a lighter worsted yarn with good drape rather than a dense, rigid yarn.
Finishing, Blocking, and Caring for Your Crochet Vest
Finishing is an important part of garment making. Even well-crocheted panels can look uneven before they are joined, edged, and shaped. Proper finishing helps the garment sit more smoothly and gives the seams a professional appearance.
Blocking the Finished Panels
Before joining the panels, lightly block them if your yarn permits. Lay each panel flat and gently shape it to the intended measurements. Avoid stretching the fabric aggressively, especially if you are using a yarn that can lose its shape when wet.
For acrylic yarn, follow the manufacturer’s care instructions and use a suitable gentle blocking method. Do not apply direct high heat or steam unless the fiber instructions specifically allow it.
Seaming and Weaving in Ends
Mattress stitch is a useful choice for joining the shoulders and sides because it creates a neat seam with minimal visible bulk. Keep the tension relaxed enough to allow the vest to move naturally.
Weave the yarn tails into several stitches on the WS, changing direction where possible to secure them. Avoid pulling the fabric tightly while weaving in the ends.
Washing and Storage
Always follow the care instructions for your chosen yarn. Many washable acrylic yarns can be gently machine washed, while wool blends may require hand washing and careful drying.
- Use cool or lukewarm water when hand washing.
- Choose a gentle detergent suitable for the fiber.
- Avoid twisting or wringing the vest.
- Press excess water out with a clean towel.
- Dry flat to help preserve the long shape.
- Store folded rather than hanging for long periods, especially if the yarn is heavy and prone to stretching.
Important garment tip: A long crochet vest can stretch under its own weight. Check the body length after blocking and drying, and store the finished garment folded to help maintain its original proportions.
At a Glance: Long Crochet Vest Pattern
- Best yarn: Soft worsted-weight yarn with comfortable drape and clear stitch definition.
- Skill level: Advanced beginner to intermediate.
- Key technique: Lemon peel stitch worked in alternating single and double crochet.
- Construction: Three flat panels joined at the shoulders and sides.
- Finishing: Textured front edging, simple armhole borders, and gentle blocking.
Make Your Own Beautiful Long Crochet Vest
This long crochet vest is a lovely project for anyone who enjoys creating practical handmade clothing. Its relaxed shape, textured stitch pattern, and open-front design make it a versatile addition to a handmade wardrobe. The neutral color palette is particularly appealing, but the pattern also works beautifully in soft gray, warm brown, dusty rose, charcoal, or other favorite shades.
Choose a yarn that feels comfortable against your skin, check your gauge before beginning, and read through the complete instructions before crocheting the panels. Pay special attention to the shoulder seams, armhole depth, and front edging to achieve a balanced finish.
Most importantly, personalize the design to suit your style. Experiment with different lengths, adjust the collar width, or introduce a contrasting border to create a garment that feels uniquely yours. With its simple panel construction and attractive textured stitches, this free crochet long vest pattern is a rewarding way to turn your favorite yarn into a cozy handmade layering piece.
Gather your hook and yarn, choose your favorite neutral shade, and enjoy creating a beautiful crochet vest that you can wear throughout the cooler seasons.
Tags
Long Crochet Vest
Free Crochet Vest Pattern
Crochet Sleeveless Cardigan
Textured Crochet Stitch
Crochet Clothing
Easy Crochet Garment
Handmade Crochet Fashion
Crochet Vest Tutorial
