

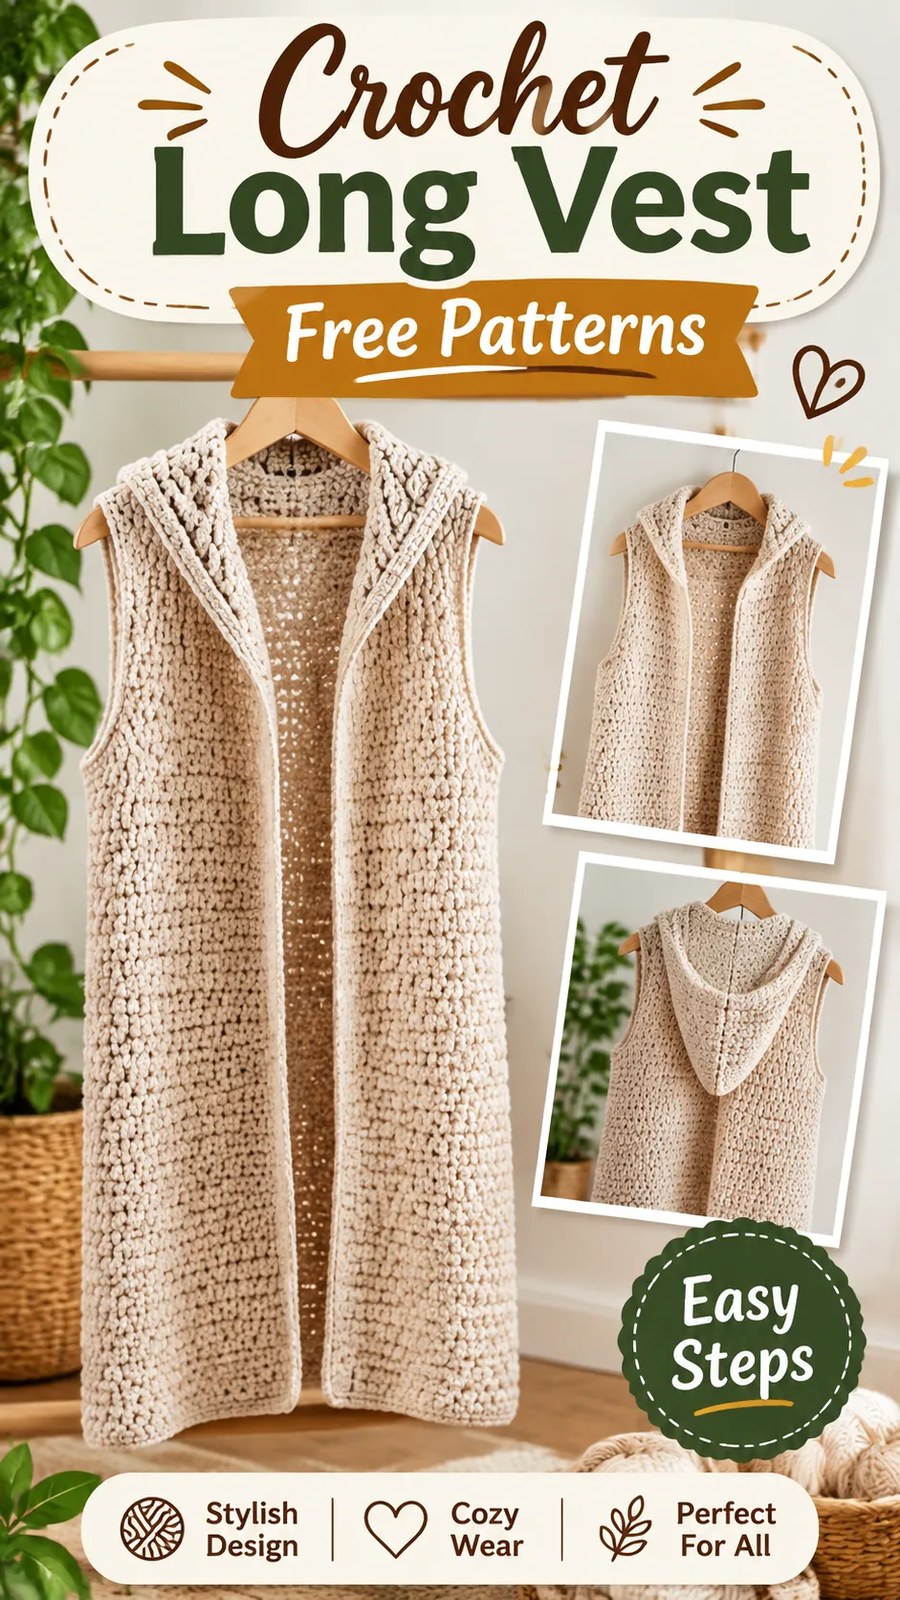
A long crochet vest is a beautiful layering piece that combines cozy comfort with timeless handmade style. With its flowing length, sleeveless silhouette, textured stitches, and generous open front, this elegant crochet garment is perfect for adding warmth without feeling too heavy. The soft cream or oatmeal color gives it a neutral, versatile look that pairs beautifully with jeans, leggings, dresses, and autumn outfits.
This long crochet vest pattern is an original design inspired by the relaxed silhouette and textured appearance of a classic sleeveless crochet cardigan. It features three simple body panels, a softly shaped shoulder area, comfortable armholes, and a wide textured front edging that creates a cozy collar effect. The construction is approachable for crocheters who understand basic stitches and want to make their first wearable garment.
Whether you are looking for an easy crochet vest pattern, a handmade winter layering piece, or a thoughtful crochet gift idea, this project offers plenty of opportunities to customize your favorite colors, length, and fit.
Key Takeaways
- Project: Long, sleeveless crochet vest with an open front and textured collar.
- Skill level: Advanced beginner to intermediate.
- Main technique: Textured lemon peel stitch worked in flat rows.
- Construction: One back panel and two front panels joined at the shoulders and sides.
- Suggested yarn: Worsted-weight yarn in a soft neutral shade.
- Customization: Easily adjustable length, width, collar depth, and overall fit.
Discover the Beauty of a Long Crochet Vest
This long crochet vest has a relaxed, elongated shape that falls around the knee or lower thigh, depending on the wearer’s height and preferred length. Its open-front design creates two long vertical edges, giving the garment a flattering appearance and making it easy to layer over everyday clothing.
The most distinctive feature is the rich, dimensional texture. Instead of relying on complicated lacework or decorative motifs, the design uses alternating crochet stitches to create a subtle pebbled surface. This texture gives the fabric visual interest while keeping the overall appearance simple and elegant.
The vest is designed without sleeves, making it comfortable to wear over long-sleeved tops, lightweight sweaters, fitted shirts, and dresses. The generously sized armholes allow comfortable movement, while the extended body provides additional coverage.
Color, Texture, and Silhouette
A warm ivory, cream, beige, or oatmeal yarn is especially suitable for this style. Neutral shades highlight the crochet texture and make the finished vest easy to coordinate with different outfits.
The long, straight body creates a relaxed silhouette rather than a tightly fitted shape. The front panels remain open, while the neckline and front edges receive additional rows of crochet to form a substantial, soft border.
The collar can be worn flat for a simple cardigan appearance or gently folded outward for a more dramatic layered look.
Crochet Construction and Stitch Texture
This original long crochet vest pattern uses a practical three-panel construction. The back is crocheted as one large rectangle, and the two front sections are worked separately. Once the panels are complete, they are joined at the shoulders and along the sides, leaving openings for the arms.
Working the panels separately makes it easier to control the garment measurements. It also eliminates complicated body shaping, making this a useful project for crocheters who are beginning to explore clothing construction.
The Lemon Peel Stitch
To create a similar raised texture, this pattern uses the lemon peel stitch. This technique alternates single crochet and double crochet stitches across each row. The different stitch heights produce a gently bumpy, woven-looking surface that resembles the dimensional texture of the vest.
Although the stitch is simple, the finished fabric looks more interesting than ordinary rows of single crochet or double crochet. It also creates a relatively dense fabric that works well for a cozy outer layer.
Yarn and Hook Recommendations
A medium-weight worsted yarn is a practical choice for this project. Look for a yarn with good stitch definition and enough softness to drape comfortably around the body. Acrylic, wool blends, and washable wool yarns are all suitable options.
A recommended starting point is a 5 mm crochet hook. However, the best hook size depends on your yarn, tension, and desired fabric density. The finished vest should feel comfortable rather than stiff.
Pro Tip:
Crochet a gauge swatch before beginning the panels. A long vest contains a considerable amount of fabric, so even a small difference in stitch gauge can noticeably change the finished bust measurement.
Free Crochet Pattern: Long Textured Open-Front Vest
Pattern description: This original long crochet vest features a straight, sleeveless body, two open front panels, a textured stitch pattern, and a wide decorative border around the front opening and neckline. It is worked flat in three separate panels and assembled with simple crochet or mattress-stitch seams.
Construction note: The instructions below describe a practical interpretation of the visible style, rather than an exact reconstruction of an unseen pattern. The recommended measurements, yarn, hook, and stitch counts are designed to work together as an independent garment pattern.
Pattern Specifications
| Skill level | Advanced beginner to intermediate |
| Construction | Three flat panels, joined at shoulders and sides |
| Sizes | XS, S, M, L, XL, 2X, 3X |
| Base size | M |
| Finished bust | Approximately 42 inches / 107 cm in M |
| Finished length | Approximately 34 inches / 86.5 cm |
| Suggested yarn | Worsted-weight yarn, category 4 |
| Recommended hook | 5 mm / US H-8 |
| Gauge | 12 stitches and 14 rows = 4 inches / 10 cm |
| Terminology | US crochet terminology |
| Ease | Approximately 4 to 6 inches / 10 to 15 cm of positive ease |
Finished Measurements and Size Selection
The measurements below represent the approximate finished garment bust circumference, measured around the body with the front panels meeting. Because the vest is open-front, the actual fit can be adjusted by changing the overlap or spacing between the front edges.
| Size | Back sts | Each front | Approx. bust | Shoulder seam |
|---|---|---|---|---|
| XS | 55 | 27 | 36.3 in / 92 cm | 12 sts |
| S | 59 | 29 | 39.0 in / 99 cm | 13 sts |
| M | 63 | 31 | 41.7 in / 106 cm | 14 sts |
| L | 67 | 33 | 44.3 in / 113 cm | 15 sts |
| XL | 71 | 35 | 47 in / 119 cm | 16 sts |
| 2X | 75 | 37 | 49.7 in / 126 cm | 17 sts |
| 3X | 79 | 39 | 52.3 in / 133 cm | 18 sts |
All sizes use the same approximate 34-inch / 86.5 cm body length and 8.5-inch / 21.5 cm armhole depth. These can be adjusted to suit the wearer.
Materials and Notions
- Worsted-weight yarn, category 4, in your preferred color.
- Approximately 1,500 to 1,800 yards / 1,370 to 1,645 meters for size M, with additional yarn for a longer or wider collar.
- 5 mm / US H-8 crochet hook, or the size needed to obtain gauge.
- Locking stitch markers.
- Yarn needle for joining and weaving in ends.
- Scissors.
- Measuring tape.
- Rust-resistant blocking pins and a suitable blocking surface.
Suggested yarn quantities for larger sizes are approximately 1,250 to 1,450 yards for XS, 1,350 to 1,550 yards for S, 1,500 to 1,800 yards for M, 1,650 to 1,950 yards for L, 1,800 to 2,150 yards for XL, 1,950 to 2,300 yards for 2X, and 2,100 to 2,500 yards for 3X. These are planning estimates, not guaranteed consumption figures.
Abbreviations
- ch: Chain.
- sc: Single crochet.
- dc: Double crochet.
- sl st: Slip stitch.
- st: Stitch.
- sts: Stitches.
- RS: Right side.
- WS: Wrong side.
- rep: Repeat.
- sp: Space.
The pattern uses US terminology throughout. In UK terminology, US single crochet is double crochet, and US double crochet is treble crochet.
Special Stitch: Lemon Peel Stitch
Lemon peel stitch: Alternate 1 sc and 1 dc across the row. On the following row, work a dc into each sc and a sc into each dc. Continue alternating stitch types in this way to maintain the textured pattern.
Important: The turning chain does not count as a stitch. Work the first stitch into the first stitch of the previous row. Slip stitches are used only for joining and do not count as body stitches.
Gauge and Preparation
Using the 5 mm / US H-8 hook, work a lemon peel stitch swatch of at least 15 stitches and 16 rows. After blocking and allowing it to dry, measure the central section.
- 12 stitches = 4 inches / 10 cm.
- 14 rows = 4 inches / 10 cm.
If your swatch is wider than the target measurement, try a smaller hook. If it is narrower, use a larger hook. Repeat the swatch until your measurements are close to the stated gauge.
Construction Notes
- Choose one size and use the corresponding stitch counts throughout.
- Each panel is worked flat in turned rows.
- The starting chain is one stitch longer than the required first-row stitch count.
- Turning chains do not count as stitches.
- Keep the first and last stitches neat and consistent.
- Place a stitch marker in the first stitch of each row if necessary.
- The two front panels are mirror-positioned during assembly.
Part 1: Crochet the Back Panel
For size M, chain 64. This creates 63 working stitches in the first row. For other sizes, use the corresponding back-panel stitch count plus 1 for the starting chain.
Row 1 (RS): Sc in the second ch from the hook, dc in the next ch. Alternate sc and dc across the chain. You will have 63 stitches. Turn.
Row 2 (WS): Ch 1. Dc in the first sc, sc in the next dc. Alternate dc and sc across the row. You will have 63 stitches. Turn.
Row 3: Ch 1. Sc in the first dc, dc in the next sc. Alternate sc and dc across. You will have 63 stitches. Turn.
Rows 4-119: Repeat Rows 2 and 3, maintaining the alternating stitch placement and working 63 stitches in every row.
At the end of Row 119, fasten off, leaving a long yarn tail if you intend to use it for seaming.
The finished back panel should measure approximately 21 inches / 53.5 cm wide and 34 inches / 86.5 cm long before final assembly and blocking.
For other sizes, use the stitch count from the sizing table. Work the same 119 rows for the suggested length.
Part 2: Crochet the Two Front Panels
Each front panel is worked separately. Both pieces have the same measurements and stitch counts. When assembled, they form the open front of the vest.
For size M, chain 32 to create 31 working stitches.
Row 1 (RS): Sc in the second ch from the hook, dc in the next ch. Alternate sc and dc across. You will have 31 stitches. Turn.
Row 2 (WS): Ch 1. Dc in the first sc, sc in the next dc. Alternate across. You will have 31 stitches. Turn.
Row 3: Ch 1. Sc in the first dc, dc in the next sc. Alternate across. You will have 31 stitches. Turn.
Rows 4-119: Repeat Rows 2 and 3, maintaining the lemon peel texture. Keep 31 stitches in every row.
Fasten off after Row 119.
Make a second identical front panel. For other sizes, chain the number of front-panel stitches plus 1, using the sizing table.
Each front panel should measure approximately 10.5 inches / 26.5 cm wide and 34 inches / 86.5 cm long for size M.
Part 3: Arrange and Join the Shoulder Seams
Place the back panel flat with the RS facing upward. Position one front panel on each side, with the lower edges aligned. The front panels should sit with their inner edges facing each other and their outer edges aligned with the back panel’s outer edges.
The upper edges of all three panels form the shoulder area. For size M, join 14 stitches along each outer shoulder. This leaves the remaining central stitches open to form the back neckline and front neck opening.
- Align the first 14 stitches of one front panel with the first 14 stitches of the back panel.
- Use a yarn needle and mattress stitch, or join with sl sts through corresponding stitches.
- Repeat for the opposite shoulder, joining the final 14 stitches of the second front panel to the final 14 stitches of the back panel.
- Check that both shoulder seams are even and that the front edges remain open.
- Weave in the yarn ends securely.
For other sizes, use the shoulder seam stitch count provided in the sizing table. The central opening will become the neckline.
Part 4: Create the Armholes and Side Seams
After completing the shoulder seams, lay the vest flat with the RS facing upward. Align the side edges of the back and front panels.
For the suggested 34-inch / 86.5 cm body length, the side seam should measure approximately 25.5 inches / 65 cm from the bottom edge, leaving an armhole opening of approximately 8.5 inches / 21.5 cm.
- Measure approximately 25.5 inches / 65 cm upward from the lower edge along each side.
- Place a stitch marker at the end of the planned seam on both the front and back edges.
- Join the side edges from the hem upward to the marked position using mattress stitch or slip-stitch seams.
- Repeat on the opposite side.
- Make sure both side seams have the same length.
- Check that the armhole openings are comfortable and symmetrical.
