

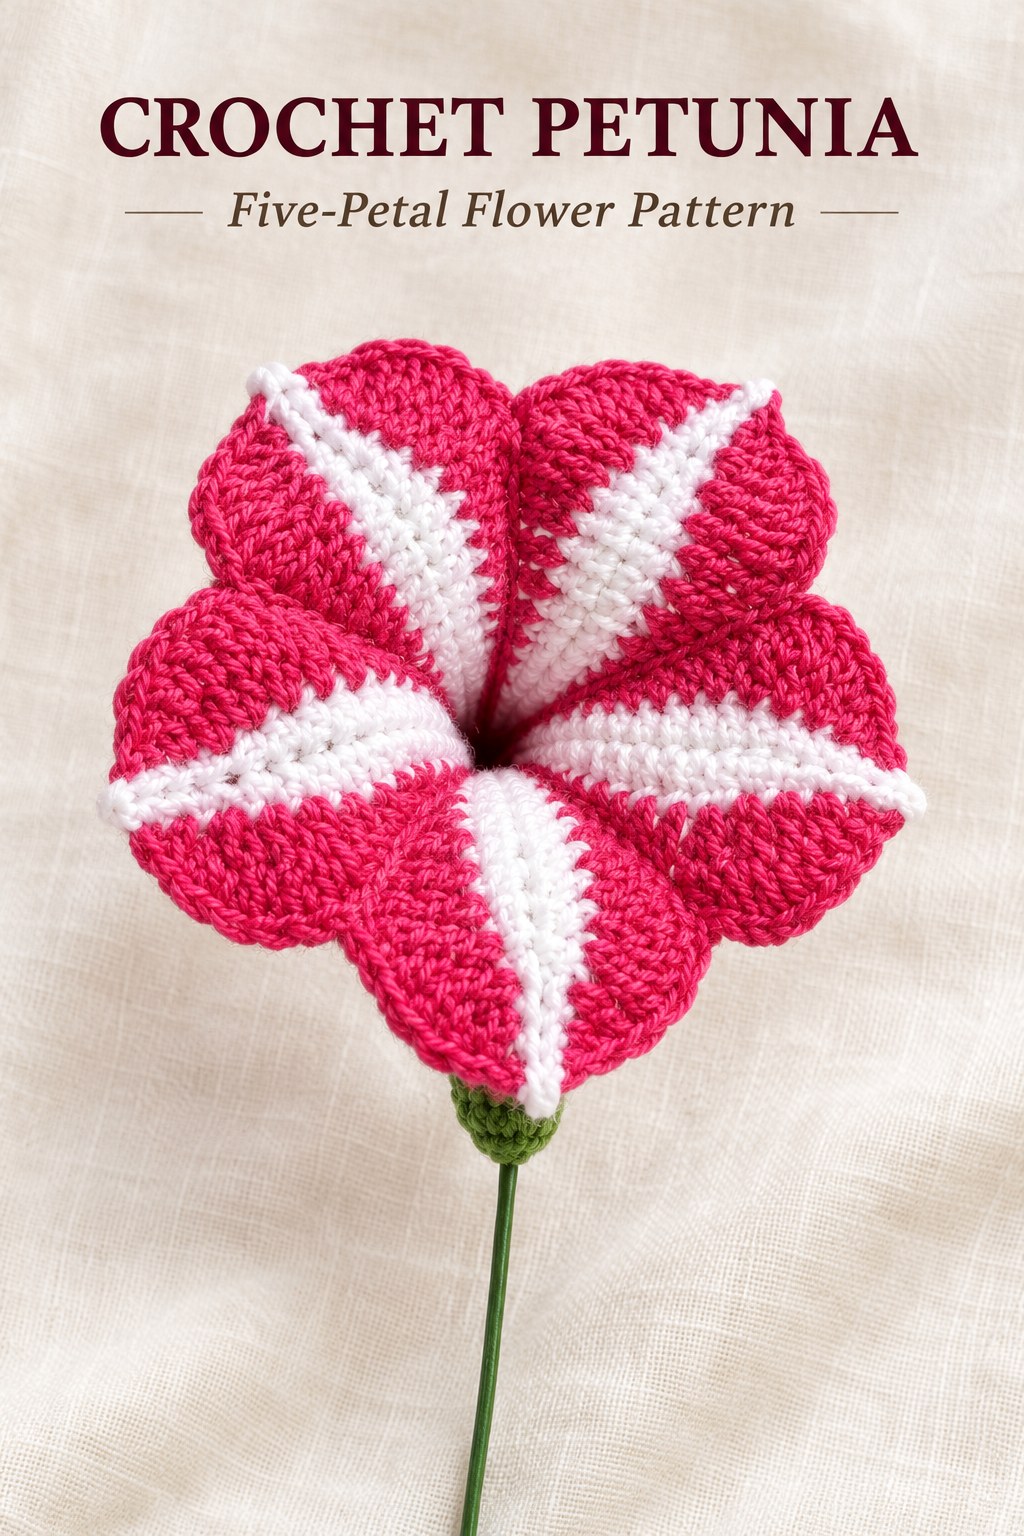
Close the Five-Petal Flower Shape
Continue the joining sequence around all five components. Their connected sides form the broad funnel and leave the narrow green-base area available beneath it. The source photograph of the joined flower shows the completed five-lobed face before the final base shaping is finished.
Check five petal lobes and five base-arch contributions. The white stripe arrangement should radiate from the throat through the individual petals, rather than appearing as an independently attached white star. The source does not give a measured seam tension or finished throat diameter.
Base Round 4: Work Fifteen Singles
Work fifteen single crochets at the base of the flower. The count comes from three contributed by each of the five petal arches. Keep this small circular round separate from the much larger visible rim, which is not the path being reduced at this stage.
The process photograph shows the green yarn working at the underside. Use the image to confirm the base location rather than counting the tall petal stitches as fifteen evenly spaced anchors around the upper flower. No extra sepal cup is supplied for this version.
Base Rounds 5–6: Narrow to Five
Round five repeats skip one original and work two singles five times. Each group uses three of the fifteen incoming positions and produces two, leaving ten singles. Round six repeats skip one and work one single five times, taking ten to five.
Tighten the small circle with one slip stitch, lock with two chains and cut the yarn. These are skipped-position reductions, not the same-stitch increases used in the upper petal construction. The source’s final five singles provide the narrow flower base shown in its underside photo.
Flower 2: Use the Same Core Construction
The second source finish begins with the same two petal rounds and uses the same joining and base rounds three through six. It is not a separately designed flower foundation. The difference is an additional round worked at the upper flower after that common construction.
The second finished photograph shows a contrasting pale outline around a dark-pink face. The text names the upper edging but does not give a separate complete color-change schedule. Match the pictured contrast if desired while keeping the actual extra-round instructions distinct from a new petal or base pattern.
Work the Optional Upper Edging Round
Repeat this sequence around the upper flower: two singles, two doubles in one original, two doubles in the next original, two singles, three doubles in one original, two singles, two doubles in one original, two doubles in the next original and two singles. Join with a slip stitch, cut and tie.
The central three-double fan and paired two-double increases add fullness along each lobe. Keep those stitches complete in their shared anchors. The chart shows the edging route around the five joined petals, so use it with the written repeat rather than working an ordinary single-crochet border everywhere.
Finish choice: Flower 1 ends after its shaped base. Flower 2 adds the written upper edging after the same petals and base, without adding another set of petals.
Install the Wire Support
Insert the green wire up and down through one side of the flower, following the source process photograph. Fold the upper wire and lock it at the base. The support is threaded through the existing crochet rather than replacing one of the petal seams.
The source gives the wire diameter but no cutting length, bend angle or numerical spacing between passes. Keep the photographed placement and retain a practical allowance for the bend and base lock. No leaf component, separate stem rod or stuffing instruction is supplied for this Petunia.
Check the Counts and Finished Shape
If the flower has fewer than five lobes, check the number of completed petals and side joins. If the base is not fifteen before narrowing, check the three singles in every arch. If it does not narrow to ten and five, review the skipped positions rather than replacing them with same-stitch increases.
If the rim looks shorter than the reference, confirm the treble interpretation at the upper sides of each petal. If Flower 2 becomes uneven, check the sequence of paired double increases around its central three-double fan. The source does not give a gauge-based correction formula, so assess the actual stitch path before changing tools or dimensions.
Source Credit and Care
This guide follows Petunia on PDF pages eighty-one and eighty-two of the supplied 350 page 1 (1).pdf, with stitch symbols checked against the general legend on page sixty-nine. The illustrations are actual finished examples, charts and construction photographs. The explanations preserve both source finishes without claiming a physical crochet test or measured sample.
Follow care guidance appropriate to the cotton and wire you select. No washing, blocking, stiffening or heat-treatment method is specified. Support the flower at its wired base when handling the display and protect the joined rim and light stripes from unnecessary pulling.
At a Glance
- Five fifteen-chain petals form one joined flower.
- Side seams use twelve singles outward and twelve slip stitches back.
- The base narrows fifteen to ten to five.
- Flower 2 adds a separate upper edging; the support wire is threaded through one side.
Finish Your Crochet Petunia
Prepare all five petals, preserve their base arches and work the complete joining paths before narrowing the flower bottom. Choose the plain or additionally edged source finish, then install its support wire. Click the Pin to see the crochet Petunia pattern and illustrated guide, and save the petal and flower charts before beginning.
Tags
Crochet PetuniaCrochet FlowersCrochet PatternJoined PetalsCotton YarnWired FlowersCrochet Charts
