

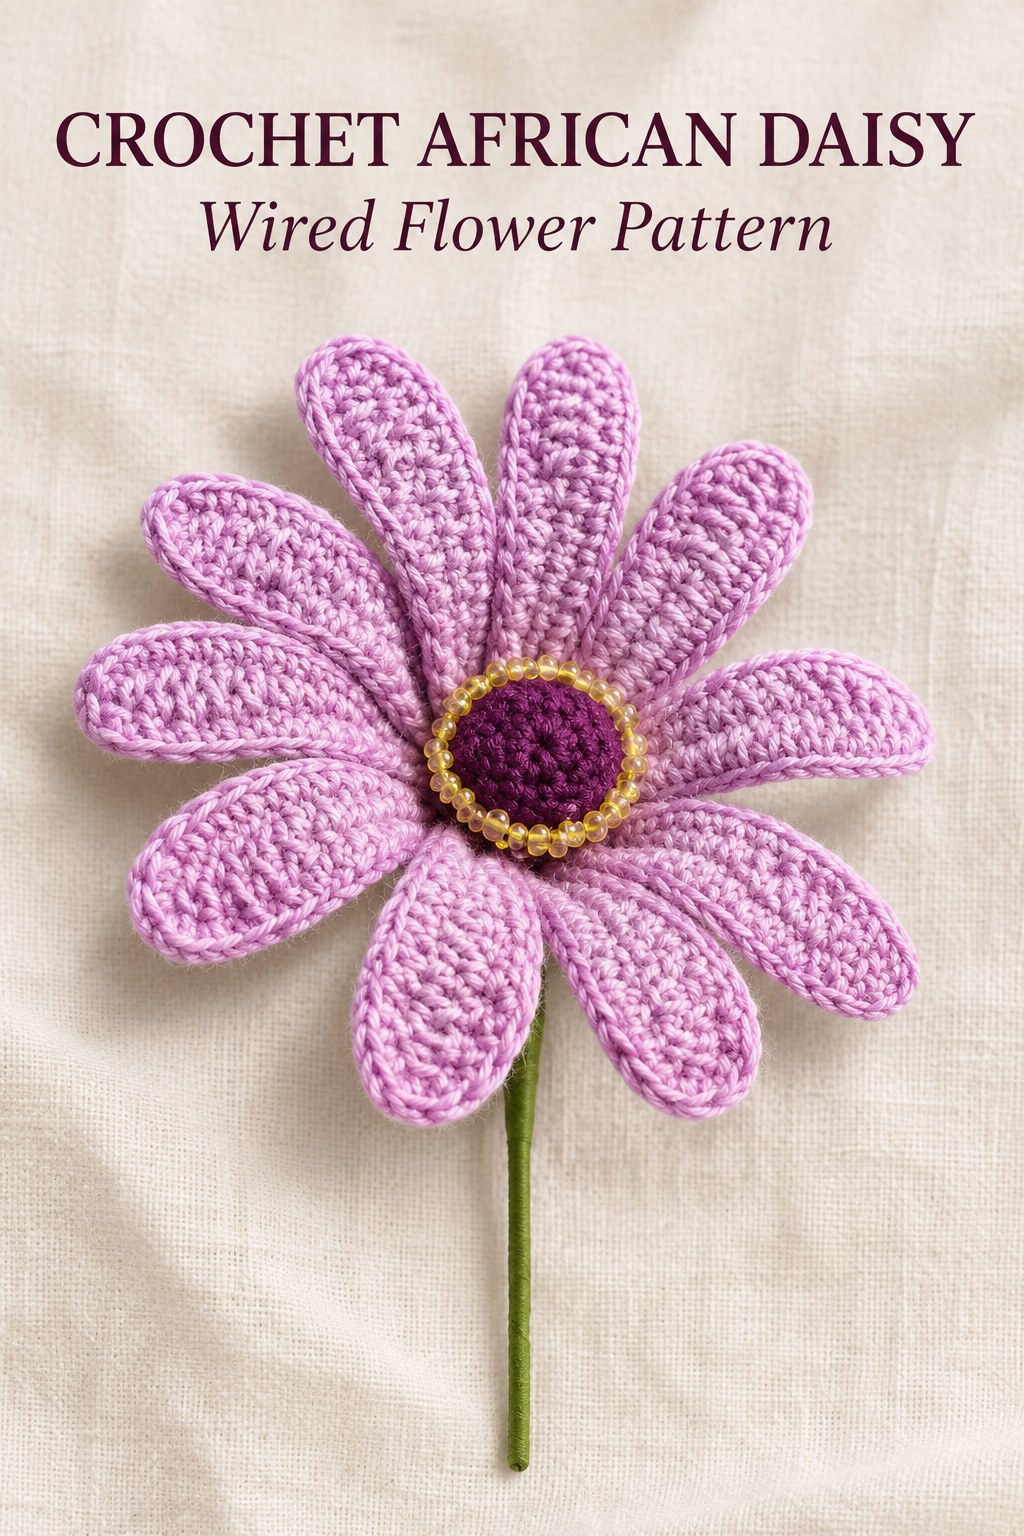
This crochet African Daisy pattern makes a radial flower from ten or more individually wired petals around a stuffed violet center edged with yellow seed beads. It follows the separate African Daisy design on PDF pages 107 and 108 of the supplied collection. The petals begin with a fifteen-chain working foundation and receive a single-crochet wire border, with an optional slipped outline. The center has nine shaped rounds before its wire and bead finish. This guide retains the complete construction and includes the actual charts and source process photographs for shaping, joining and finishing.

Key Takeaways
- Use pink, violet and dark-violet cotton yarn with a 1.90 mm hook.
- The source specifies 0.6 mm wire, yellow seed beads, fabric glue, stuffing and green floral tape.
- Make ten or more individual petals, each starting with fifteen working chains plus one height chain.
- Single crochet around each petal while enclosing wire; the third slipped outline round is optional.
- The stuffed center progresses ten, fifteen, twenty, then narrows through fifteen, ten and five.
- Apply seed beads around the center edge, allow the glue to dry, insert the center and tape the stem.
CROCHET AFRICAN DAISY FLOWER PATTERN
Project: A pink-and-violet flower with ten or more wired elongated petals and a stuffed dark-violet center ringed with yellow seed beads.
| Skill level | No difficulty rating is shown for this entry. Uses shaped petals, incorporated wire, stuffed circular work and beaded assembly. |
|---|---|
| Yarn | Cotton yarn in pink, violet and dark violet. Formal weight, brand and quantities are not supplied. The written rounds do not prescribe a separate numbered color-change sequence. |
| Hook and support | 1.90 mm hook and 0.6 mm wire. Wire-cut lengths are not specified. |
| Other materials | Yellow seed beads, fabric glue, stuffing and green floral tape. Bead count, bead size and filling amount are not supplied. |
| Gauge and dimensions | No gauge, petal measurements, flower diameter or final stem length is stated. |
| US terminology | ch = chain; sc = single crochet; hdc = half double crochet; dc = double crochet; ss = source ST, slip stitch. Source 2 sc together means 2 complete sc in one original, following the legend. |
| Petal foundation, make 10 or more | Ch15 plus 1 height chain. |
| Petal row 1 | Sc, hdc, 3 dc, hdc, 9 sc. 15 worked stitches. |
| Petal round 2 | Work around the petal in sc, incorporating wire as shown by the chart and process photos. Twist the wire. Ss to join, ch2 to lock and cut the yarn. The source does not supply a numerical border-stitch total. |
| Optional petal round 3 | Work around the petal in ss and cut the yarn. This is the optional outline shown in the finished source view. |
| Center foundation and round 1 | Make a magic ring. Ch3 and work 10 dc into it. Tighten the ring and ss to join. |
| Center round 2 | 5 times. 15 sc. |
| Center round 3 | 5 times. 20 sc. |
| Center rounds 4–6 | 20 sc in each of 3 rounds. 20 working stitches throughout; 60 sc worked across those rounds. Add stuffing after this plain section. |
| Center round 7 | 5 times. 15 sc. |
| Center round 8 | 5 times. 10 sc. |
| Center round 9 | 5 times. 5 sc. Tighten the circle with ss, ch2 to lock and cut the yarn. |
| Join the petals | Shape the supported petals, twist their wire ends and tighten the gathered petal stems with thread, following the source process views. |
| Center support | Insert wire into the back of the center and twist its ends. |
| Beaded edge | Apply fabric glue and yellow seed beads around the center edge. Allow to dry; no exact bead total or drying time is given. |
| Final assembly | Insert the center into the middle of the flower. Cover the stem with green floral tape. |
Keep This Design Separate from the Earlier African Daisy
The supplied collection includes another African Daisy on earlier pages. This entry has ten or more separately wired narrow petals and a stuffed dark center with seed beads. It is not the earlier two-layer petal construction with its separate stepped leaf pattern.
Keep the source pages and component identities clear while preparing the flower. No independent leaf is supplied here. The optional outline shown on the final source photo belongs to petal round three, and should not be confused with a second ring of separately attached petals.
Gather the Listed Cotton and Finishing Supplies
The local material list specifies pink, violet and dark-violet cotton yarn, a 1.90 mm hook, 0.6 mm wire, yellow seed beads, fabric glue, stuffing and green floral tape. It does not provide a cotton thread number, yarn quantity, wire-cut length, bead count or measured filling amount.
Choose workable supplies within those named specifications and assess your own fabric. A hook dimension does not establish a guaranteed flower diameter or petal length. The photographs show real examples beside hands, but no scale measurement is printed for converting those views into exact dimensions.
Use the source palette and photographs to organize the petal and center colors. The instructions do not number exact yarn-color changes inside the petal rounds. Keep any chosen contrasting outline identified as your interpretation of the pictured palette rather than an invented mandatory color-change formula.
Component checkpoint: Make at least ten individual wired petals. The optional slipped outline changes the edge finish; it does not create another separate petal layer.
Read the Source Legend before the Center Increases
The chapter’s general legend defines two single crochets together as two complete singles placed in the same original. It is an increase, not sc2tog. The African Daisy center’s ten-to-fifteen-to-twenty count progression confirms that local reading.
Later center rounds explicitly say to skip an original and work ordinary singles after it. Those are skipped-position reductions, not the earlier increase phrase. Keep the chart, local wording and stated counts together so a familiar abbreviation does not silently reverse the intended shaping.

Start Each Petal with Fifteen Working Chains
Chain fifteen plus one height chain. The fifteen are the working positions for the shaped first row, while the extra chain provides the starting height allowance. Keep that distinction when counting before the first single crochet.
The petal is one small elongated component. Its foundation establishes the line that will later receive a border and wire. Do not begin a separate chain for each side or replace the height chain with three chains simply because the row contains double crochet farther along.
Petal Row 1: Arrange the Stitch Heights
Work one single crochet, one half double crochet, three double crochets, one half double crochet and nine single crochets. The groups use fifteen working positions in total: one plus one plus three plus one plus nine.
The taller stitches form the broader portion of the petal, while the longer single-crochet run develops its narrow section. Keep their order as written rather than making a symmetric five-double-crochet leaf. The source chart shows the resulting elongated shape and its supporting foundation.
Petal Round 2: Single Crochet around the Outline
Work around the petal in single crochet while incorporating the 0.6 mm wire. Follow the source chart around the shaped first row and foundation edge, keeping the support enclosed by the new stitches. The written pattern does not give a numerical border-stitch total.
Keep the wire alongside the fabric rather than crossing the visible petal face. The supporting round defines the full outline around the first row. Do not invent an exact border count to fill a table, or add an unrelated decorative increase round from another flower.
Twist and Shape the Supported Petal
Twist the wire ends, join the crochet with a slip stitch, chain two to lock and cut the yarn. The source process photos show the supported petal being shaped between the hands and its wire ends twisted below the narrow base.
The wire remains in the petal outline while its ends form the attachment stem. No fixed bend angle, cut length or numerical number of twists is supplied. Use the demonstrated relationship between the elongated petal and its supporting wire without presenting unmeasured details as printed specifications.
Petal Support Note
The first row supplies fifteen shaped stitches. The next round encloses wire around the outline. The optional third round adds a slipped edge, while the wire provides the later adjustment and attachment support.
Choose Whether to Add the Optional Slipped Outline
The source explicitly marks petal round three as optional: work around the petal in slip stitches and cut the yarn. The finished comparison view shows the flower with that outline included. Retain the option rather than treating it as a missing mandatory round.
A contrasting palette choice can make the outline more visible, while a similar shade keeps it subtle. Exact written color-change points are not supplied. Work the chosen outline consistently across your petal set without changing the foundation or wire-border construction.
Prepare Ten or More Petals before Joining
Repeat the complete petal construction until at least ten are ready, following the source’s ten-or-more instruction. The reference flower shows a radial arrangement of narrow petals. More petals are permitted by the text, but the source gives no fixed upper limit or formula for changing the center size.
Compare the working row and wire outline on each piece before joining. A similar final shape does not replace the fifteen-stitch check. If one petal differs substantially, review its three double crochets and nine-single run before adjusting it solely through the support wire.
Petal tally: The source permits ten or more petals. Use the exact same first-row groups and border method for each piece rather than borrowing another African Daisy’s petal count.
