

Corolla Rounds 3–8: Hold Fifteen for Six Rounds
Work fifteen single crochets in each of rounds three through eight, six plain rounds altogether. The source also lists ninety singles for this section, meaning the combined number worked across all six rounds. The live circumference remains fifteen throughout.
The chart highlights one row and labels it to be worked six times. Keep that repeat note separate from a single enlarged round. Working ninety singles around a newly expanded circumference would invent increases and change the source’s narrow trumpet form.
Plain-round checkpoint: Ninety is six rounds of fifteen, not a ninety-stitch circumference. Later, forty likewise means two rounds of twenty.
Corolla Round 9: Increase to Twenty
Repeat a single-crochet increase followed by two plain singles around. Five three-position groups use the fifteen originals and produce twenty. This broadens the upper part of the trumpet before its final plain section and scalloped edge.
Keep the two plain singles after each increase. Repeating the earlier increase-and-one-single group would consume a different number of originals. Count twenty before moving into rounds ten and eleven so the charted rim has the correct anchor supply.
Corolla Rounds 10–11: Hold Twenty
Work twenty single crochets in each of two rounds. The source’s forty-single note is the combined worked total across these two rounds, while twenty remains the live count. No further increase belongs in this plain section.
These upper rounds establish the opening that carries the chain-loop rim. The trumpet is still a separate component at this stage. Do not attach it to the six petals before completing its rim, inside-out turn and support-wire insertion.
Corolla Round 12: Work the Small Scalloped Rim
Repeat slip stitch, chain three and slip stitch around the edge, following the paired anchor positions in the chart. The two slip-stitch anchors of each group advance over the twenty-stitch edge, giving ten small chain-loop scallops.
The loops decorate the trumpet opening rather than forming another set of large flower petals. Keep their three-chain length constant. The source does not instruct replacing the chain loops with a picot closed repeatedly into one fixed base anchor, so retain the charted edging path.
Turn the Corolla and Add Its Support
Chain two to lock the finish, cut the yarn and turn the corolla inside out. This turning step is explicit in the source. It changes how the worked cup is presented before it is inserted into the flower, rather than adding another crochet round.
Insert wire at the bottom of the corolla and twist it, following the source photograph. Keep the trumpet’s opening and looped rim above the support. The written method gives no numerical insertion depth, wire length or counted number of twists.
Join the Six Petal Wires
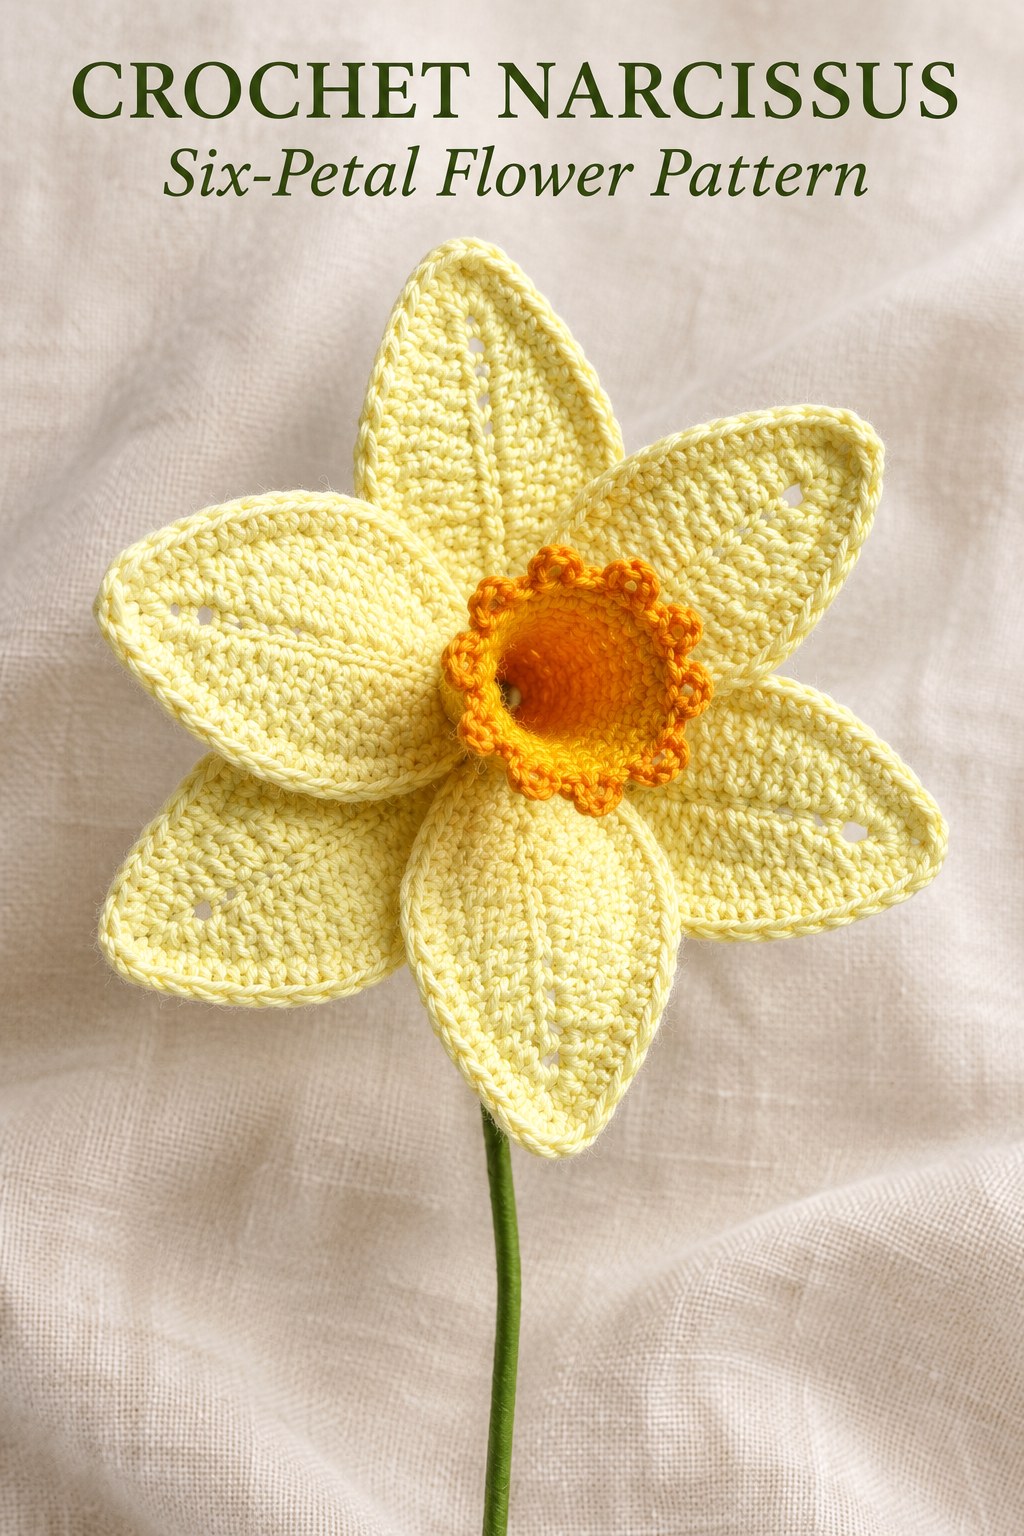
Arrange the six prepared petals as the source flower and join them by twisting their wires. The process photograph shows the supporting ends coming together beneath the petal bases. Keep the wire-enclosed edges free to hold the individual elongated shapes.
No fixed overlap angle or measured gap between petals is prescribed. Use the six-piece quantity and finished source image for the arrangement, without adding a seventh petal or a separate ring of three outer petals from another pattern. The support beneath the flower is the stated joining method.
Assembly order: Join the six petal supports first. Then position the separate turned corolla through the center and combine its wire with the flower support.
Insert the Trumpet through the Flower Center
Place the corolla at the center of the assembled petal flower, following the source process image. Its raised opening remains above the petals, with the supporting wire directed below. Twist that support together with the petal wires.
Keep the orange/yellow rim visible around the trumpet opening. The source does not specify a glued center or a counted sewing seam for this step. Avoid adding those as mandatory replacements for the photographed wire joining.
Cover the Stem with Green Floral Tape
Cover the joined support with green floral tape after the flower and corolla are secured. Start beneath the assembled bloom and enclose the visible wire as the finishing photograph shows. No separate crocheted stem component is supplied.
The source gives no required tape length or finished stem measurement. Assess the support and covering in the actual materials you use. Keep any additional display stem, vase support or leaf arrangement clearly separate from the complete six-petal Narcissus instructions.
Check Counts, Color Placement and Care
If the trumpet does not reach fifteen after its first increase, check the five same-stitch increase groups. If its upper circumference differs from twenty, review round nine before working the two plain rounds. If the rim has too many loops, compare the paired slip-stitch anchors with the original chart.
If a petal seems too narrow, check its three treble increases on each side and the oval path around the foundation strip. If the bloom lacks its raised center, review the separate corolla turn and insertion rather than replacing it with a flat disc. The source photograph guides the pale petals and stronger center colors without specifying a numbered color-change schedule.
This guide follows Narcissus on PDF pages one hundred and five and one hundred and six of the supplied 350 page 1 (1).pdf, using the general legend on PDF page sixty-nine. The diagrams and process photographs are actual source illustrations. The expanded explanations preserve the six petals, trumpet rounds and wire assembly without claiming a physical crochet test or measured finished sample.
Follow care guidance appropriate to the cotton, wire and floral tape. No washing schedule, pressing recipe or stiffening mixture is supplied. Support the taped stem when moving the decoration and protect the looped trumpet rim and wired petal edges from unnecessary pulling or crushing.
At a Glance
- Six wired petals begin from fifteen working chains plus one.
- The separate trumpet expands ten to fifteen, then to twenty.
- Six plain fifteen-stitch rounds and two plain twenty-stitch rounds establish its depth.
- Complete the scalloped rim, turn the cup, join the supports and tape the stem.
Finish Your Crochet Narcissus
Keep the source-specific increase meaning, six-petal quantity and plain-round tallies clear before assembly. Finish and turn the trumpet, insert it through the flower center and cover the support with floral tape. Click the Pin to see the crochet Narcissus pattern and illustrated guide, and save the charts and assembly photographs before beginning.
Tags
Crochet NarcissusCrochet FlowersCrochet PatternSix PetalsTrumpet CorollaWired CrochetCrochet Charts
