

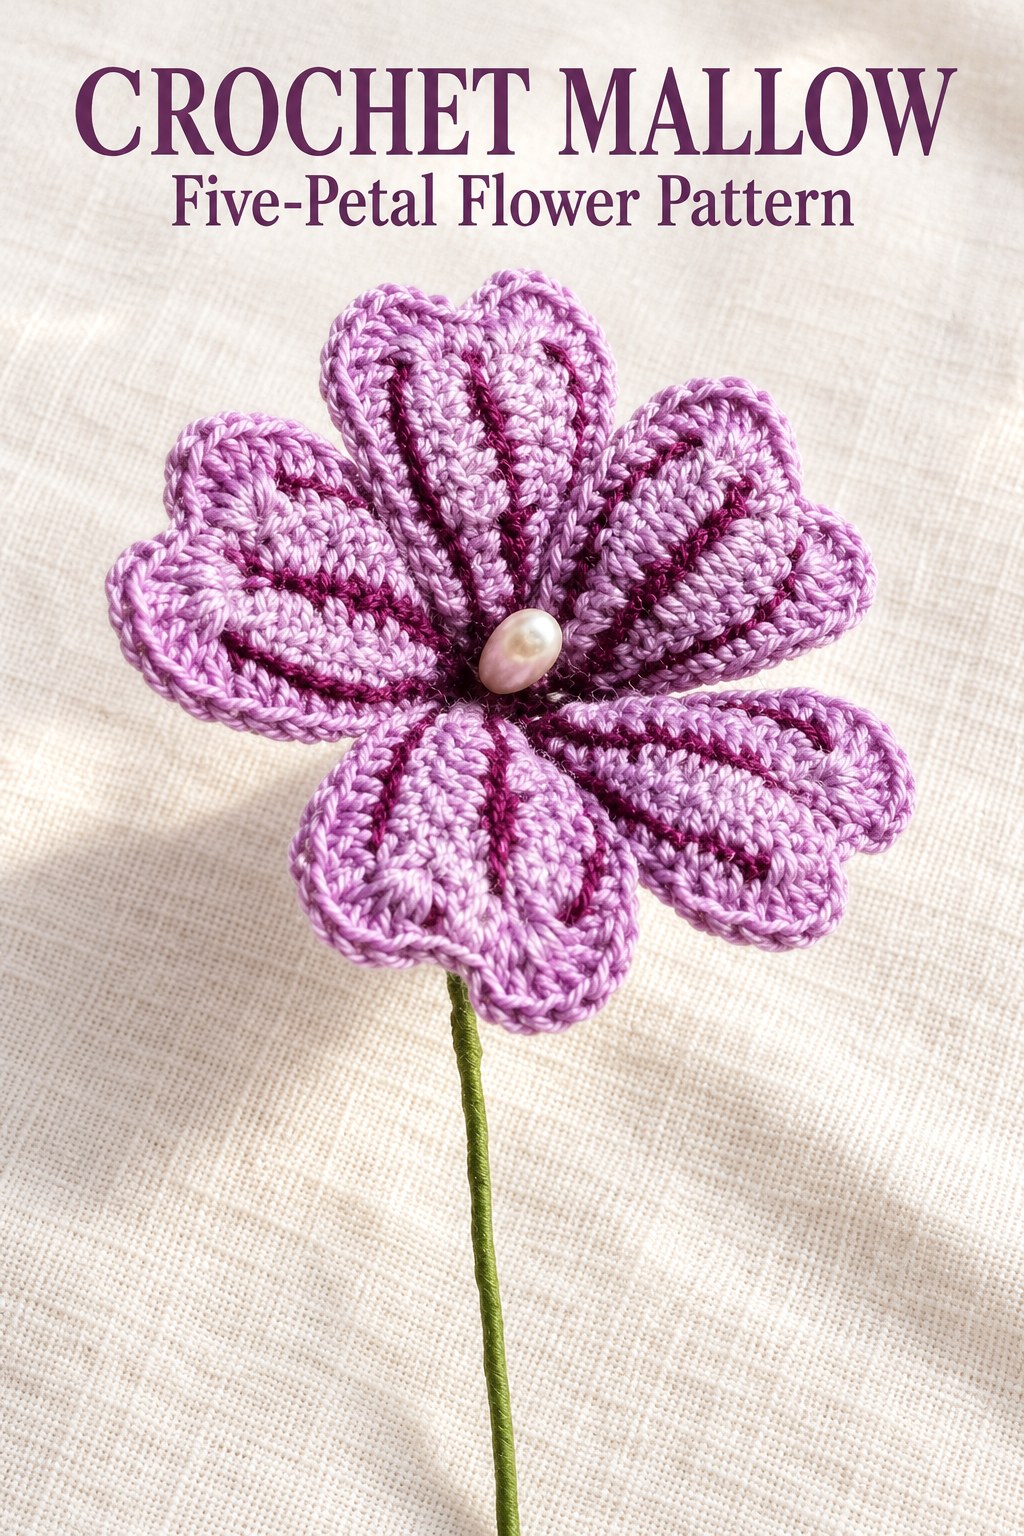
This crochet Mallow pattern creates a five-petal lilac-and-violet flower with a small white oval pearl at its center. Each petal has a split upper shape, slipped side tracks and an outer edging that returns to stitches of an earlier row. It follows PDF pages seventy-seven and seventy-eight of the supplied collection. The source provides a chart and several actual working photographs, which are especially useful for the tip bridge, basal extension and wire support. This guide retains those construction details and explains the chapter’s unusual use of together for increases.

Key Takeaways
- Make five separately worked petals, then join their wires at the center.
- Use lilac and violet cotton yarn, a 1.90 mm hook and 0.6 mm wire.
- Start each petal with seven working chains plus one height chain and seven slip stitches.
- The third row bridges the tip with five chains and makes a separate lower extension.
- The fourth row combines back-loop side edging with fans worked into exposed row-two positions.
- One white oval pearl forms the center, and green floral tape covers the final stem.
CROCHET MALLOW FLOWER PATTERN
Project: One five-petal Mallow with wired notched petals, a white oval pearl center and a taped wire stem.
| Skill level | No difficulty grade is shown for this entry. Uses back-loop work, earlier-row insertions and wired assembly. |
|---|---|
| Yarn and color | Lilac and violet cotton yarn. The chart and photographs show contrasting tracks; exact written color-change points are not numbered. Yarn weight and quantity are not supplied. |
| Hook and support | 1.90 mm crochet hook, 0.6 mm wire, one white oval pearl and green floral tape. Pearl size and wire-cut lengths are unspecified. |
| Gauge and size | No gauge, petal measurements, flower diameter or finished stem length is stated. |
| US abbreviations | ch = chain; ss = source ST, slip stitch; sc = single crochet; hdc = half double crochet; dc = double crochet. Together means multiple complete stitches in one original position here, following the source legend. |
| Petal foundation, make 5 | Ch7 plus 1 height chain. |
| Row 1 | Work 7 ss and turn. |
| Row 2, first side | 3 sc, 3 dc; in the end position work 3 dc and sc together, then ch2. |
| Row 2, return side | In the same end area work sc and 3 dc together; continue with 3 dc and 3 sc, then turn. This works around the foundation as shown in the chart. |
| Row 3, tip bridge | 8 ss, ch5, skip 4 positions at the tip, 8 ss. The source photo identifies the skipped group as sc, ch2, sc. Follow the chart’s side tracks rather than adding an unlisted full edge round. |
| Row 3, lower extension | Ch3 plus 1 height chain; work 2 sc and hdc back along it. Ss to join at the base. |
| Row 4, first side | In back loops work 7 sc and dc. |
| Row 4, upper edge | Return to the exposed earlier-row positions shown in the chart: 4 dc in one position, 3 sc across the top bridge area, then 4 dc in the other earlier-row position. These are fans, not decreases. |
| Row 4, return side | In back loops work sc, then 7 sc, retaining the source’s written finish. Cut and knot the yarn. |
| Support each petal | Insert wire between posts on the back. Fold the upper wire and lock it at the petal base, following the process photographs. |
| Join petals | Make 5 petals and join them by twisting their wires together. |
| Pearl center | Thread the white oval pearl onto wire, then twist beneath it. |
| Finish flower | Insert the pearl pistil into the flower and cover the stem with green floral tape. |
Understand the Five Separate Petals
The flower is assembled from five individual petals. Each starts with a narrow slipped foundation and develops two sides around it. The upper opening is bridged in row three, and the last row builds a divided, scalloped top while maintaining the side tracks. A small lower extension belongs to the same petal.
Keep those parts of one petal distinct from the total flower count. The two lobes at its top do not make it two separate petals. Make five complete notched pieces before joining their supporting wires, then place the single oval pearl at their central junction.
Gather the Listed Cotton, Wire and Pearl
The local material list gives lilac and violet cotton yarn, a 1.90 mm hook, 0.6 mm wire, a white oval pearl and green floral tape. It does not give a cotton thread number, yarn quantity, pearl dimensions or wire-cut length. Select practical amounts without turning those choices into unsupported printed specifications.
The source photograph shows lilac petal surfaces with darker violet tracks and a pale oval center. The chart and process pictures help place that contrast visually, while the written rows do not number exact color changes. Keep that limitation clear rather than inventing a formal color recipe with unsupported join points.
Gauge, petal width, flower diameter and finished stem length are not supplied. Assess the fabric from your own cotton and tension. A flower pictured beside hands is still not a measured sample, and the hook size alone does not establish a guaranteed finished diameter.
Component checkpoint: One complete flower has five notched petals and one oval pearl center. Each petal contains its own two upper lobes and small lower extension.
Read Together as an Increase in This Chapter
The general legend defines two or three double crochets together as complete stitches worked in the same original position. It separately labels a closed cluster with the additional words and close together. The Mallow’s four-double groups therefore form fans rather than double-crochet decreases.
The same local reading applies to mixed groups such as three doubles plus one single. Work the named complete stitches into one stated end position before continuing. Do not close all their loops together as an improvised cluster, which would change both the edge structure and its available top stitches.

Foundation and Row 1: Make the Slipped Spine
Chain seven plus the one height chain, then work seven slip stitches along the foundation. Turn. This narrow initial strip becomes the central reference line around which the two petal sides develop. Keep all seven worked positions identifiable before changing to single and double crochet.
Source ST is written as ss in this guide to avoid confusing it with a generic stitch. These are actual slip stitches, not seven single crochets. A thicker single-crochet spine would alter the source’s central track and the later petal proportions.
Row 2: Develop the First Side and End Group
Work three singles and three doubles. At the end position work three doubles and one single into the same position, then chain two. The short stitches narrow the lower petal area and the taller doubles provide its broader upper section.
Keep the two-chain space clear at the upper turn. It becomes part of the group bridged in the following row. The source’s photograph later identifies that tip area as single crochet, two chains and single crochet, so it is more than an ordinary chain-one turn at the edge of flat fabric.
Continue Row 2 around the Foundation
Work one single and three doubles together at the end area, then continue with three doubles and three singles along the other side. Turn as the source directs. The chart shows the work surrounding the central slipped foundation rather than stacking a new independent full-width row on one face.
Retain the two upper mixed groups and their separating chain space. Their position helps create the petal’s notched top. Do not replace the end with one large group of eight doubles or omit the two singles around the chain-two area.
Earlier-Row Construction Note
Row three adds slipped side tracks and a five-chain bridge. Row four uses those back-loop tracks along the sides but returns to exposed row-two positions for the top fans. It is not worked only into one uniform preceding row.
Row 3: Bridge the Upper Opening
Work eight slip stitches, chain five, skip the four tip positions and work eight slip stitches along the other side track. The source caption names the skipped group as one single, two chains and one single. Its chart shows the bridge above the earlier tip opening.
Keep the printed eight-slip side tracks and the separate bridge as shown. This is a shaped working path with a basal join, not a newly specified full round using every earlier position once. Do not add a ninth slip stitch to each side or change the five-chain bridge solely to force a different whole-edge count.
Add the Small Lower Extension
After the side tracks, chain three plus one height chain. Work two singles and one half double back along the short chain, then join with a slip stitch at the base. This extension is part of the same petal and remains at its lower end near the future flower center.
The three return stitches fit the three usable working chains after the height allowance. Keep the half double at its stated place rather than replacing the extension with three singles. The source’s paired process views show the small piece being worked and then joined back at the petal base.
