

Row-three checkpoint: Keep three distinct parts: eight slipped stitches on each side, the five-chain bridge over the tip and the separate lower chain extension joined at the base.
Row 4: Edge the First Side in Back Loops
Work seven single crochets and one double crochet in back loops along the first side track. The other loop remains visible as a raised line, helping create the layered track seen in the finished petal. Follow the chart’s working direction from the basal area toward the upper edge.
Back-loop edging is not a new separate strip sewn onto the petal. It is worked directly through the available slipped track. Keep the side line identifiable while preparing to change insertion depth for the next part of the row.
Return to Row Two for the Upper Fans
Work four complete doubles into the exposed earlier-row corner position, three singles across the top bridge area and four complete doubles into the opposite earlier-row corner position, following the chart and source close-up. The fans pass back into row two rather than simply building on each slip stitch of row three.
This earlier-row insertion is specifically illustrated by the source process photographs. Keep the two fans separated by the three singles at the top. Their complete double crochets add the scalloped upper volume; working them as a closed four-double decrease would remove that shape.
Complete the Return-Side Edging
The written final line works one single crochet followed by seven singles in back loops, then cuts and knots the yarn. Retain that eight-single finish as supplied. It is not silently changed to another double crochet merely to mirror the first side.
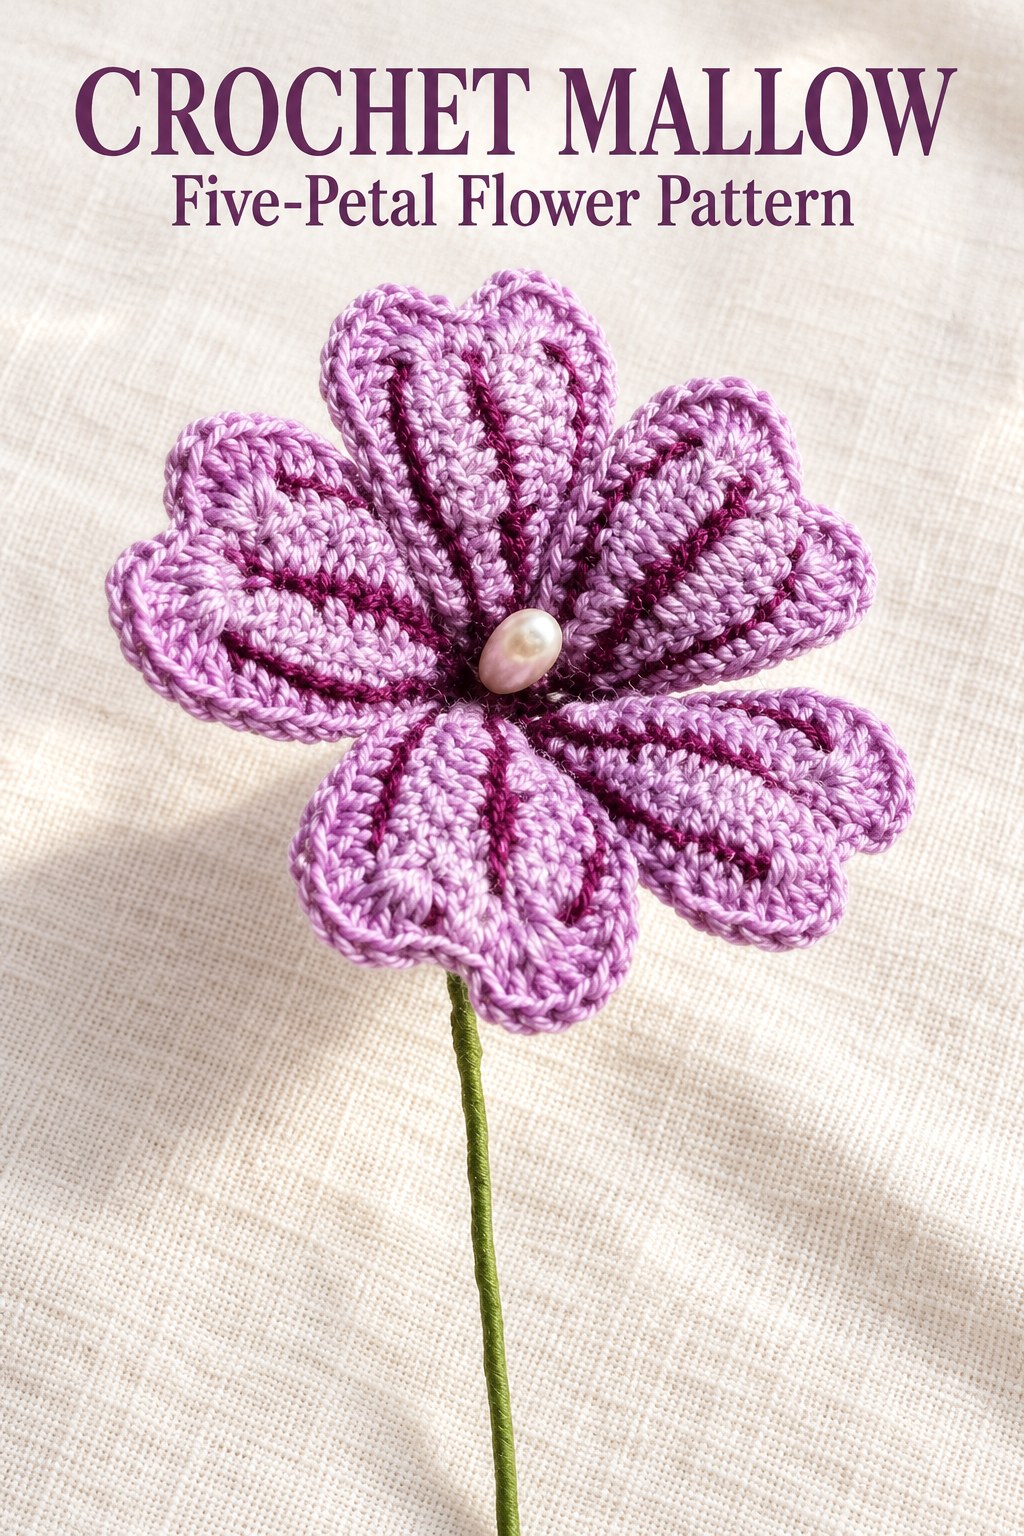
Keep the central tracks and the upper notch visible after fastening. The source does not prescribe pressing, a measured blocking template or a numerical finished petal size. Use the chart and completed photo to assess the outline without adding an unlisted extra edging round.
Make Five Complete Petals
Repeat the full petal sequence until five pieces are finished, maintaining the same foundation and upper bridge method. Compare their working paths and fastening points while they are still separate. A pair of upper lobes belongs to one petal, so do not count ten pieces for the final flower.
The two listed cotton shades provide the visual contrast shown in the source. Exact written switch points are not numbered, so keep your selected contrast placement consistent and distinguish it from the actual stitch instructions. Changes of color do not alter the five-petal requirement or the fan definitions.
Insert Wire between Posts on the Back
Pass the supporting wire between posts on the back of each completed petal, following the source photographs and their arrow. This uses the existing fabric as the channel. It is not a round crocheted over wire during the petal rows.
Fold the upper wire and secure it at the lower base. The source supplies the 0.6 mm diameter but no individual wire-cut length or fixed twisting count. Keep those practical allowances separate from the printed stitch recipe and protect the visible petal tracks while forming the support.
Wire checkpoint: The source inserts wire after the crochet is complete, passing it between posts on the back, folding the upper end and locking it at the petal base.
Join the Five Petals and Prepare the Pearl
Join the petals by twisting their supporting wires together. Arrange the five notched faces around the flower center, retaining their distinct upper lobes. The source gives no measured overlap angle or a counted seam around the petal rims.
Thread the white oval pearl onto its wire and twist below it to form the central pistil. Only one oval pearl is listed for this design. Do not replace it with three small beads from the neighboring Bouganville pattern or an embroidered yarn center.
Insert the Center and Cover the Stem
Insert the pearl pistil into the flower’s central junction. The source’s side views show its relationship to the joined petals before the final stem finish. Keep the oval bead visible without pulling every petal edge flat beneath it.
Cover the stem with green floral tape. The source gives no numerical finished stem length, tape overlap or additional green crochet component. Its method ends with the taped wire support, so a separate leaf, sepal cup or stuffed backing is not added as a printed requirement.
Troubleshoot the Notch, Fans and Support
If the upper opening closes into a solid rounded point, review the two-chain tip area and five-chain bridge. If the top scallops are small or absent, check that each four-double group is worked as complete stitches in one earlier-row position. A closed cluster would create a different structure.
If the side tracks disappear, inspect the back-loop insertion along row three’s slipped edges. If a petal twists around its wire, review the back-post channel and folded-end locking step before adding an unlisted adhesive. Keep the five finished petal pieces distinct while arranging their shared center.
Source Credit and Care
This guide follows Mallow on PDF pages seventy-seven and seventy-eight of the supplied 350 page 1 (1).pdf, using the relevant general legend on page sixty-nine. The completed flower, chart and process panels are actual source illustrations. The expanded explanations preserve the notched petals, earlier-row fans and pearl-and-wire assembly without claiming a physical crochet test.
Care for the decorative flower according to the actual cotton, wire, pearl and floral tape used. The source supplies no washing schedule, stiffening mixture, blocking recipe or pressing temperature. Support the taped stem when moving it and protect the notched edges and small pearl center from unnecessary pulling.
At a Glance
- Five individually made notched petals form the flower.
- The upper bridge and lower extension are separate parts of row three.
- Four-double fans return to earlier-row positions and are increases.
- Wire supports the petals; one oval pearl and green floral tape complete the assembly.
Finish Your Crochet Mallow
Keep the slipped tracks, tip bridge and earlier-row fans clear before adding wire. Join the five supported petals, insert the oval pearl center and finish the taped stem neatly. Click the Pin to see the crochet Mallow pattern and illustrated guide, and save the chart and process photographs before beginning.
Tags
Crochet MallowCrochet FlowersCrochet PatternNotched PetalsBack-Loop CrochetPearl CenterWired Flower
