

In round thirteen, repeat two singles followed by skipping one original. Five groups consume the fifteen incoming positions and produce ten singles. In round fourteen, repeat one single followed by skipping one original, leaving five singles from the ten incoming positions.
Join with a slip stitch, chain two to lock and cut the yarn. These are skipped-stitch reductions, not a demand to substitute joined-top decreases. Keep the foam inside while the opening narrows, following the close source photograph rather than adding an unlisted drawstring round.
Base checkpoint: The working counts are 10 doubles, 15 doubles, ten plain rounds of 15, then 10 singles and 5 singles. Insert the foam before the last two rounds.
Insert the Covered Wooden Support
Cover the wooden stick with green floral tape and insert it into the base as photographed. The stick supports the tall flower spike beneath the foam-filled crochet. The source illustration shows the direction of insertion along the tube’s length.
No insertion depth, stick diameter or required adhesive is given for this step. Keep the source’s fitted support relationship clear and check that the base is ready before the flower surface is covered. The blue florets are attached afterward, rather than being trapped inside the narrowing green rounds.
Fold and Pin the Small Flowers
Fold each floret’s petals down as the source close-up demonstrates, then insert a pearl-head pin through the flower. The pin is the attachment between the small crocheted component and the foam-filled support. Keep the six petals visible around its center.
The source does not prescribe sewing all the blue flowers to the green tube. Follow the actual pinned method rather than inventing a counted seam. A finished floret should retain its separate shape, with the small petal edges free to create the textured Hyacinth surface.
Keep the Shortened-Pin Method Optional
A separate source image labels shortening the pin and dipping it in glue as optional. This is an alternative preparation for the same flower attachment, not another crochet round and not an instruction to glue every petal flat against the tube.
No glue type, drying time or shortened pin measurement is specified. If choosing that option, follow the materials’ appropriate handling directions and keep the change distinct from the source’s standard full pin. Do not describe a particular adhesive recipe as part of the written pattern.
Cover the Support from Bottom to Top
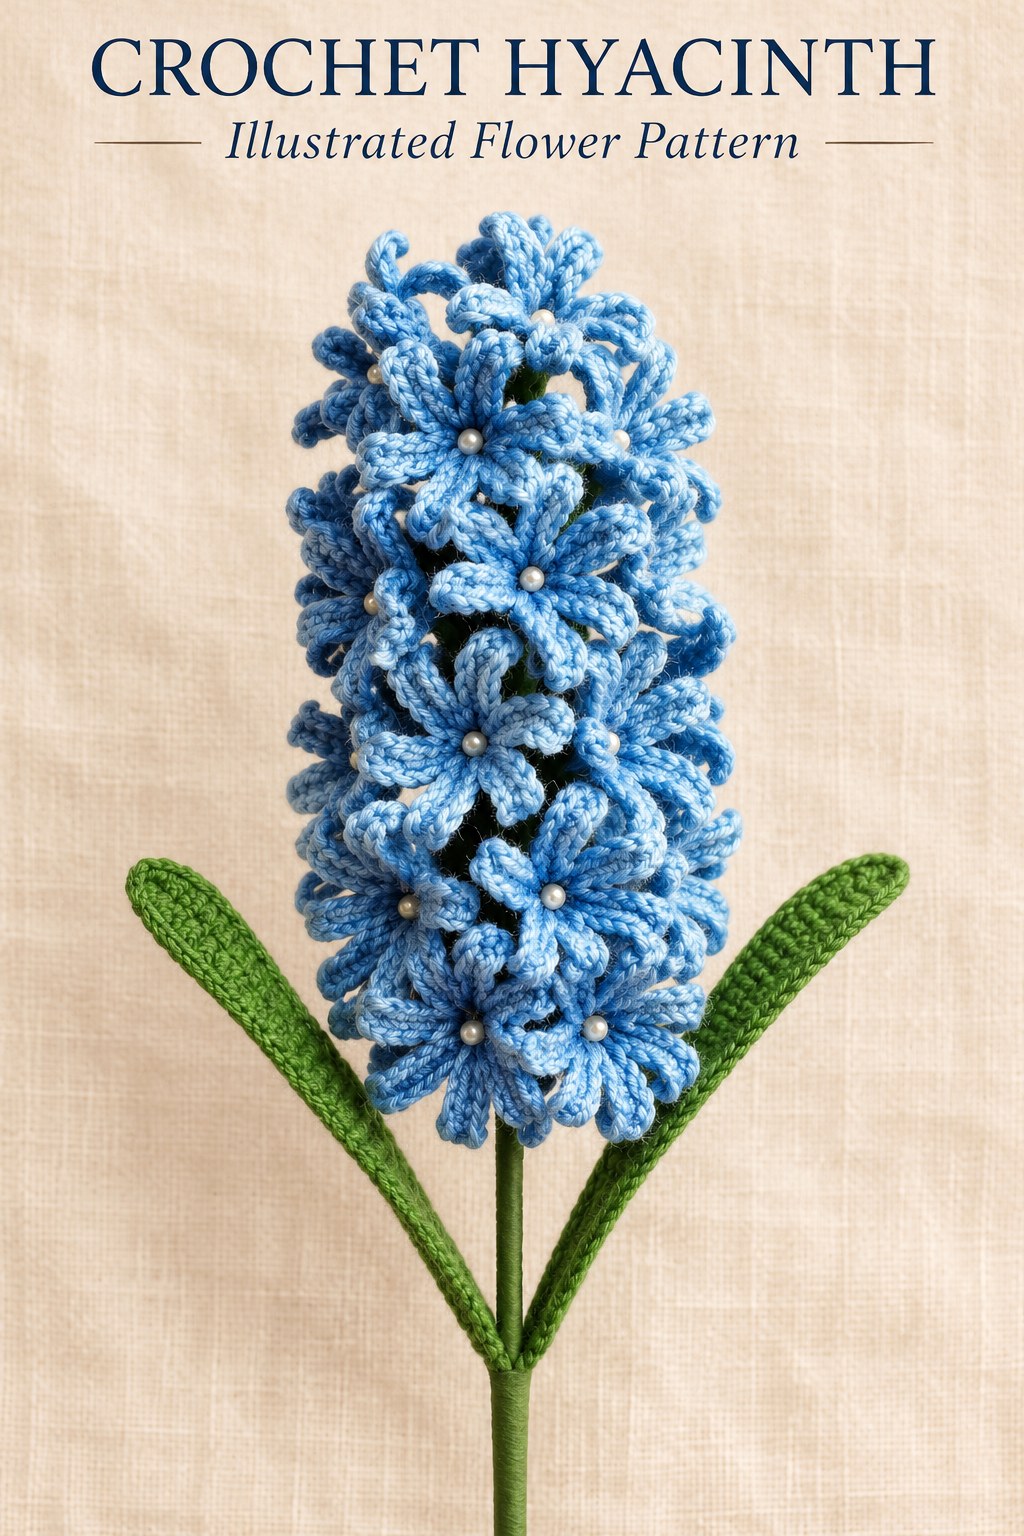
Place the prepared florets onto the base from bottom to top, following the source assembly photograph. The first flowers surround the lower part while the upper green section remains exposed. Continue adding florets until the tall support has the dense blue coverage shown in the completed image.
The source calls for forty or more rather than a fixed number of horizontal rows. Actual coverage depends on the materials, floret shape and placement. Keep the six-petal flower construction constant while adding enough completed flowers for the photographed arrangement.
Make the Two Long Leaves
Begin twenty-four working chains plus one height chain. Follow the original two-sided leaf chart with one single, twenty half doubles, six singles, twenty half doubles and one single. The full path contains forty-eight worked stitches around the central foundation.
The six-single section connects the two long half-double sides in the charted oval path. Do not treat the full list as one straight row across only twenty-four top loops. The source diagram supplies the turning placement, keeping the leaf long and narrow rather than requiring a longer invented foundation.
Enclose Wire in the Leaf Edge
For the second leaf round, incorporate wire while working twenty-four singles, one chain and twenty-four singles. Twist the support, join with a slip stitch, chain two to lock and cut the yarn. Complete two leaves using the same sequence.
The photograph shows the support enclosed during crochet and the ends twisted afterward. Keep the central leaf line clear while the wire follows the perimeter. The source supplies no wire-cut length, measured leaf width or extra decorative border beyond this second round.
Attach the Leaves and Tape the Stem
Join the two leaves to the wooden stick by twisting their supports beneath the flower spike. The source assembly image shows them angled away from the stem near the bottom of the blue head. No numerical leaf angle or measured attachment height is supplied.
Cover the completed stem with green floral tape after the leaf supports are joined. Keep the narrow leaf shapes visible and the blue florets clear of the taped area. The source does not add a separate crocheted stem cover or another pair of small leaves.
Check the Repeats and Source Details
If a floret has too many petals, review the six working doubles and six extension repeats. If the base flares, check that only its second round increases. If the leaf is too long, review the two-sided path instead of doubling the twenty-four-chain foundation. Keep the ten plain base rounds separate from their total number of worked stitches.
These instructions and actual illustrations come from Hyacinth on PDF pages one hundred and thirty-four through one hundred and thirty-six of the supplied collection; the general stitch legend is on page sixty-nine. No physical test, measured gauge or finished-size promise is claimed. Choose care appropriate to the yarn, floral foam, pins, wire and tape rather than assuming the assembled decoration can be washed like an unfilled crochet motif.
At a Glance
- Make forty or more six-petal blue florets.
- Fit floral foam inside the fifteen-stitch green tube before narrowing.
- Pin the folded florets onto the support from bottom to top.
- Finish two wired leaves, join them to the support and tape the stem.
Finish Your Crochet Hyacinth
Keep the floret, foam-filled base and wired leaves separate until their own crochet and support stages are complete. Use the source attachment photographs to build the dense blue spike in the stated order. Click the Pin to see the crochet Hyacinth pattern and illustrated instructions, and prepare enough finished florets before covering the support from its lower edge upward.
Tags
Crochet HyacinthBlue Crochet FlowersCrochet PatternWired LeavesCrochet ChartsFloral FoamBotanical Crochet
