

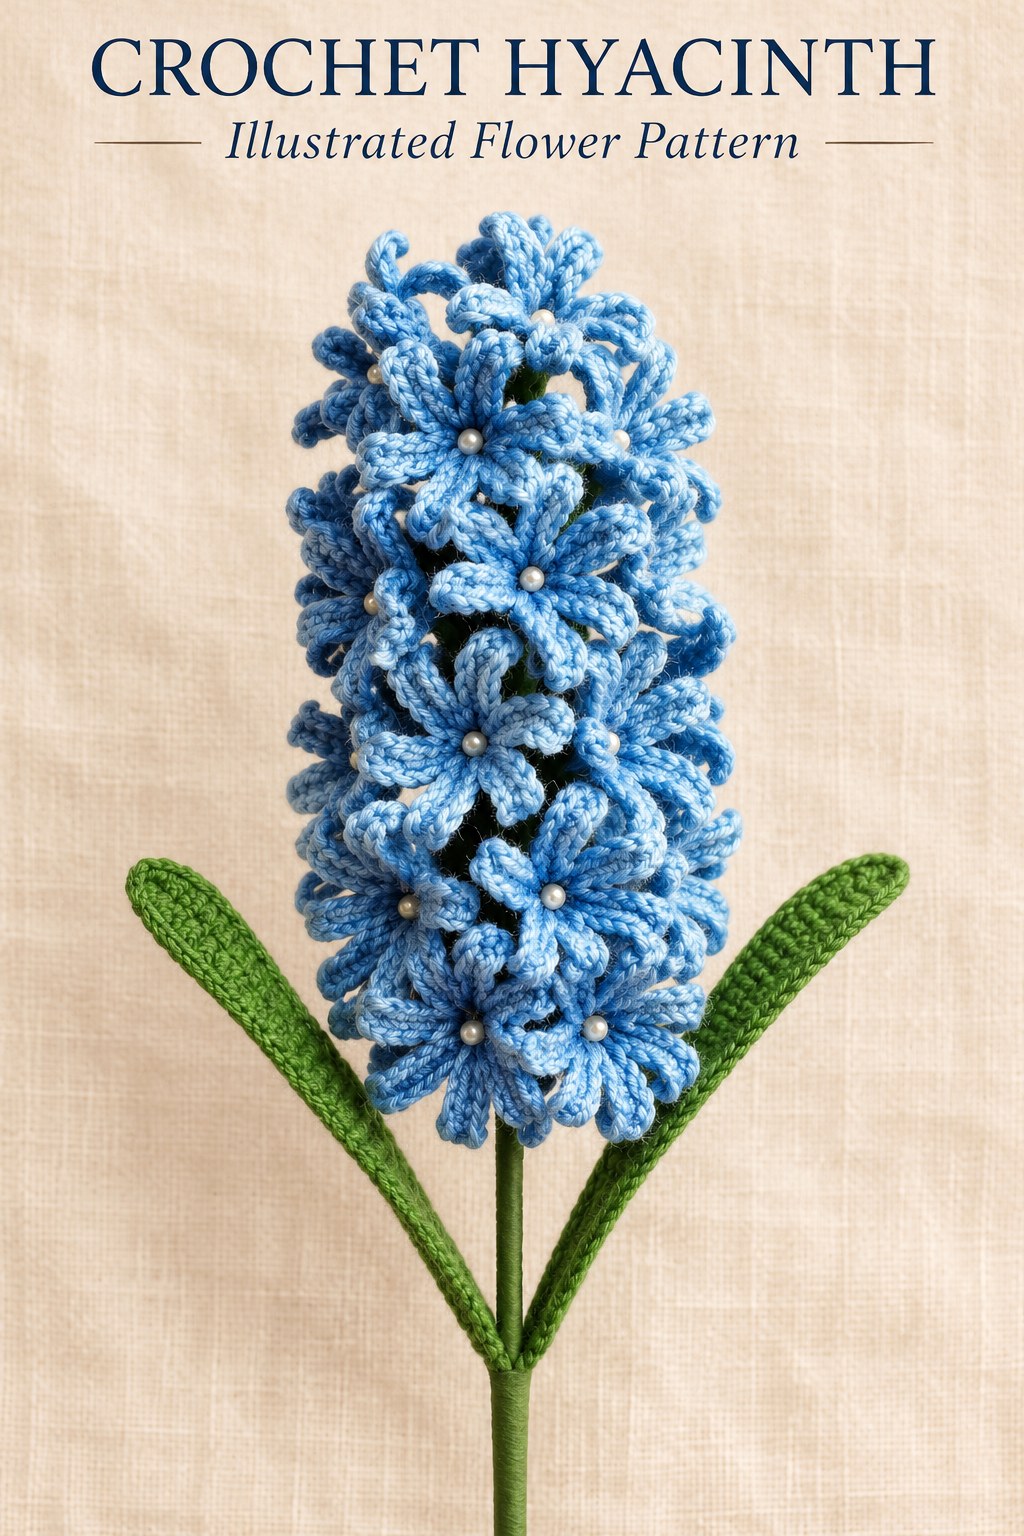
This crochet Hyacinth pattern builds a full blue flower spike from forty or more small six-petal florets. Each floret is finished separately and pinned onto a foam-filled crocheted base. Two wired green leaves and a floral-taped wooden stem complete the arrangement. The source provides separate charts for the floret, support base and leaf, together with photographs of foam fitting and flower attachment. Follow those three components in order so the dense finished spike remains understandable as a group of small crocheted flowers.

Key Takeaways
- Make forty or more separate six-petal florets in the listed azure cotton.
- Use a 1.90 mm hook for the cotton and a 3.50 mm hook for the green wool components.
- The support base holds fifteen doubles for ten plain rounds before narrowing around floral foam.
- Pearl-head pins attach the folded florets from the bottom of the base upward.
- Two leaves are worked around a twenty-four-chain foundation and finished with wire.
- Complete the taped wooden support, attach the leaves and cover the final stem with floral tape.
CROCHET HYACINTH FLOWER PATTERN
Project: A dense blue spike of forty or more six-petal florets pinned onto a foam-filled crocheted support, finished with two wired green leaves.
| Skill level | Not explicitly graded. Uses small two-sided petal extensions, same-stitch increases, a tubular support, floral foam, pins and wired leaves. |
|---|---|
| Materials | Cotton in light azure and dark azure; 1.90 mm hook. Green wool; 3.50 mm hook. Green wire 0.6 mm; pearl-head pins; Oasis floral foam; wooden stick; green floral tape. Glue is named only in the optional pin preparation. Weights, quantities, gauge and finished sizes are unspecified. |
| US terminology | ch = chain; sc = single crochet; hdc = half double crochet; dc = double crochet; ss = slip stitch. Inc means 2 complete dc into the same original. Source ST means ss; together for this increase does not mean dc2tog. |
| Floret rounds 1–2 | Magic ring. R1: ch3, 6 dc into the ring, tighten and ss join. R2: ch3, 6 dc, ss join. Six working dc in each round. |
| Floret round 3 | 6 times. Ss join. Six narrow petal extensions. |
| Floret round 4 | For each extension: 6 ss, ch1, 6 ss, then ss in round 2. Repeat around all 6 petals. Cut and tie the knot. Make 40 or more florets. |
| Base rounds 1–2 | Magic ring. R1: ch3, 10 dc into ring, tighten and ss join. R2: ch3, around, 5 groups, 15 dc; ss join. |
| Base rounds 3–12 | Ch3, 15 dc in each round for 10 rounds, ss join as directed. Keep 15 working stitches. Fit the cut floral foam inside the base before narrowing. |
| Base round 13 | around, 5 groups. 10 sc. |
| Base round 14 | around, 5 groups. 5 sc. Ss join, ch2 to lock, cut the yarn. Insert the floral-tape-covered wooden stick as photographed. |
| Leaf foundation and round 1, make 2 | Ch24 plus 1 height chain. Work around the foundation following the chart: sc, 20 hdc, 6 sc, 20 hdc, sc. 48 worked stitches across the two-sided path. |
| Leaf round 2 | Incorporate wire: 24 sc, ch1, 24 sc. Twist the wire, ss join, ch2 to lock and cut the yarn. Complete 2 leaves. |
| Floret attachment | Fold the petals down and insert a pearl-head pin through each floret as photographed. Optional: shorten the pin and dip it in glue. Place florets on the foam-filled base from bottom to top until covered. |
| Final assembly | Join the 2 leaf supports to the wooden stick by twisting their wires. Cover the stem with green floral tape. No required number of pins per square inch, foam dimensions or wire-cut lengths are supplied. |
Separate the Florets, Base and Leaves
The finished Hyacinth can look like one complicated crocheted mass, but the source divides it into three manageable components. The tiny blue flowers are repeated many times. The hidden green base is a straight crochet tube around floral foam, and the two long leaves are made independently with wired edges.
The source quantity is forty or more florets, not forty petals. Each floret has six petal extensions of its own. Keep the completed flowers together while preparing the support so the final coverage can be assessed without changing the construction of every small piece.
Choose the Listed Yarns and Supports
The cotton palette is light azure and dark azure, used with the 1.90 mm hook. Green wool and a 3.50 mm hook are listed separately for the green work. The source does not provide yarn brands, formal weight categories, quantities, a gauge swatch or measured finished dimensions.
The supporting materials are 0.6 mm green wire, pearl-head pins, Oasis floral foam, a wooden stick and green floral tape. Glue is mentioned in the optional pin preparation, rather than as a mandatory ingredient for every attachment. Keep that distinction when choosing the source’s standard pinned method or its optional reinforced pin finish.
No fixed foam cylinder length, pin length or stick length is printed. Fit those supports to the actual crocheted base and use the process photographs to understand their relationship. Arbitrary numerical dimensions would imply a tested specification that the supplied pages do not give.
Start One Floret with Six Doubles
Make a magic ring, chain three and work six double crochets into the ring. Pull the loose end to tighten and join with a slip stitch. In the second round, chain three, work six doubles and slip-stitch join again.
Keep six actual working doubles identifiable in both rounds. The chain rise is not an extra petal anchor. The flower chart shows the six-part layout that the following extensions use, so adding a seventh working position would change the petal count and the source silhouette.

Round 3: Add Six Narrow Petal Extensions
Begin six working chains plus one height chain and work six single crochets back along the working chains. Continue with one single crochet at the circular base. Repeat that complete extension six times, then join with a slip stitch.
The six-chain strip makes one narrow petal, not six petals. Keep the return singles distinct from the attachment single at the base. Each repetition travels outward and back before moving to the next base position, producing the small radial form in the original chart.
Floret checkpoint: One small flower has six extensions. Each begins with six working chains plus one height chain, followed by six return singles and its base attachment.
Round 4: Slip Stitch around Each Petal
Work six slip stitches along one side of the extension, chain one at its tip and work six slip stitches back along the other side. Continue with a slip stitch into round two, following the chart. Repeat around all six extensions, then cut and tie the knot.
The outer path finishes the slender petals rather than adding a broad round of doubles. Keep the one-chain turn at the tip separate from the six slip stitches on each side. The source does not give a picot, fan or extra increase for this final floret round.
Prepare Forty or More Finished Florets
Repeat the complete four-round floret until forty or more are ready. Compare the six-part outlines and finish loose yarn before attachment. The dense arrangement is created by placing finished flowers over the support, not by joining all their petals into one continuous crochet fabric.
The written color list gives the two azure shades without a numbered color-change schedule. Use the finished and close process photographs as the placement guide, keeping any chosen transition point separate from the exact written rounds. No particular ratio of light-blue to dark-blue florets is specified.
Begin the Green Support Base
Make a magic ring, chain three and work ten double crochets into it. Tighten the loose end and join with a slip stitch. In the second round, chain three and repeat a double-crochet increase followed by one plain double around, then slip-stitch join.
The chapter legend defines the increase as two complete doubles in one original. Five groups use the ten incoming positions and produce fifteen doubles. This is not dc2tog, which would narrow the base instead of producing the stated fifteen-stitch support.
Base Rounds 3–12: Ten Plain Rounds
Work a chain-three rise and fifteen doubles in each of rounds three through twelve, joining as directed. Ten plain rounds are included in this range. Keep fifteen working stitches around the tube throughout this section.
The chart highlights the repeated row and labels it ten times. It does not require a new increase every round or a one-hundred-fifty-stitch circumference. The straight tube is later fitted around floral foam, which provides the firm surface needed for pinning the blue florets.
Construction Note
The base is a hidden support. Its crochet gives a green covering, while the fitted floral foam receives the pins. Finish the foam and stem preparation before covering the tube with the separate blue flowers.
Cut and Fit the Floral Foam
Cut the Oasis floral foam to fit the actual green tube, following the source preparation photographs. Place it into the base before working the final narrowing rounds. The images show a long narrow foam piece rather than loose textile stuffing.
No measured foam template is supplied. Fit the support to the crocheted tube without treating an invented diameter as a source requirement. Replacing the foam with soft stuffing would change the pin attachment system, so preserve the stated material for the source-based version.
