

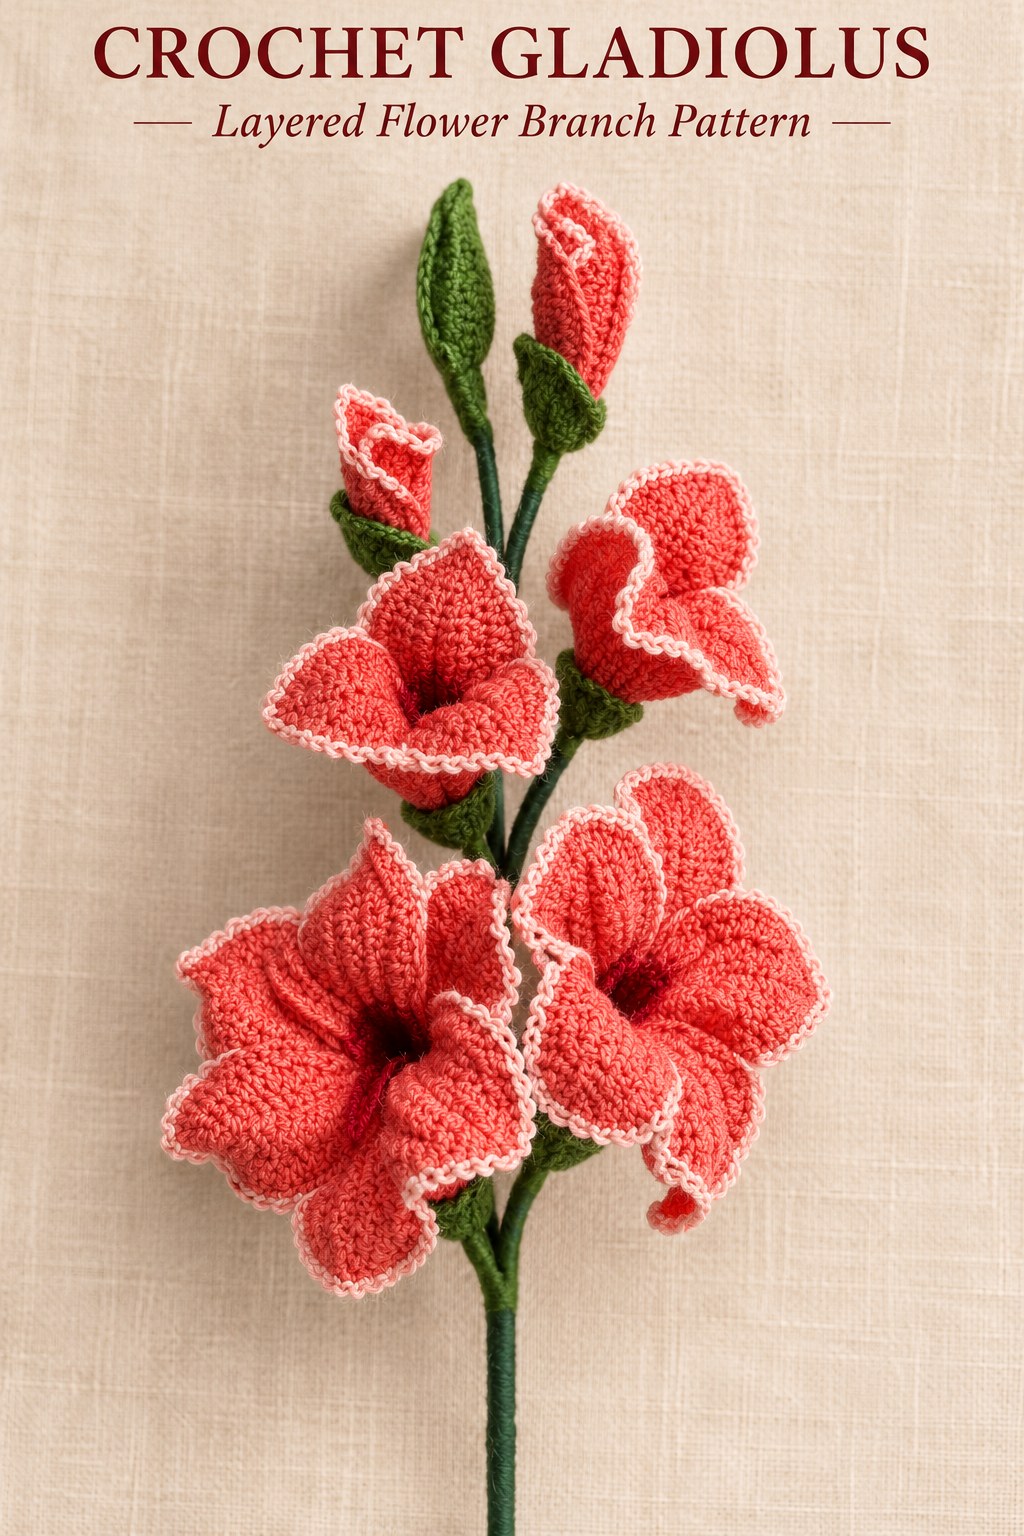
This crochet Gladiolus pattern builds an upright branch with two layered flowers, two open small flowers and two wrapped small flowers. Seven round wired leaves are folded into supports along a taped wooden branch. The crochet begins with a narrow tube and three projecting petal foundations; a second unit is nested inside each large flower. The source’s chart and assembly photographs explain the looped edges and twelve-chain bridges, so keep the base, outer flower and small-flower variations distinct throughout the project.

Key Takeaways
- Make two large layered flowers and four small flowers; wrap two of the small ones.
- Each large flower combines a completed three-lobed base with a second three-lobed outer unit.
- Source MD and MT match US treble and double treble in the chart.
- The base edge, outer flower edge and small-flower edge have different round-thirteen instructions.
- Make seven round wired leaves, fold them in half and tape them along two joined wooden sticks.
- Insert the flower components into their folded leaf supports after the branch is prepared.
CROCHET GLADIOLUS FLOWER PATTERN
Project: An upright branch of two nested large flowers, two open small flowers and two wrapped small flowers, carried by seven folded wired leaves.
| Materials | Cotton in dark red, light red and pink; 1.90 mm hook. Dark-green wool; 3.50 mm hook. Green wire 0.8 mm, 2 wooden sticks and green insulating tape. Yarn weights, amounts, gauge, finished sizes and wire-cut lengths are not supplied. |
|---|---|
| US abbreviations | ch chain; sc single crochet; dc double crochet; tr treble crochet; dtr double treble crochet; ss slip stitch. Source MD = charted tr, MT = charted dtr, ST = ss. Inc or a named stitch group means complete stitches in one original, not a joined-top decrease. |
| Shared unit, round 1 | Magic ring; ch3, 10 dc into ring, tighten and ss join. |
| Shared round 2 | around, 5 groups. 15 sc. |
| Shared rounds 3–8 | 15 sc each round, 6 rounds. 90 sc worked in total; circumference remains 15. |
| Shared round 9 | around, 3 groups. 21 worked stitches. |
| Shared round 10 | around, 3 groups. Three petal strips are attached to the base. |
| Shared round 11 | For each lobe, follow the chart around the strip: sc, dc, 4 tr, 4 dtr, 4 tr, dc, sc, ch2; sc, dc, 4 tr, 4 dtr, 4 tr, dc, sc; continue with 2 ss. Repeat for 3 lobes. |
| Shared round 12 | for each lobe. Each lobe has 35 worked edge stitches. |
| Inner base round 13 | For each lobe: 10 ss; 14 times; sc, 10 ss. Repeat for all 3 lobes. This completes the inner base. |
| Large outer flower | Work another unit through shared rounds 1–12. Insert the completed base into this outer flower. Outer R13, each lobe: skip 10; 14 times; join with sc; ss in the first base arch; ch12 across the back; ss in the last base arch; skip 10. Repeat for 3 lobes. Make 2 complete layered flowers. |
| Small flower | Work shared rounds 1–12. R13: skip10; 14 times, join with sc; skip20; 14 times, join with sc; skip20; 14 times, join with sc; skip10, ss join. Make 4 small flowers. |
| Leaf rounds 1–2, make 7 | Magic ring; R1 ch3, 10 dc, tighten, ss join. R2 ch3, 2 complete dc in each original, 20 dc; ss join. |
| Leaf rounds 3–4 | R3 ch3, 2 complete dc in each original, 40 dc; ss join. R4 incorporate wire while working 40 sc. Twist the support and fold each leaf in half. |
| Prepare the branch | Join and cover the 2 wooden sticks with green insulating tape. Place the folded leaves on the support and lock with tape, arranging successive leaves from top to bottom. |
| Place the flowers | Insert flowers into the folded leaves and close the leaves around their bases. Wrap 2 of the 4 small flowers and insert them into leaf supports. Final arrangement: 2 large flowers, 2 open small flowers and 2 wrapped small flowers. Seven leaves are supplied; no extra seventh flower is specified. |
Keep the Three Flower Finishes Separate
The source calls its first three-lobed unit the base. It carries the complete round-thirteen edge and sits inside a second unit for a large flower. The outer unit shares rounds one through twelve but has a different last round that joins its edge to the nested base.
The small flower also shares rounds one through twelve, yet finishes without the nested unit and twelve-chain back bridges. Four small flowers are made; two remain open and two are wrapped into the bud-like shapes shown near the top of the finished branch.

Gather the Two Yarn Types and Hook Sizes
The cotton colors are dark red, light red and pink, worked with a 1.90 mm hook. Dark-green wool is listed with a 3.50 mm hook for the leaf supports. The remaining materials are 0.8 mm green wire, two wooden sticks and green insulating tape.
No yarn brand, formal weight category, gauge, finished measurement, wire-cut allowance or stick length is printed. Use the actual components and photographs to fit the support. The palette suggests deeper flower centers and pale looped edges, but no numbered color-change schedule is supplied in the prose.
Read the Tall-Stitch Symbols Correctly
The flower text uses MD and MT, while the chart shows their actual heights. The two-slash upright symbol corresponds to US treble crochet, and the three-slash upright symbol corresponds to US double treble. This guide writes tr and dtr so those two heights remain distinct.
The source legend also uses together for complete stitches placed in one original. Thus two singles together is an increase, while five doubles together in round nine is a five-double fan in one original. It is not a five-double closed cluster unless the instruction explicitly says to close the stitches together.
Terminology checkpoint: Preserve both tall heights: tr for source MD and dtr for source MT. The five-double group in round 9 contains five complete doubles in one original.
Shared Rounds 1–8: Make the Narrow Tube
Begin a magic ring, chain three and work ten doubles into it. Tighten the loose end and slip-stitch join. In round two repeat a single-crochet increase followed by one plain single, five groups around the ten originals, producing fifteen singles.
Work fifteen singles in each of rounds three through eight. That is six plain rounds and ninety singles worked across the section. The live count remains fifteen, not ninety. The chart highlights the repeated tubular section and identifies its six repetitions.
Shared Round 9: Establish Three Fan Groups
Repeat skip one original, five complete doubles into the next original, skip one original and two singles. Each group uses five incoming positions and produces seven stitches. Three groups consume the fifteen originals and leave twenty-one worked stitches.
The three groups establish the three-lobed layout that follows. Keep the skipped positions in the stated order rather than replacing them with a decrease stitch. The five doubles share one original and remain separate complete stitches for the next round.
Shared Round 10: Add Three Petal Strips
For each repeat, work two singles, make fourteen working chains plus one height chain and work fourteen singles back along the strip. Skip one original at the base, work two singles and continue with two more singles. Repeat this sequence around the three groups.
Each base repeat uses six worked singles and one skipped original, accounting for seven incoming positions. The returned strip is a projecting foundation, not another long circumference round. Keep all three strips identifiable before working the tall shaping around their two sides.
Shared Round 11: Shape Each Lobe
Follow the chart along a strip and its adjacent base positions: one single, one double, four trebles, four double trebles, four trebles, one double and one single. Chain two at the tip, then repeat the same sequence along the second side. Continue with two slip stitches between lobes.
The rise and fall of stitch heights creates each broad tapered lobe. Preserve the four-double-treble middle group instead of replacing every tall stitch with a treble. The two-chain tip arch remains available for the three doubles placed into it in the next round.
Shared Round 12: Complete the Lobe Edge
For each lobe work three singles, ten doubles and three singles, then three doubles into the two-chain tip arch. Continue with three singles, ten doubles and three singles on the other side, then skip two original connector positions.
The worked edge has thirty-five stitches per lobe: sixteen on the first side, three in the tip arch and sixteen on the second side. This count explains the final-edge allocation of ten positions, fifteen central positions and ten more positions. Keep it separate from the skipped connectors below.
Construction Note
Every unit has three lobes after shared round 12. A large flower becomes layered by nesting two units, not by changing the shared unit into a six-lobed chart. The small flower uses only one unit.
Inner Base Round 13: Work the Full Edge
On each base lobe, work ten slip stitches, then repeat single crochet and chain two fourteen times. Continue with one single and ten slip stitches. The fifteen central single-crochet anchors and two ten-position side sections account for the thirty-five-stitch edge.
Repeat around all three lobes to complete the inner base. Keep the first and last arches of each looped section identifiable for the outer flower attachments. This base edge is not replaced by skipped positions, which belong to the separate outer and small-flower versions.
Nest the Base inside the Outer Flower
Work another unit through shared rounds one to twelve. Insert the completed inner base into this outer unit as the source component photographs show. Both units have three lobes, and their relative arrangement produces the fuller flower seen in the finished close-up.
Do not complete the outer unit with the base’s slip-stitched side edges. Its final round skips those side sections and attaches the looped center of each lobe to the inner base. Keep the nested parts together while following the next process photographs.
Outer Round 13: Loop, Join and Bridge
For an outer lobe, skip ten stitches. Repeat single crochet and chain two fourteen times, then join with one single. Work a slip stitch into the first arch of the inner base. Make twelve chains across the back and slip stitch into the last arch of the base.
