

Skip the final ten outer stitches and repeat for the remaining lobes. The photographs show the first arch attachment, the twelve-chain bridge and the last arch attachment separately. Keep the bridge behind the nested flower rather than stretching it across the visible front.
Make two complete large flowers using this paired construction. The source’s quantity refers to two finished layered flowers, each requiring its own inner base and outer unit. It does not mean only two units for the whole branch.
Large-flower checkpoint: Complete two nested flowers. Each uses a fully edged inner base and an outer unit whose final round joins the base arches with twelve-chain bridges at the back.
Make Four Small Flowers
For a small flower, work the shared unit through round twelve. Begin its final round by skipping ten stitches, working fourteen single-and-chain-two repeats and joining with one single. Skip twenty positions to the next central section and repeat the fourteen loops and single anchor.
Skip twenty again, repeat the third looped section and its single anchor, then skip the final ten positions and slip-stitch join. The twenty-position gaps combine the ten-position side portions of neighboring lobes. No inner base or twelve-chain bridge is added to this small-flower version.
Complete four small flowers. Two will remain open, and two will later be wrapped as shown in the assembly photographs. This is one small-flower pattern used in two presentations, rather than a separate invented bud crochet sequence.
Crochet Seven Round Leaves
For each leaf, make a magic ring, chain three and work ten doubles. Tighten and slip-stitch join. In round two chain three and place two complete doubles into every original, producing twenty doubles; slip-stitch join.
In round three chain three and place two complete doubles into every original again, producing forty doubles; slip-stitch join. In round four work forty singles while incorporating wire. Make seven leaves using these same rounds.
Twist the Wire and Fold the Leaves
Twist the support ends and fold each completed round leaf in half, following the source process image. The resulting folded shape becomes a green support around a flower base. It is not a separately crocheted pointed leaf that begins from a long chain.
The source provides the seven-leaf quantity and the folded arrangement but no wire allowance, measured fold angle or sewn closure. Keep the wire enclosed in the forty-single edge and preserve the two halves for the later insertion and closing photographs.
Join the Wooden Sticks and Place the Leaves
Join and cover the two wooden sticks using green insulating tape. The source preparation photograph shows the support lengths together beneath the covering. This is the branch structure that carries the wired leaves and completed flower components.
Place a folded leaf on the wooden support and lock it with tape. Continue with the next leaves from top to bottom as the source directs. The completed green branch photograph shows their successive positions before the red flower components are inserted.
Insert the Open Flowers into Their Supports
Place a completed flower into a folded leaf and close the leaf around its base. The source photographs show both the insertion and the closing movement. Keep the red petal lobes clear above the green support rather than wrapping tape over their visible looped edges.
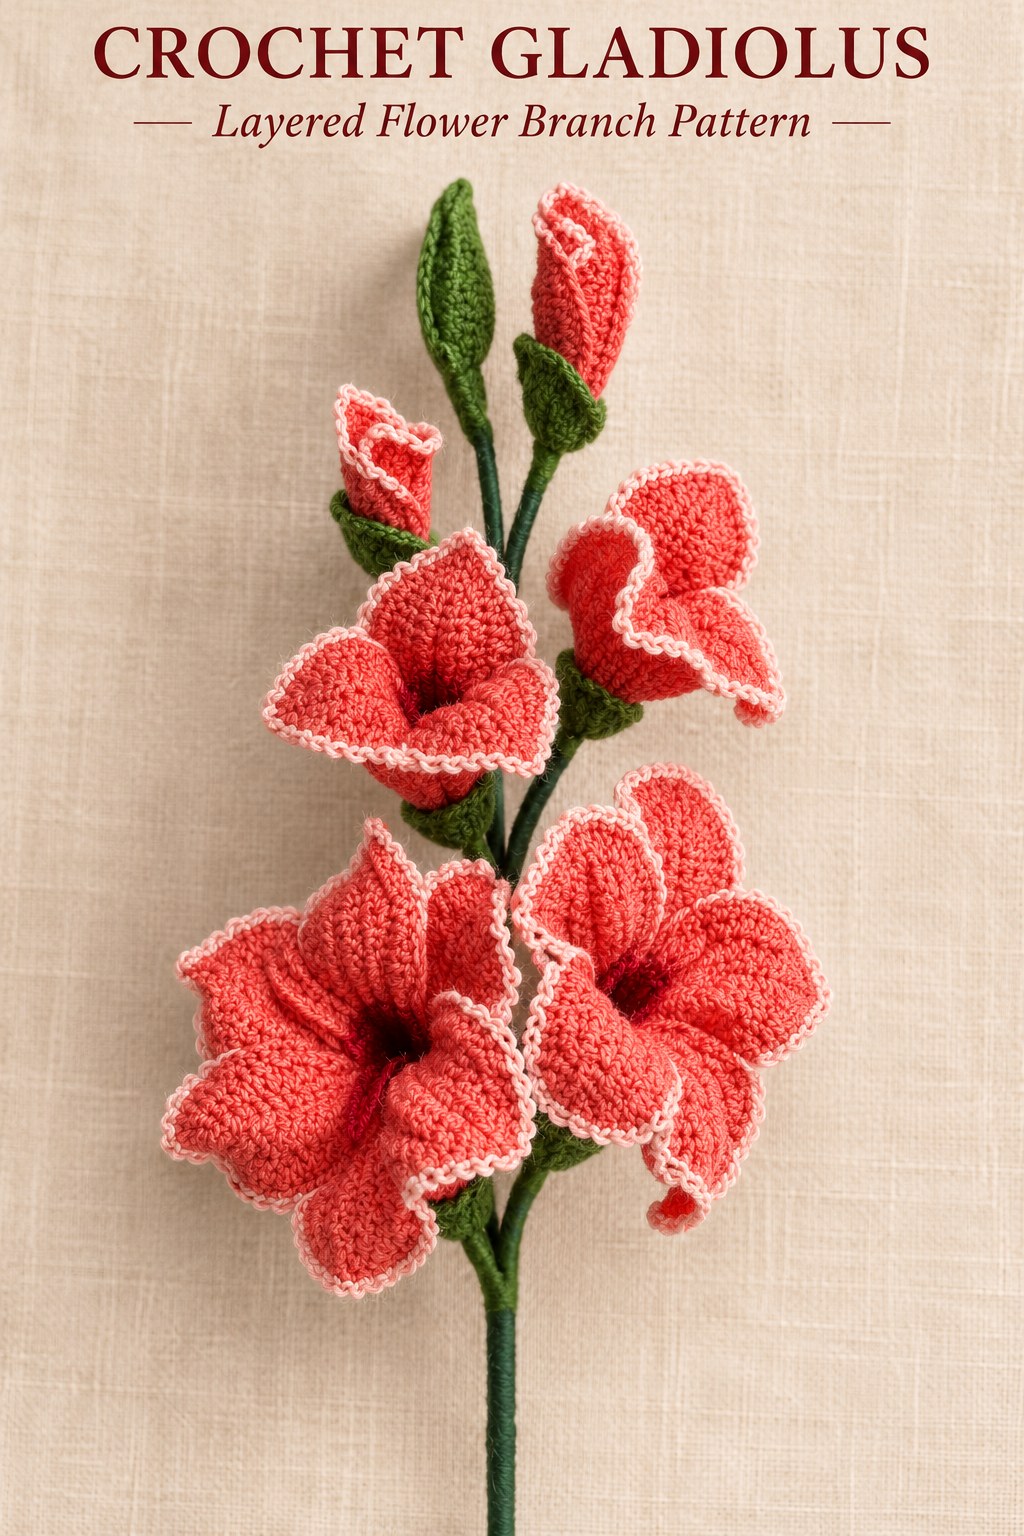
Arrange the two large flowers and the two open small flowers using the finished branch photograph as a guide. No numbered spacing measurements are supplied. The leaf supports are made and mounted first, which allows the photographed insertion sequence to remain accessible.
Wrap Two Small Flowers for the Upper Buds
Wrap two of the four small flowers as the source arrow illustrates. Place each wrapped flower into a folded leaf support, giving the upper branch its tighter bud-like forms. The small flower’s original three-lobed crochet and looped edge remain the underlying component.
The final source arrangement explicitly contains two large flowers, two open small flowers and two wrapped small flowers. Seven leaves are made, while only six flower components are named. Retain the extra green support in the branch rather than inventing a seventh flower to match the leaf count.
Check the Shared Counts and Finishing
If the first shaping groups do not align, check fifteen stitches before round nine and twenty-one afterward. If the looped edge runs short, check the thirty-five worked positions on each lobe. If a large flower lacks depth, confirm that its complete inner base was nested before the outer final round.
These instructions and actual illustrations come from Gladiolus on PDF pages one hundred and twenty-nine through one hundred and thirty-three of the supplied collection; the chapter legend is on page sixty-nine. No physical test, gauge or measured finished sample is claimed. Different colors or yarn thicknesses are optional variations. Choose care appropriate to cotton, wool, wire, wooden supports and insulating tape, protecting the looped edges and folded leaves when moving the decoration.
At a Glance
- Three-lobed shared units form both the large and small flowers.
- Two nested units and back chain bridges make each large flower.
- Seven wired round leaves are folded and taped onto two joined sticks.
- Finish with two large flowers, two open small flowers and two wrapped small flowers.
Finish Your Crochet Gladiolus
Prepare the shared units carefully, keep their three final-edge versions separate and assemble the green support branch before inserting the blooms. Use the source photographs for the nested base, back bridges and wrapped buds. Click the Pin to see the crochet Gladiolus pattern and illustrated instructions, and save the full chart alongside the assembly images before starting the branch.
Tags
Crochet GladiolusCrochet FlowersLayered CrochetWired LeavesCrochet PatternCrochet ChartsBotanical Branch
