

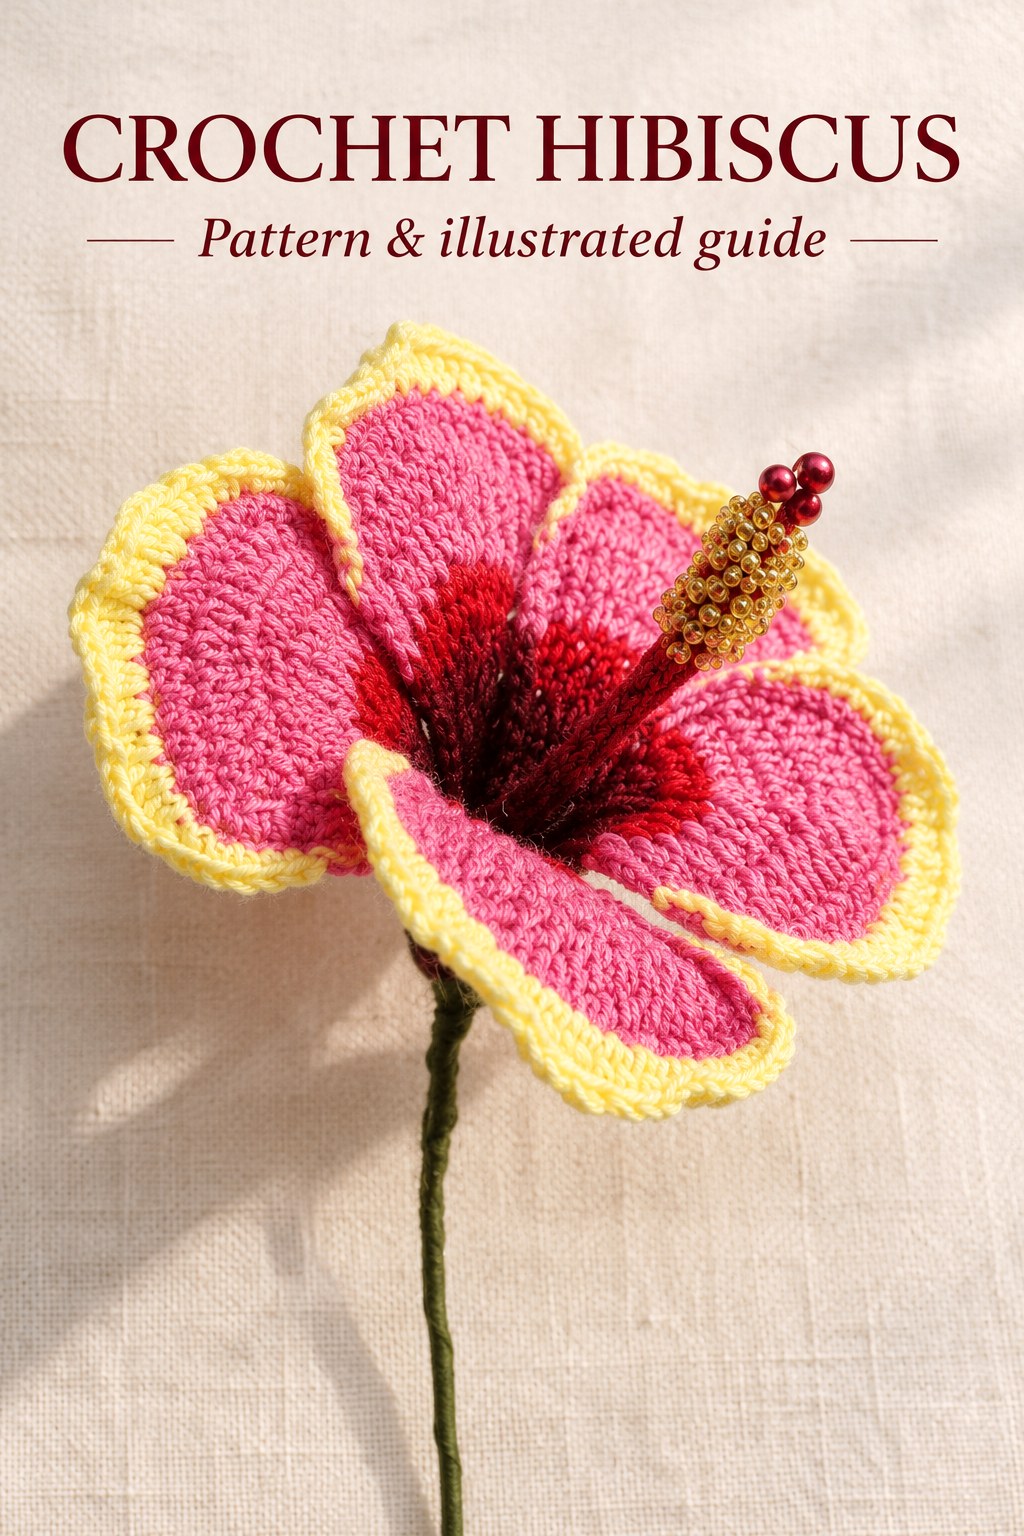
This crochet Hibiscus pattern makes five broad wired petals around a dark throat and a long red pistil with a yellow seed-beaded tip. The source flower combines dark red, red, dark pink and yellow cotton, with its narrow petal bases gathered into a green taped stem. The design appears on PDF pages 109 and 110 of the supplied collection. This guide retains the full petal and pistil sequences and includes the actual charts and source photographs for wiring, shaping, beading and final assembly.

Key Takeaways
- Use cotton in dark red, red, dark pink and yellow with a 1.90 mm hook.
- The source lists 0.6 mm wire, red pearls, yellow seed beads, fabric glue and green floral tape.
- Make five petals, each beginning with eight working chains plus one height chain.
- The petal fan widens through single-, half-double- and double-crochet shaping, then receives a wired border and decorative edge.
- The pistil has an eight-single-crochet section followed by a four-double-crochet tube.
- The final tube section is worked six times, as stated explicitly in both text and chart, despite the inconsistent printed range label.
CROCHET HIBISCUS FLOWER PATTERN
Project: A five-petal cotton Hibiscus with individually wired fan-shaped petals, yellow ruffled edges and a long red pistil finished with yellow seed beads and red pearls.
| Skill level | No difficulty rating is supplied. Uses shaped partial rows, wire incorporated in a border, narrow tubular crochet, bead decoration and supported assembly. |
|---|---|
| Materials | Cotton in dark red, red, dark pink and yellow; 1.90 mm hook; 0.6 mm wire; red pearls; yellow seed beads; fabric glue; green floral tape. |
| Measurements and quantities | No gauge, flower dimensions, cotton weight, yarn amount, wire-cut length, pearl number or bead count is specified. |
| US terms | ch = chain; sc = single crochet; hdc = half double crochet; dc = double crochet; ss = slip stitch, source ST. Two or three stitches together means that many complete stitches in one original, following the source increase legend. |
| Petal foundation, make 5 | Ch8 plus 1 height chain. |
| Petal round 1 | 7 ss, sc. In the same end position work hdc, 5 dc, hdc. Continue on the return side with sc, 7 ss. Do not cut this yarn. |
| Petal row 2 | Skip 10 stitches to the charted broad section, join yarn and work 2 sc in one original, 3 sc, 2 sc in one original. Turn. 7 sc produced. |
| Petal row 3 | Ch1, sc, hdc, dc, 3 complete dc in one original, dc, hdc, sc. 9 worked stitches. |
| Petal row 4 | Ch3, 4 dc, 3 complete dc in one original, 4 dc. Turn to work the next widening row as shown by the chart. |
| Petal row 5 | Ch3, 5 dc, 3 complete dc in one original, 5 dc. Continue the alternating-row path shown by the chart. |
| Petal row 6 | Ch3, 6 dc, 3 complete dc in one original, 6 dc. |
| Petal round 7 | Work sc around the petal while incorporating wire. Use yarn matching the petal color as directed. Twist the wire, knot and cut the yarn ends. No numerical border total is printed. |
| Petal round 8 | Skip 14 stitches to the charted broad-edge starting point. Work 3 ss; 2 complete sc in one original 3 times; 2 complete hdc in one original 3 times; 2 complete dc in one original 3 times; 3 complete dc in one original; then the corresponding 3 double-crochet increases, 3 half-double increases, 3 single-crochet increases and 3 ss. Ch2 to lock and cut the yarn. |
| Prepare the five petals | Repeat the petal, shape each supported piece and twist its wire ends. Join the five petals and twist their wires as shown. |
| Pistil foundation and round 1 | Magic ring; 8 sc into the ring. Tighten the circle. |
| Pistil rounds 2–6 | 8 sc per round for 5 rounds. 40 sc worked across the section. |
| Pistil round 7 | Ch3; 4 times. 4 working dc. Ss to join. |
| Pistil final plain section | Ch3, 4 dc, ss to join, for 6 rounds. Both the explicit repeat and chart say six; the source’s printed 8–12 range is inconsistent with that repeat. Follow six plain rounds rather than interpreting the range as five. |
| Beaded pistil tip | Apply fabric glue to the top of the pistil, apply yellow seed beads and allow to dry. |
| Pearl support | Insert wire through the red pearls and twist. Insert the wired pearls into the pistil and secure the wire at the pistil base, following the source photographs. |
| Final assembly | Insert the finished pistil at the flower center and cover the stem with green floral tape. |
Understand the Petal and Pistil Construction
Each petal begins with a narrow foundation and a wider end. Short rows expand the broad fan, while the long narrow base remains below. The single-crochet border incorporates wire around the component, and the final partial edge adds the raised yellow finish visible in the completed flower.
The pistil is made separately as a narrow crocheted tube. Its broader end receives glue and yellow seed beads; wired red pearls are inserted into the component before it is placed at the center of the gathered petals. Keep these two construction paths separate until their actual assembly step.
Gather the Named Colors and Finishing Supplies
The printed list names cotton yarn in dark red, red, dark pink and yellow, a 1.90 mm hook, 0.6 mm wire, red pearls, yellow seed beads, fabric glue and green floral tape. Set out the shades in relation to the finished photograph: darker near the throat, pink on the broad petal faces and yellow around the outer edges.
The source does not give a formal yarn weight, brand, quantities, gauge, finished diameter or support-wire length. Its chart provides useful color placement, but the written rounds do not enumerate a complete yarn-change schedule. Use the photographed palette and colored chart without inventing extra mandatory numbered color-change rounds.
Component checkpoint: Make five individual petals and one separate pistil. There is no independent leaf pattern or stuffed center sphere in this Hibiscus entry.
Interpret the Collection’s Increase Language
The general legend defines multiple stitches together as separate complete stitches in the same original, unless a closing action is explicitly stated. For this petal, two singles together therefore means two finished singles in one original. The central three doubles also form an increase, not a shared-top cluster.
Complete every stitch before beginning its partner in the shared position. The seven stitches in petal row two and nine in row three confirm the widening direction. A conventional sc2tog or dc3tog decrease would reverse that shaping and produce a different fan from the one shown in the source chart.

Petal Round 1: Form the Narrow Base and Rounded End
Chain eight plus one height chain. Work seven slip stitches and one single crochet along the foundation. At the end position, work one half double, five doubles and one half double in the same position. Continue along the return side with one single and seven slip stitches. Do not cut this yarn.
The grouped taller stitches make the first rounded part of the fan, while the slipped foundation sides retain a narrow base. Follow the chart around the chain rather than treating the return sequence as a new disconnected row. Keep the original yarn available, as the source explicitly distinguishes it from the new join used for the broad section.
Petal Row 2: Join at the Broad Section
Skip ten stitches to the indicated working section, join yarn and work two complete singles in one original, three ordinary singles and two complete singles in one original. Turn. The sequence produces seven singles, arranged as an increase at each end with three ordinary stitches between them.
The chart shows this as partial work across the broader end of the foundation, leaving the narrow stem-like base below. Do not restart at the tip of that narrow base or extend seven singles around the entire component. Retain the stated skipped approach and use the chart to identify the broad-section relationship.
Petal Row 3: Add a Central Three-Double Increase
Chain one, then work a single, a half double, a double, three complete doubles in one original, a double, a half double and a single. This consumes the seven positions of the previous row and produces nine worked stitches. The centered increase provides the next expansion while the shorter end stitches keep the sides lower.
Keep the side sequence mirrored around the three-double center. There is only one shared insertion point for those three doubles, and each is finished independently. Moving the central group to an edge or closing its stitches together would alter both the count and the curved fan shown in the chart.
Petal Rows 4–6: Widen the Fan Symmetrically
For row four, chain three, work four doubles, place three complete doubles in the central original and work four doubles. For row five, chain three and use five doubles on either side of the central three-double increase. For row six, chain three and use six doubles on either side.
Follow the alternating directions shown by the chart as these short rows widen across the broad part of the petal. Preserve the four-, five- and six-double side runs rather than making every row identical. The initial height chains belong to their row starts and should not become an invented additional central increase.
Petal Round 7: Incorporate the Wire Border
Work around the petal in single crochet while enclosing the wire, using yarn corresponding to the petal color as directed. The source chart traces the border around both the wide fan and its narrow base. No numerical single-crochet total is supplied for this perimeter, so follow the actual edge and source diagram.
Twist the wire ends, knot and cut the yarn ends. The source process photographs show the support held with the petal while the crochet encloses it, followed by yarn finishing. Keep that support around the outline rather than threading an unlisted straight rod across the visible face of the fan.
Wire-border note: The source gives a complete perimeter route but no border-stitch total. Keep the actual chart beside the work; an invented total would not improve the printed instructions.
Petal Round 8: Work the Decorative Partial Edge
Skip fourteen stitches to the charted starting point on the broad edge. Work three slip stitches, then three single-crochet increases, three half-double increases and three double-crochet increases. At the center, work three complete doubles in one original. Mirror the increase groups back down through doubles, half doubles and singles, ending with three slips.
Chain two to lock and cut the yarn. This partial path decorates the broad fan and leaves the narrow basal portion distinct. The source shows its contrasting yellow edge above the pink border. Keep each pair in its own original, preserving the gradual changes of stitch height around the central three-double group.
Shape and Gather the Five Supported Petals
Complete five petals. The source photographs show widening and curving the supported fan between the hands, then twisting the wire ends below. Work with the incorporated support to develop the cupped petal shape, keeping the dark narrow base available for joining at the throat.
Join the five petals and twist their wires as shown in the assembly photograph. The broad fans overlap around the center opening. No exact bend angles, measured spacing or counted twisting formula is supplied. Use the source’s actual arrangement while keeping the opening accessible for the separately finished pistil.
