


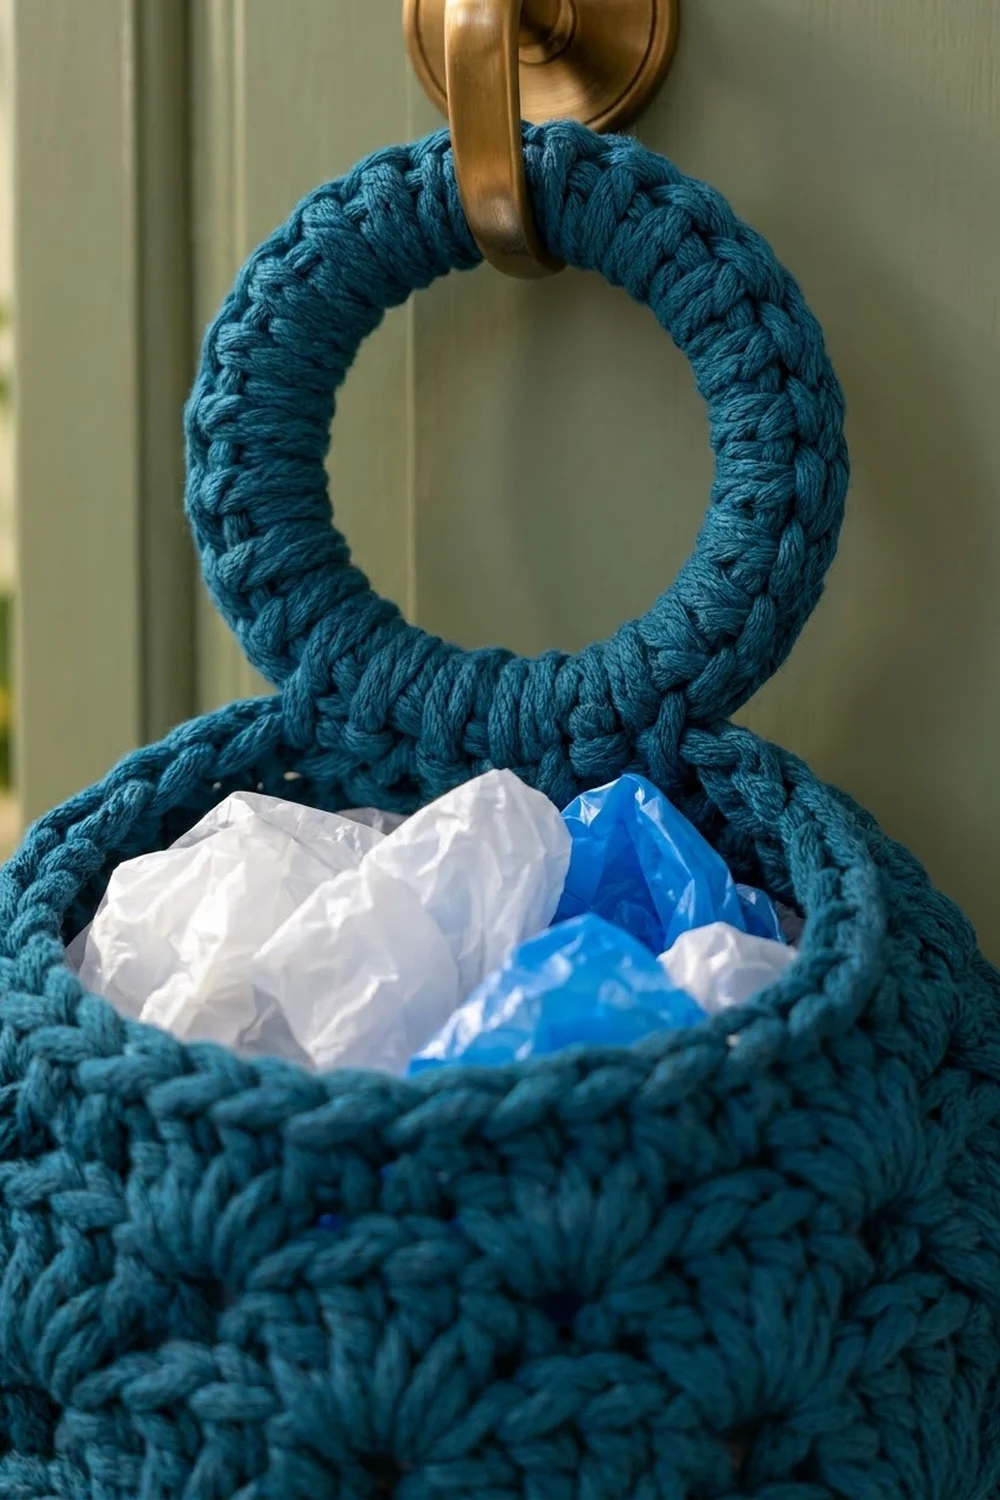
This round, bubble-shaped bag holder keeps grocery bags in one place and looks good while it does. You push bags in through the open top and pull them out one at a time through a small hole at the bottom. A thick, covered ring at the top slips over a door knob, hook, or cabinet handle.
The sample uses one solid color, a deep petrol teal. Staggered shell stitches cover the body and give it a scalloped texture that reads well from across the room. The top rim and the area around the dispensing hole are worked in single crochet, which gives clean, firm edges that hold up to frequent use.
The pattern uses US crochet terms. The finished pouch is about 8 in (20.3 cm) wide and 8.5 in (21.6 cm) tall when flattened. With the ring added, the holder is about 11.5 in (29.2 cm) tall overall.
You work the body in continuous joined rounds from the bottom up. First you make the dispensing hole and a single-crochet base, then the shell rounds, and then you decrease toward the opening and finish with a rolled rim. The ring is single crochet worked over a 3 in (7.6 cm) ring core, with a short tab that you sew to the inside back of the rim.
Finished Size and Construction
- Finished size (pouch, flat): 8 in (20.3 cm) wide × 8.5 in (21.6 cm) tall
- Overall hanging height: about 11.5 in (29.2 cm)
- Skill level: Advanced beginner
- Terminology: US
- Yarn weight: Bulky (#5) cotton or cotton-blend cord
- Hook: 6.0 mm (US J-10)
- Number of pieces: 2 (body + hanging ring)
- Layout: Ring centered above the body, sewn to the inside back of the rim
- Piece size: body 16 in (40.6 cm) around at its widest; ring 3.75 in (9.5 cm) across
- Size before rim: about 7.75 in (19.7 cm) measured up the side from the hole edge
- Rim depth: 3 rounds, 1 in (2.5 cm)
Materials
Yarn: Use a smooth bulky cotton or cotton-blend cord with good stitch definition. Fuzzy yarns hide the shells. Cotton keeps the pouch firm, so it holds its round shape even when it’s only half full.
- Petrol Teal: 220 g, about 310 m (339 yd)
This quantity includes a margin of about 20% for gauge swatching and differences between yarn brands.
Tools:
– 6.0 mm (US J-10) crochet hook
– One 3 in (7.6 cm) plastic or wooden ring (for the hanging ring core)
– Tapestry needle
– 2 stitch markers
– Measuring tape
– Scissors
– A small towel or plastic bags, for blocking
Abbreviations (US Terms)
- ch – chain
- sl st – slip stitch
- sc – single crochet
- dc – double crochet
- sc2tog – single crochet 2 together
- sk – skip
- st(s) – stitch(es)
- rnd(s) – round(s)
- rep – repeat
- BLO – back loop only
Special stitch – Shell: Work 5 dc in the same stitch. The center stitch of a shell is its 3rd dc.
Gauge and Checkpoints
- Single crochet: 12 sc and 12 rows = 4 in (10.2 cm)
- Shell pattern: 12 sts (2 repeats) = 4 in (10.2 cm) wide; 5 shell rnds = 4 in (10.2 cm) tall
Before you start, make a sc swatch about 5 in (12.7 cm) square. If your 4 in (10.2 cm) of stitches has more than 12 sc, go up a hook size. If it has fewer, go down one.
Checkpoints while working the body:
– After Rnd 7: the base measures 16 in (40.6 cm) around the outer edge and is about 2.25 in (5.7 cm) tall from the hole edge, measured along the surface.
– After Rnd 14: the body measures about 7.75 in (19.7 cm) up the side and still 16 in (40.6 cm) around.
– After Rnd 17: the opening measures 12 in (30.5 cm) around, or 6 in (15.2 cm) across when flattened.
If a checkpoint comes out 0.5 in (1.3 cm) or more too big, rip back to the base and go down a hook size. If it’s too small, go up a size. Don’t change the stitch counts, because the shell repeat depends on 48 stitches.
Body
Foundation (dispensing hole): Ch 12. Sl st to the first ch to form a ring, taking care not to twist.
Rnd 1: Ch 1, work 1 sc in each ch around, then sl st to the first sc to join. (12 sts)
Rnd 2: Ch 1, sc in next st, 2 sc in next st; rep from * 5 more times. Join. (18 sts)*
Rnd 3: Ch 1, sc in next 2 sts, 2 sc in next st; rep from * 5 more times. Join. (24 sts)*
Rnd 4: Ch 1, sc in next 3 sts, 2 sc in next st; rep from * 5 more times. Join. (30 sts)*
Rnd 5: Ch 1, sc in next 4 sts, 2 sc in next st; rep from * 5 more times. Join. (36 sts)*
Rnd 6: Ch 1, sc in next 5 sts, 2 sc in next st; rep from * 5 more times. Join. (42 sts)*
Rnd 7: Ch 1, sc in next 6 sts, 2 sc in next st; rep from * 5 more times. Join. (48 sts)*
These rounds add 6 stitches each. That’s slightly fewer than a flat circle needs, so the base cups up into the rounded bottom of the bubble.
Rnd 8 (Shell Rnd A, first): Ch 1, sc in the same st as the join, sk 2 sts, shell in next st, sk 2 sts, sc in next st; rep from * 6 more times, then sk 2 sts, shell in next st, sk 2 sts. Sl st to the first sc to join. (8 shells + 8 sc = 48 sts)*
Rnd 9 (Shell Rnd B): Ch 3 (counts as dc), 2 dc in the same st as the join (half shell), sc in the center dc of the next shell, shell in the next sc; rep from * 6 more times, then sc in the center dc of the last shell and 2 dc in the first sc (the same st as the starting ch-3). Sl st to the top of the ch-3 to join. (7 shells + 2 half shells + 8 sc = 48 sts)*
The two half shells meet at the join to make a complete 5-stitch shell. The ch-3 is that shell’s center stitch.
Rnd 10 (Shell Rnd A): Ch 1, sc in the same st as the join (the top of the ch-3), shell in the next sc, sc in the center dc of the next shell; rep from * 6 more times, then shell in the last sc. Sl st to the first sc to join. (8 shells + 8 sc = 48 sts)*
Rnds 11–14: Work Shell Rnd B (Rnd 9), then Rnd A (Rnd 10), then Rnd B, then Rnd A. (48 sts each rnd)
This gives 7 shell rounds in total. Because each round puts its shells on top of the previous round’s single crochets, the shells sit staggered like brickwork.
Rnd 15 (conversion round): Ch 1, sc in each st around. Join. (48 worked 1 per existing st + 0 added = 48 sts)
Rnd 16: Ch 1, sc in next 6 sts, sc2tog; rep from * 5 more times. Join. (42 sts)*
Rnd 17: Ch 1, sc in next 5 sts, sc2tog; rep from * 5 more times. Join. (36 sts)*
Check the opening now: it should be 12 in (30.5 cm) around.
