

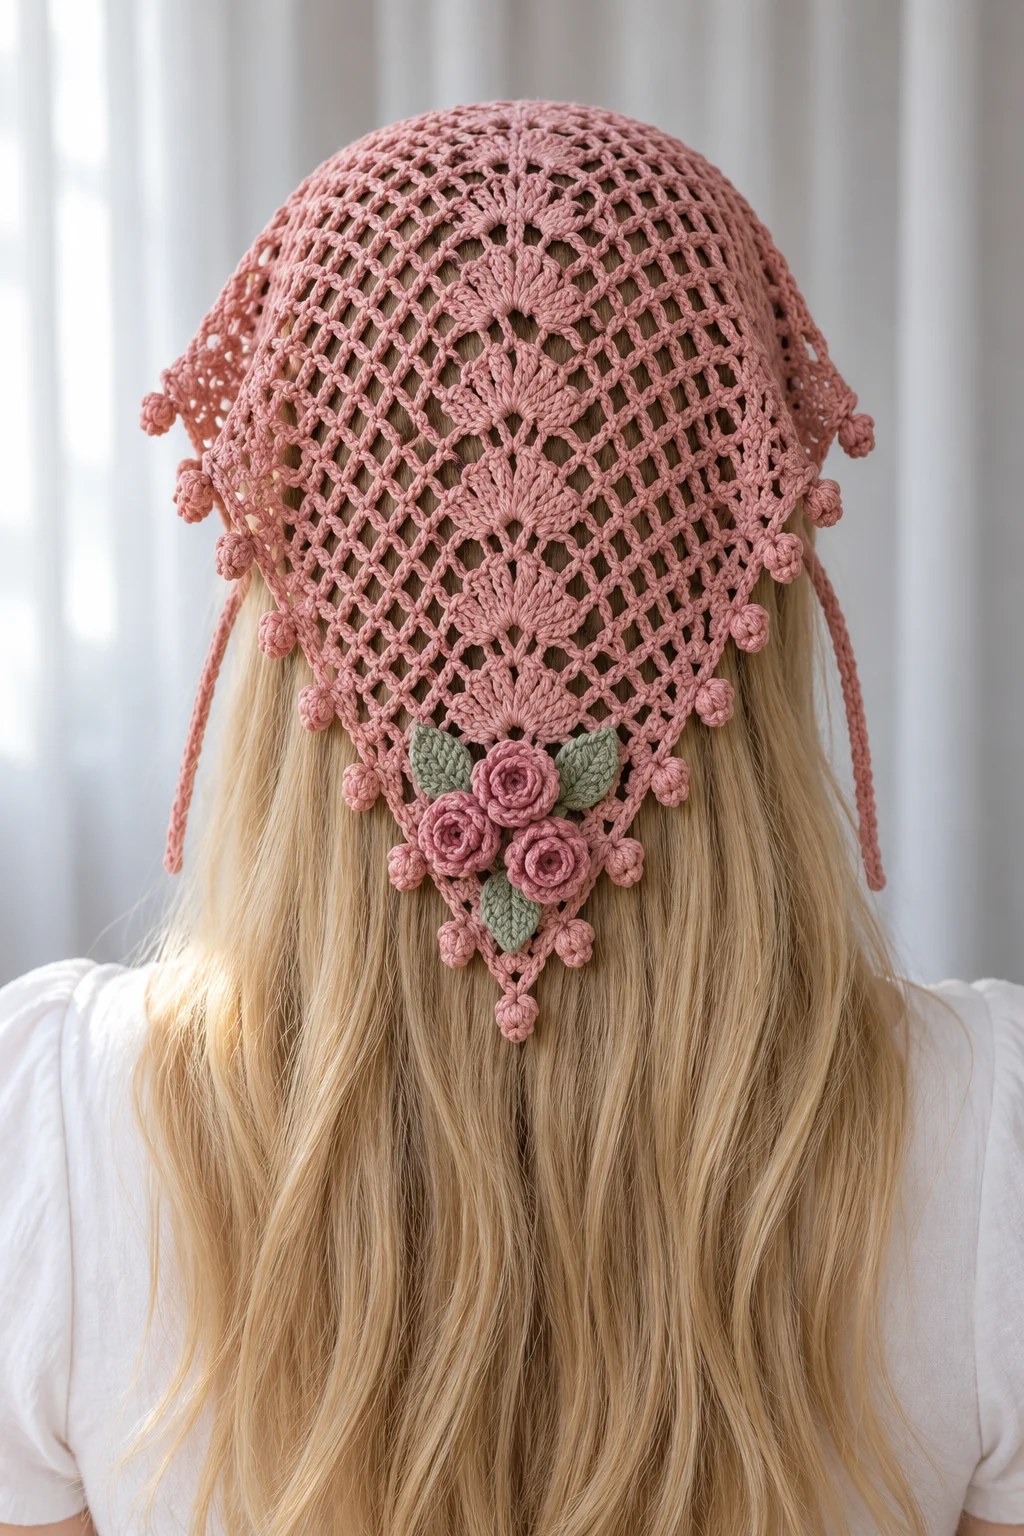
The newest row is always your widest edge (the top). The starting ring remains the bottom tip.
Sizing adjustment: After row 24, lightly block and measure. Your target is a top edge of 48 cm and depth of 30 cm. If you need more width, add whole rows using the same rule. Every row adds about 2 cm of width and 1.25 cm of depth at target gauge. Record your final row count for the edging section.
Section 02: Edge and Ties
Now you will create a stable edge around your triangle and add the ties.
Top edge foundation:
Chain 1, turn. Work 1 single crochet in each existing single crochet AND 5 single crochets into every chain 5 arch.
At 24 arches, your total should be 25 + 120 = 145 single crochets. Do not pull this row tight.
Working around the sides:
Continue around the first sloping side. Work 2 single crochets around each row end segment. When you reach the starting ring at the point, work 3 single crochets into it. Then work 2 single crochets around each row end segment up the second side. Join at the first top edge single crochet.
Adjust only if needed for a flat edge, and record your count.
Tie 1:
At the first upper corner, chain 71. Working back toward the scarf, single crochet in the second chain and each remaining chain. (70 sc) Slip stitch securely into the corner. Fasten off.
Tie 2:
Repeat at the opposite upper corner.
Measure your ties rather than stretching them to the target. Each should be approximately 25 cm. Add or remove starting chains before working back if necessary.
To wear, tie behind the head beneath the hair, keeping the triangular point centered.
Section 03: Border and Center Fans
Picot border:
Work single crochet along both sloping edges, making one picot after every fourth single crochet. At the lower point, work (single crochet, picot, single crochet) in the center point stitch. Keep picot spacing symmetrical and leave the top edge plain.
Fan motifs (make 8 in dusty rose):
Chain 4, slip stitch to first chain for a ring. Chain 3 (counts as first double crochet for this motif only), 6 double crochets in ring. (7 dc total)
Do not close the fan into a circle. Fasten off with a 20 cm tail for sewing. Spread gently into a semicircle.
Assembling the fan spine:
Arrange the fans in a centered column from about 3 cm below the top edge to about 3 cm above the tip. Point the straight edges downward and overlap neighboring fans slightly. Sew each base to mesh intersections, then tack its outer corners. Do not pull mesh arches together.
Optional tip medallion (for olive version):
Chain 4, join to ring. Chain 3 (counts as double crochet), 11 double crochets in ring, join. (12 dc) Fasten off. Sew medallion over the lowest fan base. This motif is purely decorative and does not shape the triangle.
Section 04: Accent Motifs
These roses and leaves give the headscarf its romantic garden character.
Rose:
Chain 19. Starting in the second chain, single crochet across. (18 sc) Turn. Chain 1. four times. Skip 1 single crochet, 5 double crochets in last single crochet. Fasten off.
Roll from the first shell into a spiral and stitch through the base several times to secure.
Leaf:
Chain 8. Starting in the second chain, work single crochet, half double crochet, double crochet, 2 double crochets in next chain, double crochet, half double crochet, 3 single crochets in last chain. Rotate your work. Along the unused loops, work half double crochet, double crochet, 2 double crochets in next chain, double crochet, half double crochet, single crochet. Join with slip stitch. Fasten off.
Sew a contrasting line of stem stitch along its center for a realistic vein detail.
Placement:
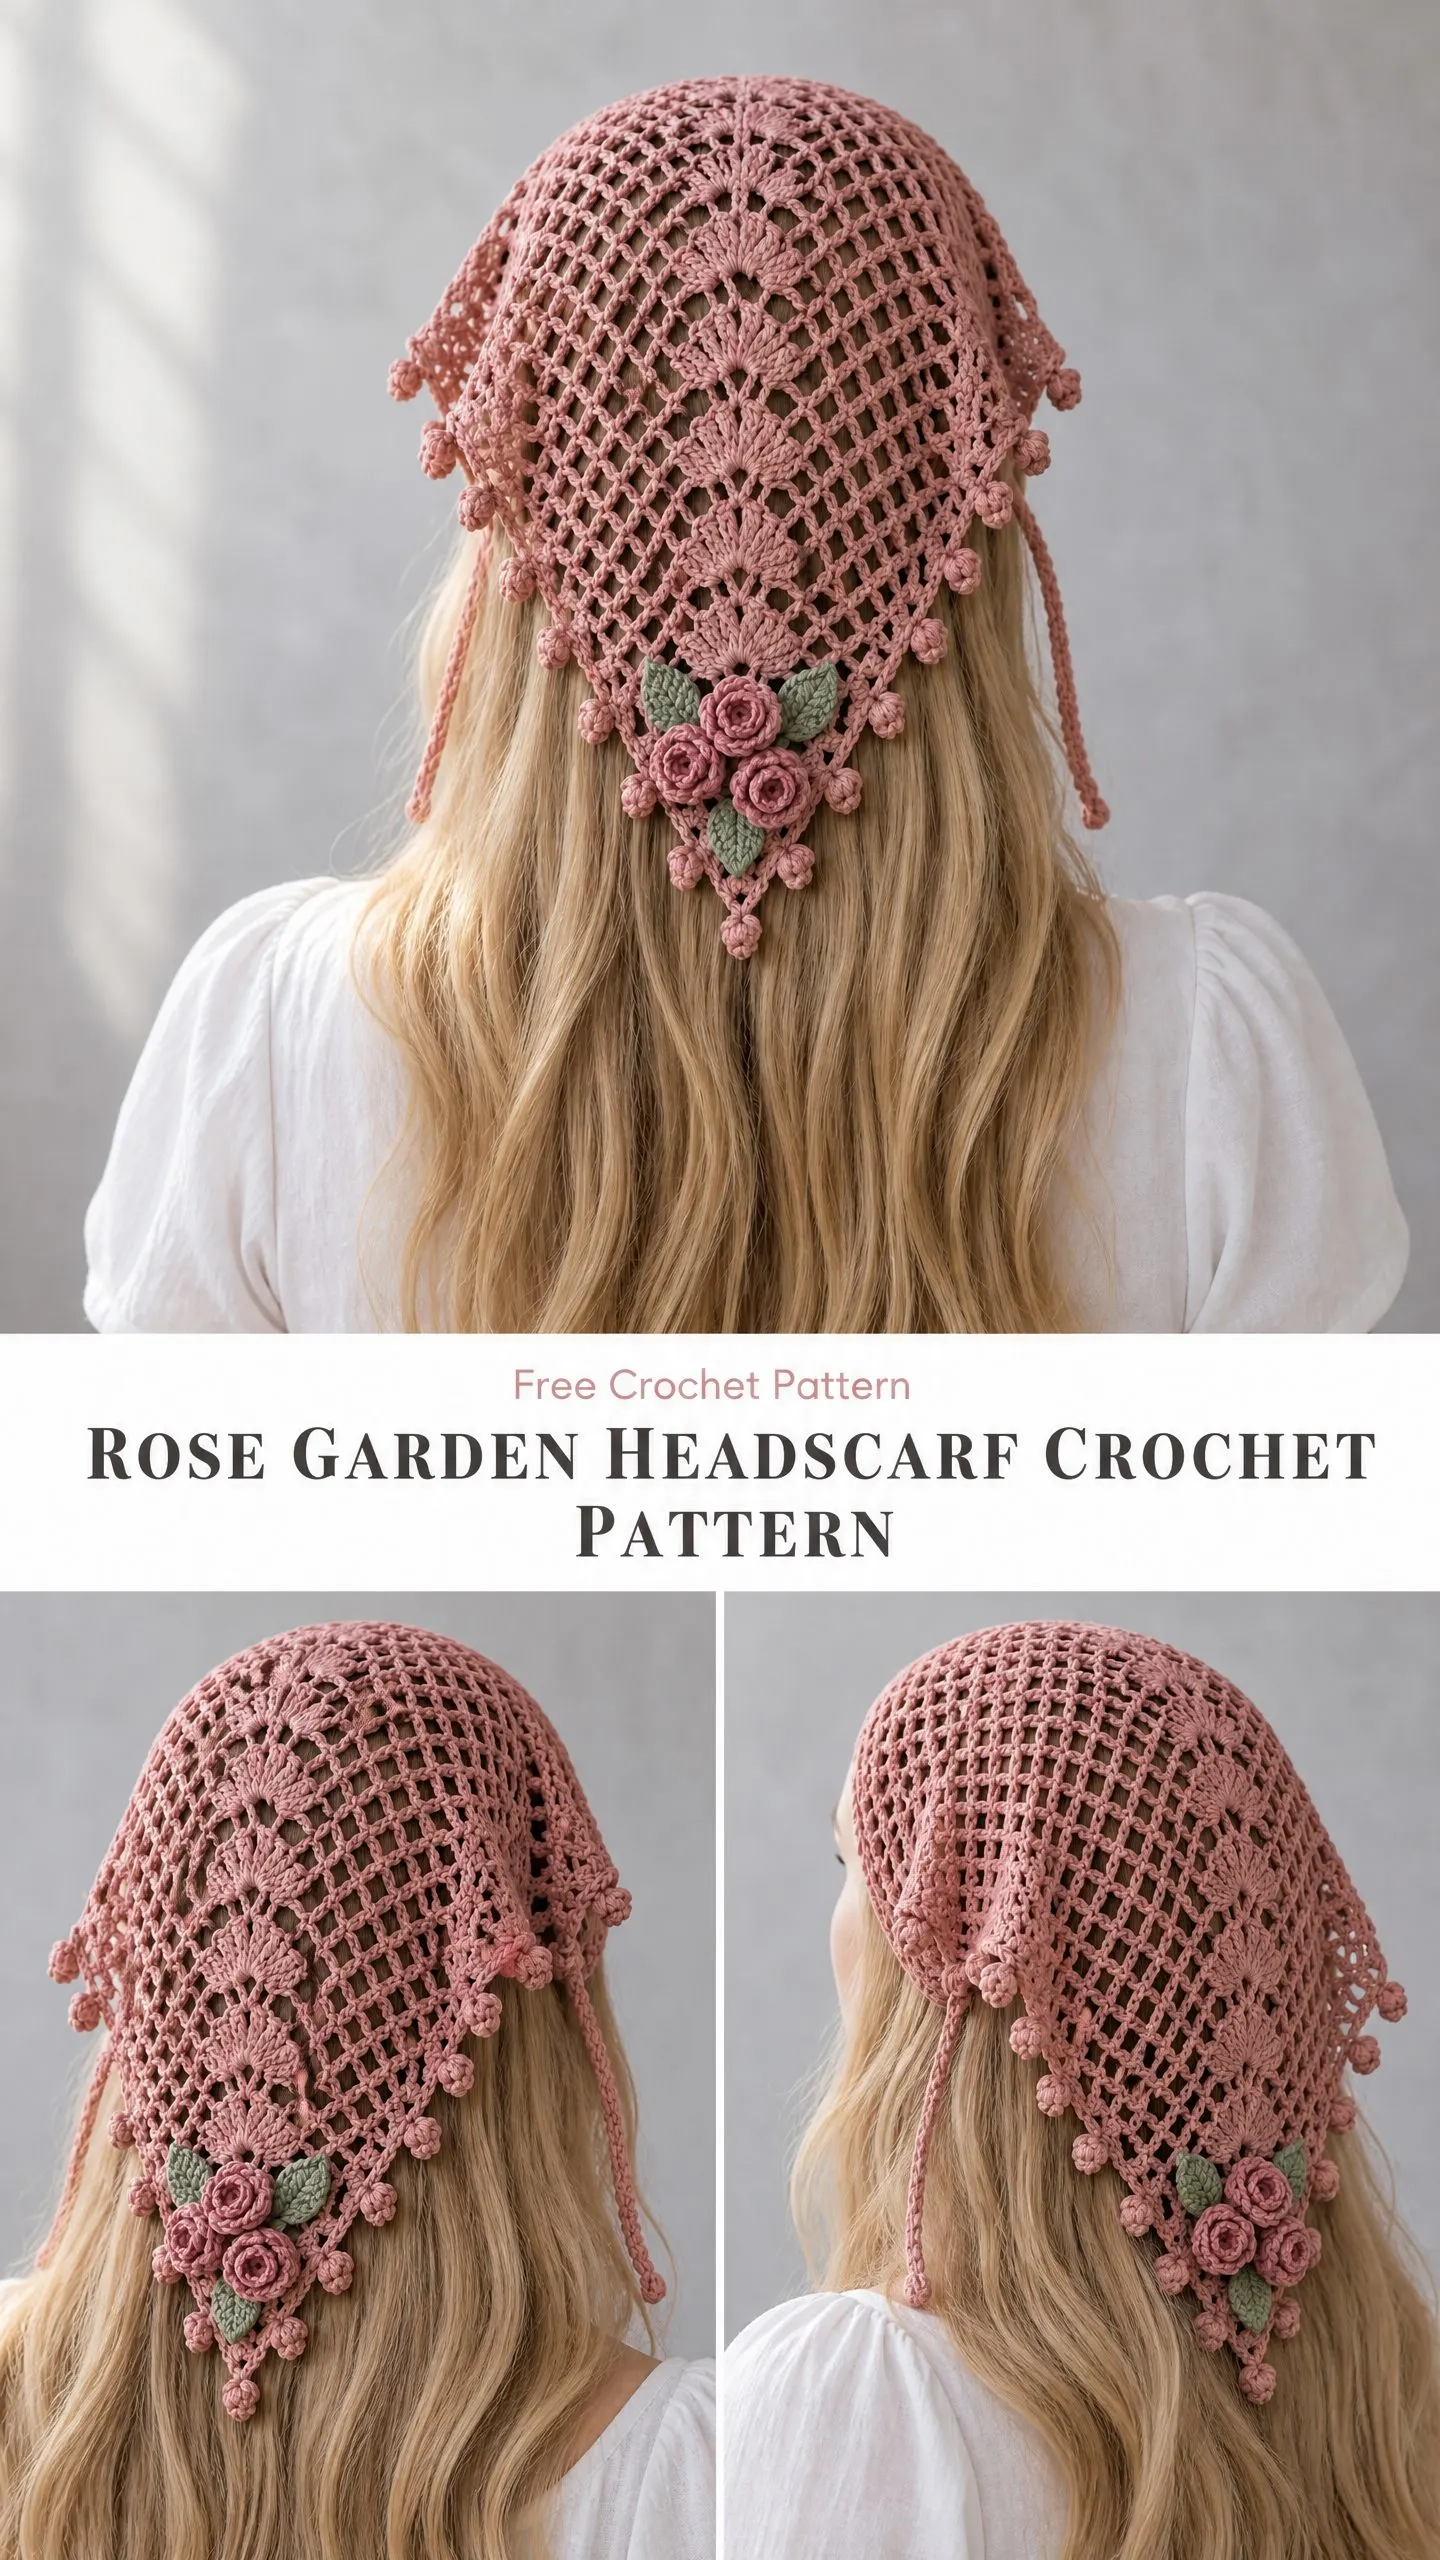
Sew three small motifs along the lower 10 cm of the fan spine. Keep appliques away from the forehead area. For the Rose Garden version, use dusty rose roses with sage leaves.
Tack every outer point and loop to ensure your appliques stay secure during wear.
Section 05: Blocking, Fitting, and Finishing
Weaving in ends:
Weave ends in at least two directions through nearby solid stitches. This prevents them from working loose over time.
Blocking:
Soak according to your yarn label instructions. Press excess water into a towel (do not wring). Lay the scarf on a blocking mat. Pin the top edge to about 48 cm and the lower tip to about 30 cm depth. Pin both side edges symmetrically.
Open mesh gently with your fingertips, keeping each chain arch similar in size. Do not stretch so hard that stitches lose their shape. Let dry completely before removing pins.
Fitting:
Try on over the crown with the longest edge across the front hairline. Tie the two corner ties at the nape beneath your hair. The center point should hang down the middle of your hair. Adjust tie position for comfort without pulling the mesh tight.
Care notes:
Inspect beads, tassels, and appliques before each use. Remove the accessory for sleep or any activity where ties could catch. Follow your cotton yarn label for washing and re-block after laundering.
Troubleshooting Tips
Curling top edge: This usually means your single crochet tension is too tight on the edge round. Try working that row more loosely.
Flared sides: You may have too many edging stitches. Reduce the number of single crochets per row end segment from 2 to 1 in spots where the fabric ripples.
Unequal sides: This typically indicates a missed arch or an extra end repeat somewhere. Undo to the last correct row and restore its arch count before continuing.
Why This Pattern Works
The genius of this design is the separation between structure and decoration. Your mesh triangle provides the shape and fit. The fans, roses, and leaves provide the visual interest. If you make a mistake on an applique, you simply make another one. No frogging half your project.
This also means you can customize freely. Want more roses? Add them. Prefer a simpler look? Skip the appliques entirely and let the mesh and picot border speak for themselves.
Gift Giving Ideas
This headscarf makes a lovely gift for:
The fingering weight cotton makes it comfortable for three season wear, and the open mesh keeps it from feeling too warm in summer.
Thank you so much for choosing this pattern for your next project. I hope you love making your Rose Garden Headscarf as much as I enjoyed designing it. If you make one, I would absolutely love to see it. Tag me on Instagram or share a photo in our Facebook group. Seeing your finished pieces truly makes my day.
If this pattern is going on your must make list, go ahead and save it to your Pinterest boards so you can find it easily when you are ready to start. And please drop a comment below if you have any questions or just want to share how yours turned out. Happy crocheting!
You Might Also Like
- Dusty Rose Boho Circle Handle Bag Free Crochet Pattern
- Mint Daisy Notebook Cover Free Crochet Pattern
- Terracotta Boho Basket Bag with Black Fringe Free Crochet Pattern
- Sunset Orange Butterfly Bag Free Crochet Pattern
CONTENT END 1
