

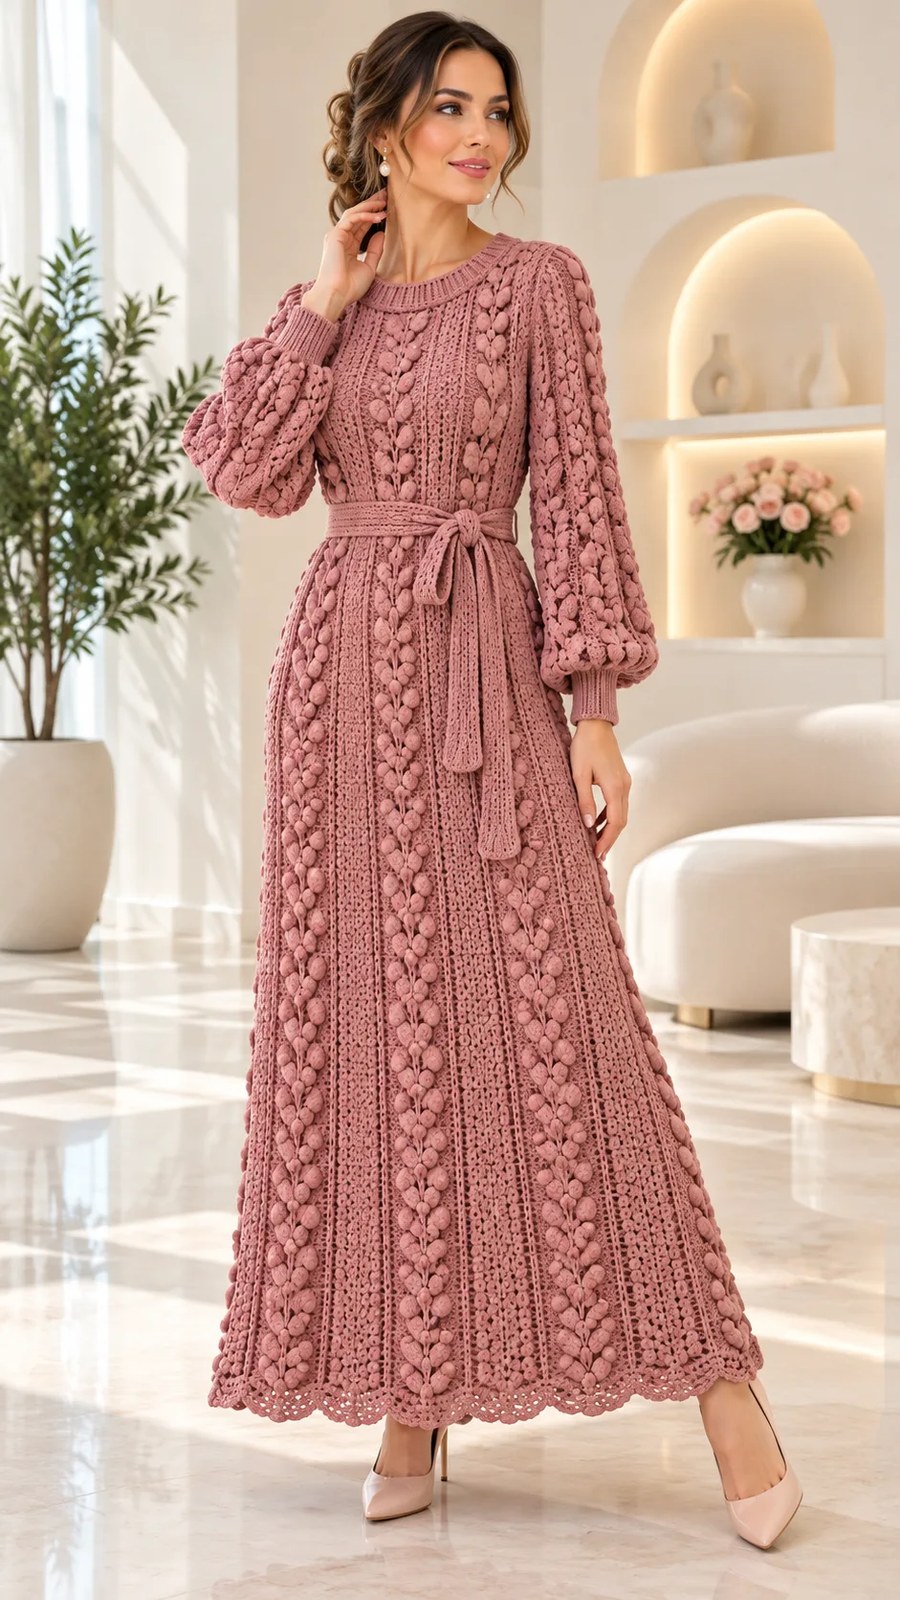
Work a second 99-position panel through Row 154.
Rows 155 through 156:Work each outer group of 33 positions separately for 2 rows, leaving center 33 unworked. Fasten off.
Sleeves (Make Two)
With main yarn and 4.0 mm hook, ch 80. Work the following sleeve pattern through Row 56. Fasten off. The starting edge is the cuff side, and the last row is the shoulder side.
Row 1 (RS):Dc in fourth ch from hook and in each ch across.
Row 2 (WS):Dc in each st across.
Row 3 (RS): Dc in next 5 sts, dc in next 3 sts, pc in next st repeat from to 18 times.
Rows 4 through 6:Dc in each st across, working one st into each pc top.
Following rows:Work a popcorn row on rows 7, 11, 15, and every fourth row thereafter. All other rows are worked in dc across.
Belt or Drawstring
With main yarn and 3.5 mm hook, ch 6.
Row 1:Sc in second ch from hook and in each ch across.
Rows 2 through 320:Ch 1, turn, sc BLO in every st.
Target length is 160 cm and approximately 2.5 cm wide. Use a belt swatch gauge of 20 rows per 10 cm. Lengthen or shorten by whole rows to reach 160 cm. Fasten off.
Assembly Instructions
You’ll need main-color yarn, a tapestry needle, and your 4.0 mm hook for any slip-stitch joining. Use mattress stitch unless noted otherwise. Match row ends carefully and keep seams flexible.
Join 1:With RS facing outward, mattress-seam each front shoulder to the matching back shoulder, one stitch to one stitch.
Join 2:Mark 26 row ends down from each shoulder on both front and back panels. Center each sleeve’s last row at the shoulder seam. Ease half the sleeve width to the front and half to the back. Pin four equal sections and sew.
Join 3:Close both sleeve underarms. Close body sides from below the armhole marker to the hem.
Checkpoint: Shoulder widths should match. Sleeves should be centered and hang without twisting. The assembled chest should measure approximately 108 to 110 cm around after seam take-up. Try the dress over your intended slip before adding edgings.
Edgings and Details
Switch to your 3.5 mm hook for all edgings. Mark the first stitch of every round.
Neckline Trim
Round 1:Attach yarn at back neck. Sc into 33 center back positions, 2 sc in each of 2 back neck row ends, 2 sc in each of 8 front neck row ends, 33 center front positions, then mirror both side edges. Join.
Round 2:Ch 3, dc in each sc around, join.
Round 3: Ch 3, FPdc, BPdc repeat from to 53 times, join.
Round 4:Repeat Round 3. Fasten off.
Cuff Trim (Work on Each Sleeve)
Round 1:Sc into first 7 foundation stitches, then sc2tog 35 times around remaining foundation edge. Join.
Round 2:Dc in each sc around. Join.
Rounds 3 through 6: FPdc, BPdc repeat from to 21 times, join.
Fasten off after Round 6.
Hem Edging
Round 1:With RS facing, sc once into each foundation position. Treat both panels as one continuous round since there is no slit. Join.
Round 2: Sc in next st, skip 2 sts, 5 dc in next st, skip 2 sts repeat from to 33 times. Join to first sc.
Checkpoint: The neckline should lie flat and stretch easily over your head. Cuffs should measure approximately 21 to 23 cm around without forcing. The hem should have 33 scallops.
Finishing Your Dress
Pass 1: Weave each tail through at least 5 cm of adjacent stitch backs. Reverse direction and repeat. Trim only after checking that each tail is secure.
Pass 2: Damp-block flat to the schematic dimensions. Pin scallops evenly and support all garment weight during blocking. Avoid heat on acrylic blends and avoid pressing textured stitches flat.
Pass 3: Let dry completely. Fit over your intended lining and inspect each seam, cord end, and bead (if used). Fold for storage instead of hanging long term to prevent stretching.
Final checkpoint: The hem should be even with no slit. Record your actual finished measurements and yarn used. Wear-test walking, sitting, and raising your arms before wearing publicly.
Care Instructions
Follow your yarn label’s care recommendations. Hand wash cool with mild detergent if compatible with your chosen yarn. Support the wet garment to prevent stretching, roll in a towel to remove excess water, and dry flat. Remove any detachable embellishments first.
Keep beads, needles, and cut threads away from children and pets. Inspect sewn beads before each wearing. Long cords, tassels, and open lacework can snag, so keep clear of machinery and open flames. Shorten a dragging hem if needed.
Helpful Tips for Success
Block your pieces before seaming. This makes assembly much easier and ensures accurate sizing.
Check fit at multiple stages. Baste seams temporarily first. Make sure the neckline passes over your head, the hips have walking ease, and the hem clears the floor with your intended footwear.
The belt is essential. It shapes an otherwise straight silhouette, so don’t skip it.
Adjust length carefully. If you need to shorten or lengthen the dress, do so only in complete texture repeats below the armhole. Document any altered row numbers before seaming.
A lining makes a difference. Cotton-acrylic blends can be somewhat sheer, especially with the texture pattern. A matching slip underneath gives you confidence and comfort.
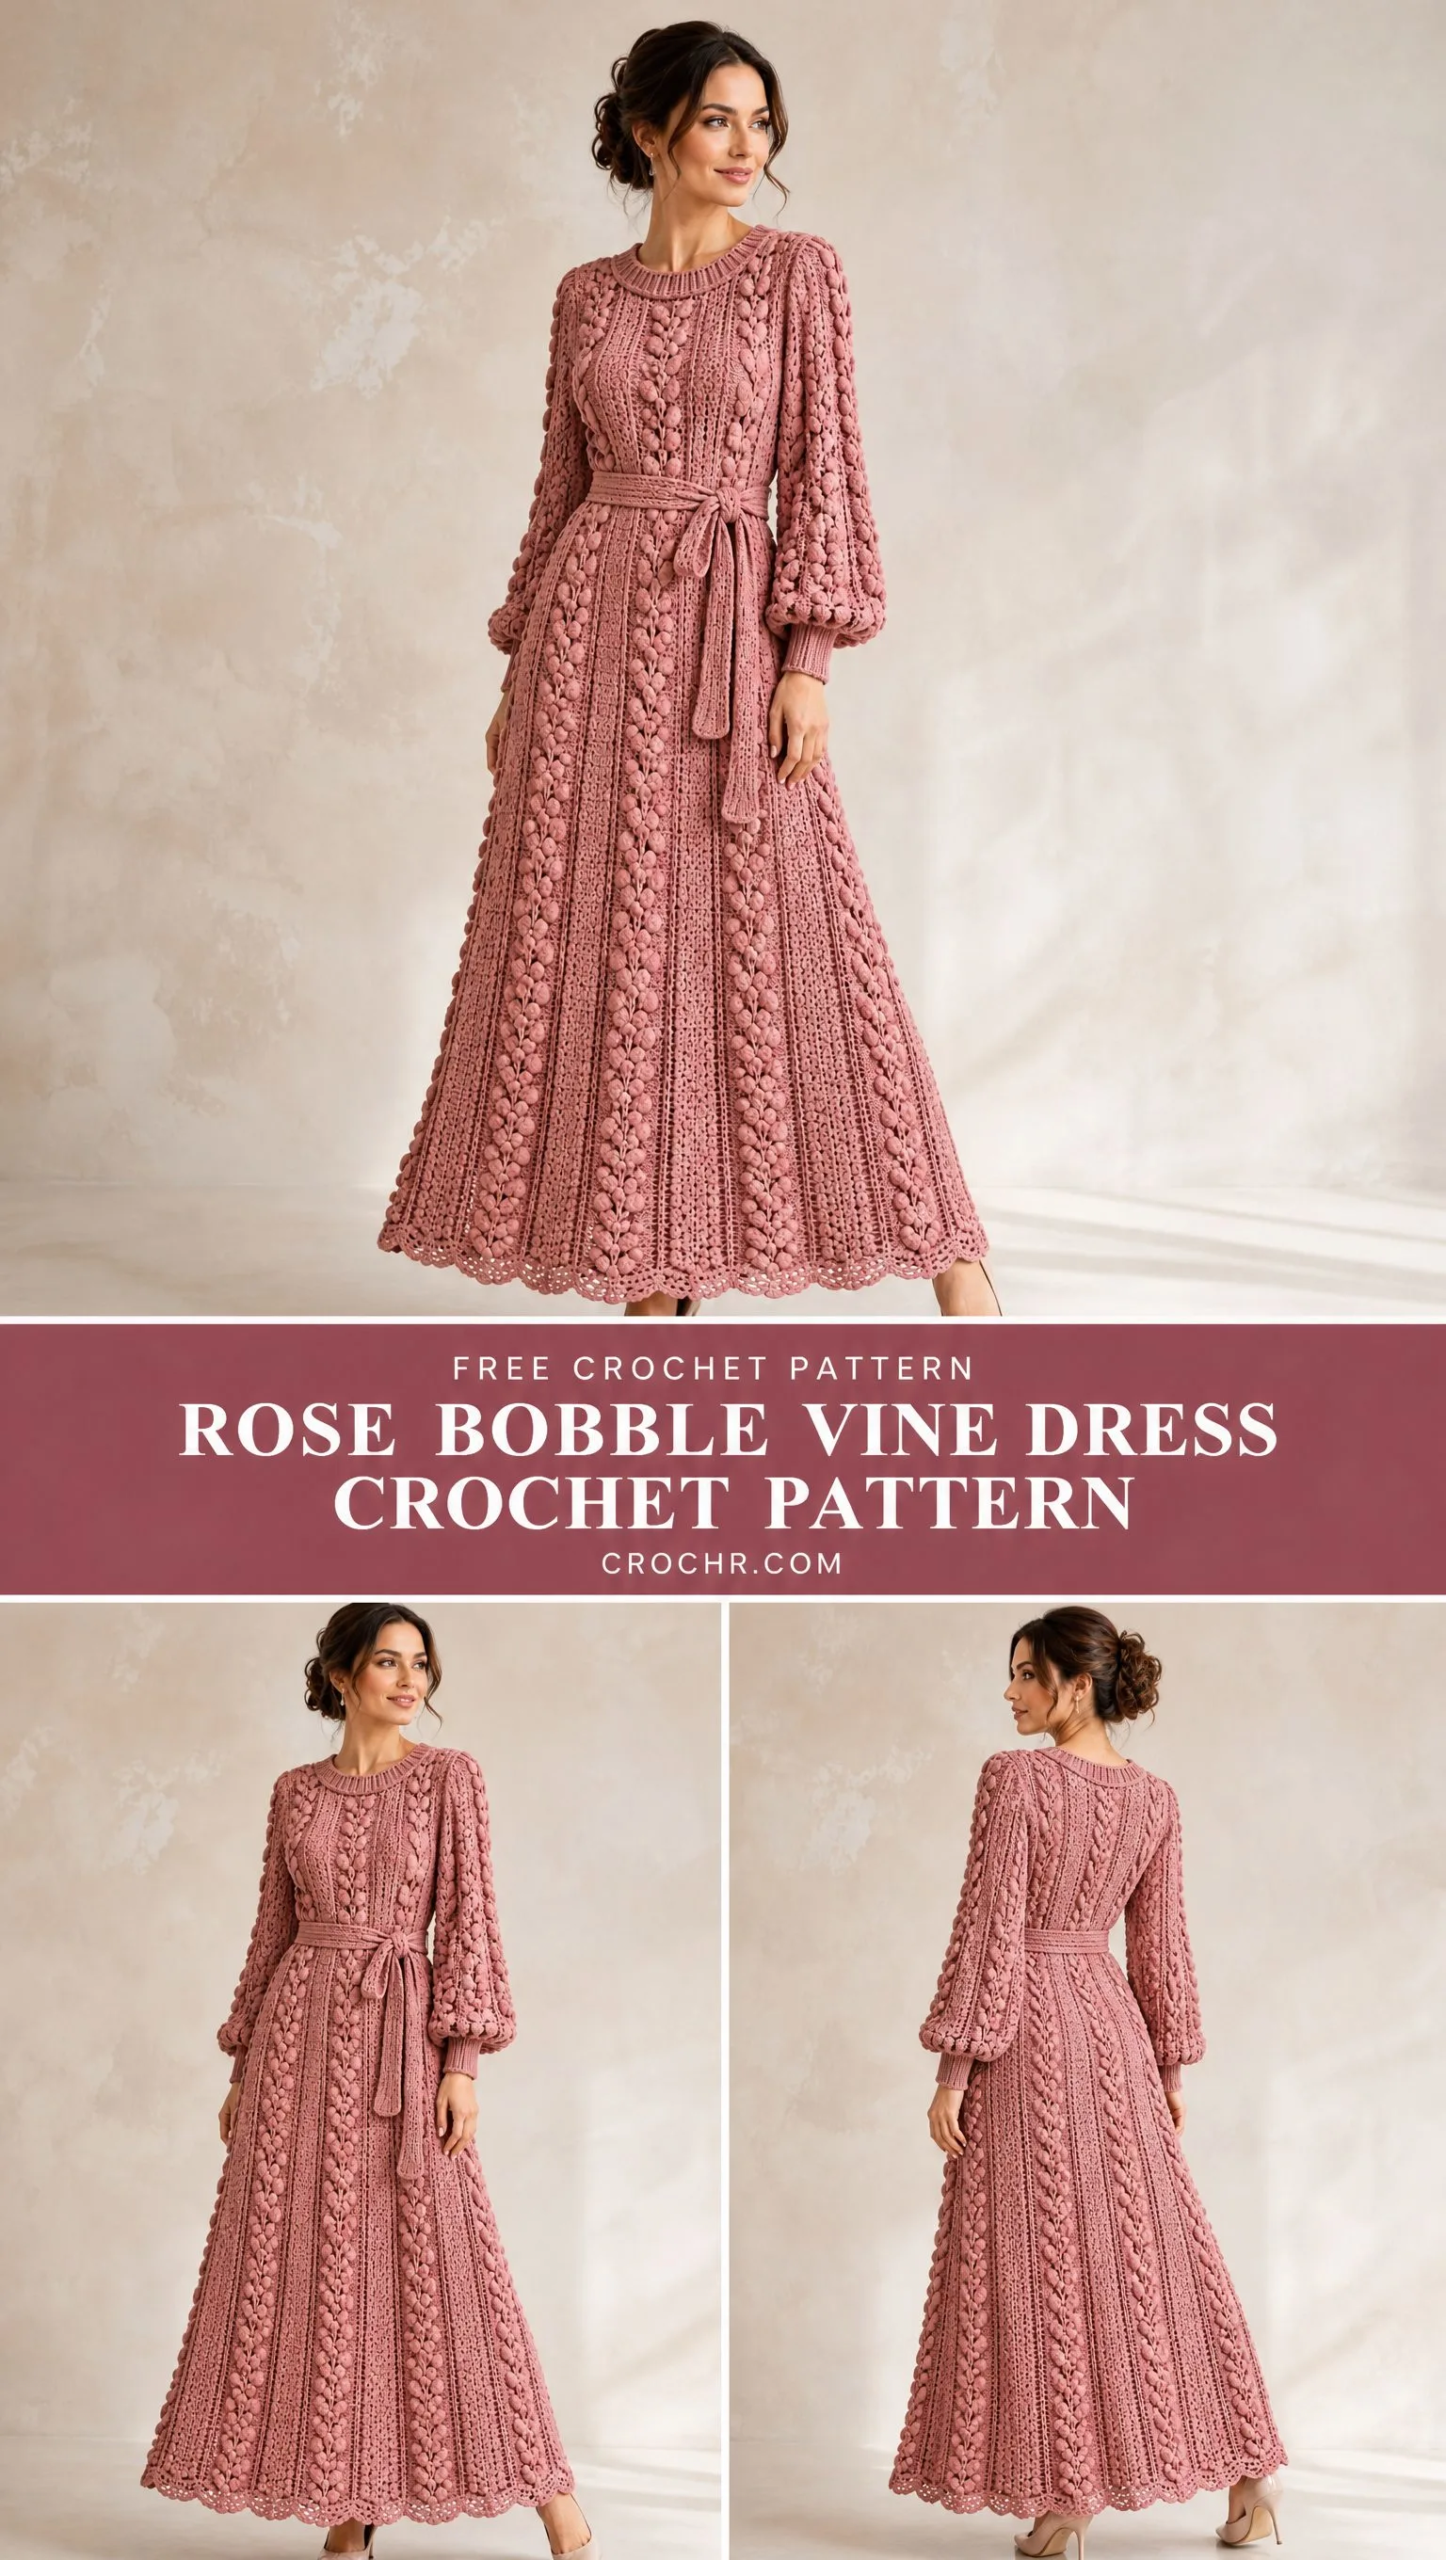
This Rose Bobble Vine Dress is a true heirloom piece. The kind of project you’ll be proud to say you made with your own hands. Take your time, trust the process, and enjoy watching those beautiful bobble vines grow row by row.
Thank you so much for choosing this pattern for your next crochet adventure. If you make this dress, I would absolutely love to see your finished piece. Tag your photos on Instagram or share them in our Facebook community. Seeing your creations is the best part of sharing patterns.
If this Rose Bobble Vine Dress Crochet Pattern caught your eye, save it to your Pinterest boards so you can find it when you’re ready to start. And if you do make it, please leave a comment below. I’d love to hear how it turned out and see your color choices!
You Might Also Like
- Dusty Rose Boho Romper Free Crochet Pattern
- Blush Pink Bow Front Crochet Cardigan Free Pattern
- Amethyst Fan Lace Placemat Crochet Pattern
- Ocean Sunset Jellyfish Free Crochet Pattern
CONTENT END 1
