

Repeat for the second sleeve.
Part 4: Attach the Sleeves to the Back Panel
Place the back panel flat with the right side facing upward. Identify the two shorter side edges. These edges form the attachment points for the sleeves.
Center each sleeve opening along one side edge of the back panel. The sleeve circumference is slightly larger than the panel edge, so distribute the extra fabric evenly rather than gathering it into one concentrated area.
- Mark the midpoint of each back-panel side edge.
- Mark the midpoint of each sleeve opening.
- Match the sleeve midpoint to the panel midpoint.
- Pin the sleeve opening along the entire corresponding side edge.
- Distribute the extra sleeve fabric evenly along the attachment edge.
- Sew the sleeve to the back panel using a mattress stitch or whip stitch.
- Repeat with the second sleeve.
Check that both sleeves hang evenly and that the garment is symmetrical before securing the final stitches.
Part 5: Crochet the Sleeve Cuffs
The cuffs add a comfortable finish to the oversized sleeves and help prevent the openings from looking unfinished.
Join yarn at the sleeve opening.
Round 1: Ch 1. Work 1 sc in each available stitch around the opening, spacing stitches evenly. Sl st to the first sc to join.
Round 2: Ch 1. Work 1 sc in each stitch around. Sl st to join.
Round 3: Ch 1. Work 1 sc in BLO of each stitch around. Sl st to join.
Round 4: Repeat Round 3.
Round 5: Repeat Round 3.
Fasten off and weave in the ends. Repeat the same cuff instructions for the second sleeve.
If you prefer a more substantial cuff, add two or three additional rounds of back-loop-only single crochet.
Part 6: Finish the Outer Edges
For a clean and polished finish, add a simple single crochet border around the exposed lower edge of the back panel and the front opening edges.
- Join yarn at the lower back-panel edge.
- Ch 1 and work 1 sc in each stitch across.
- At corners, work 2 sc into the corner stitch or space to keep the edge flat.
- Continue along the exposed front edges, placing stitches evenly along the row ends.
- Sl st to join where appropriate.
- Fasten off and weave in all remaining yarn ends.
Do not pull the edging tightly. A relaxed border allows the crochet shrug to retain its natural drape.
Part 7: Final Assembly and Weaving in Ends
Lay the completed shrug flat and check the sleeve seams, attachment points, and edging. Secure any loose areas with a yarn needle and matching yarn.
Weave each yarn tail through several stitches on the wrong side, changing direction at least once to help prevent unraveling. Trim excess yarn carefully without cutting into the fabric.
Give the garment a gentle shape with your hands before blocking.
How to Customize Your Crochet Shrug Size
The basic pattern creates a relaxed adult shrug, but you can adapt the measurements to suit different body shapes and style preferences. Before changing the stitch counts, measure the intended wearer and compare those measurements with the finished garment.
Adjusting the Back Panel Width
The back panel determines how much coverage the shrug provides across the upper back. To make it wider, increase the foundation chain in multiples of two while maintaining an odd total stitch count for the mesh-row arrangement.
For example, you can increase the foundation chain by 4 chains to add approximately 1.5 to 2 inches, depending on your gauge. Always make a swatch and calculate the resulting width before beginning.
Adjusting the Back Panel Length
To create a longer shrug, add more rows to the back panel. Each additional pair of mesh and solid rows adds a little height while preserving the established texture.
For a more cropped style, remove complete pairs of mesh and solid rows. Avoid removing only one row from the sequence if you want the visual texture to remain balanced.
Adjusting Sleeve Length and Width
To make longer sleeves, add rows to each sleeve rectangle. To create a shorter sleeve, remove rows evenly from both sleeves.
For a more fitted sleeve, reduce the foundation width while preserving the required odd stitch count. For a more dramatic balloon effect, increase the sleeve width and distribute the additional fabric carefully during assembly.
Important sizing tip: Measure the arm circumference and desired sleeve length before making both sleeves. Check the first sleeve against the wearer or a favorite garment before crocheting the second one.
Common Crochet Shrug Mistakes and How to Fix Them
Uneven Mesh Openings
Uneven chain spaces usually happen when a stitch is skipped incorrectly or a double crochet is placed in the wrong stitch. Count the double crochet stitches and chain spaces after every mesh row. Using stitch markers at the beginning and end of a row can also help.
Sleeves That Look Different
If one sleeve is longer or wider than the other, compare the two pieces before seaming. Count the rows and stitches rather than relying only on visual appearance. Slight differences can become more noticeable after assembly.
A Stiff or Heavy Garment
Bulky yarn can create a heavy fabric when the stitches are too tight. If your crochet feels stiff, try a larger hook and make another gauge swatch. A softer yarn with better drape can also improve the final result.
Twisted Sleeve Seams
Before sewing the sleeve rectangle, make sure it lies completely flat. Align the long edges without twisting the fabric. Pin the edges at several points to keep the seam straight while sewing.
Wavy Edging
Too many stitches along the garment edge can create unwanted ripples. If the border looks wavy, remove it and work fewer evenly spaced stitches. If the fabric pulls inward, add stitches where necessary.
Blocking, Finishing, and Caring for Your Crochet Shrug
Blocking helps the finished shrug settle into its intended shape. It is particularly useful for openwork crochet because it can improve the appearance of the chain spaces and even out the edges.
How to Block the Finished Garment
- Check the care instructions for your chosen yarn.
- Lay the shrug on a clean, flat surface.
- Gently shape the back panel and sleeves to the desired dimensions.
- Use rust-resistant blocking pins if needed.
- Allow the garment to dry completely before removing the pins.
For acrylic yarn, gentle steam may be suitable depending on the fiber and manufacturer recommendations. Keep the iron or steamer away from direct contact with the crochet fabric because excessive heat can permanently damage acrylic fibers.
Washing and Storage
Follow the yarn label when washing your crochet shrug. Many acrylic yarns can be machine washed on a gentle cycle, while wool blends may require hand washing.
- Use mild detergent suitable for the yarn fiber.
- Avoid harsh twisting or wringing.
- Press out excess water gently with a clean towel.
- Dry flat to help maintain the garment shape.
- Store folded rather than hanging to reduce stretching.
Taking care of the fibers will help preserve the texture, softness, and shape of your handmade crochet clothing.
Crochet Insight: Choosing the Right Texture
The charm of this oversized crochet shrug comes from the contrast between its solid stitches and open mesh sections. If you want a more substantial winter layer, use more solid double crochet rows. For a lighter spring or summer version, increase the proportion of mesh rows and choose a breathable cotton blend.
- Choose bulky yarn for a cozy, textured appearance.
- Use a slightly larger hook if you want softer drape and more open stitches.
- Keep the cuffs neat to balance the generous sleeve shape.
Creative Ways to Style and Personalize Your Shrug
One of the best things about a handmade crochet shrug is how easily it can be adapted to different wardrobes. The neutral design works with casual outfits, romantic dresses, and relaxed everyday clothing.
Choose a Different Color Palette
Ivory and cream create a soft, timeless finish, but you can experiment with other shades. Oatmeal and taupe provide a natural look, while blush pink and lavender add a gentle touch of color. Deep brown, charcoal, and forest green are excellent choices for cooler seasons.
Experiment with Sleeve Details
Try longer cuffs for a more dramatic look, or use a few extra solid rows near the sleeve openings for additional structure. You can also make the sleeves slightly shorter for a relaxed three-quarter-length style.
Create a Seasonal Version
For a cool-weather shrug, choose a soft wool blend or warm acrylic yarn. For a lighter garment, substitute a suitable worsted-weight cotton blend and adjust the hook and stitch counts to achieve your desired measurements.
Always make a new gauge swatch when changing yarn weight. A different yarn can significantly affect the finished dimensions and drape.
Crochet Shrug at a Glance
- Best yarn: Soft bulky category 5 yarn for a cozy textured finish.
- Skill level: Adventurous beginner to intermediate.
- Main techniques: Double crochet, chain spaces, mesh rows, and simple seaming.
- Size adjustments: Customize the back panel width, body length, and sleeve dimensions.
- Finishing: Single crochet edging, ribbed cuffs, weaving in ends, and gentle blocking.
Make Your Own Beautiful Crochet Shrug
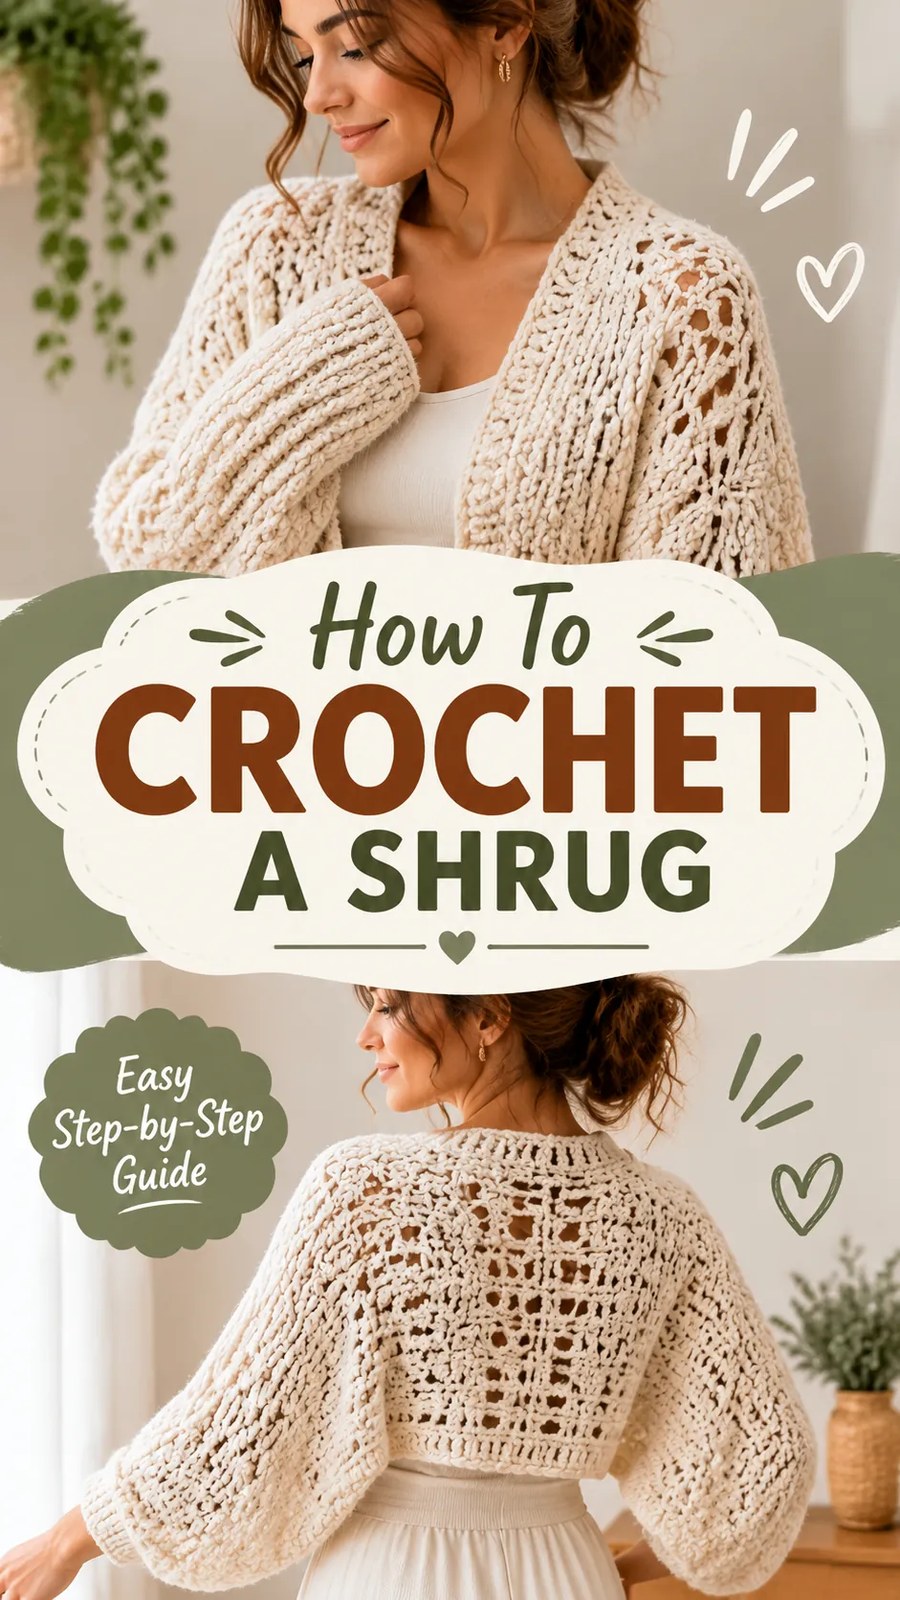
This cozy crochet shrug is a wonderful project for anyone who loves handmade clothing with relaxed shapes and beautiful stitch textures. Its oversized sleeves, cropped back panel, and delicate mesh details create a versatile layering piece that feels both comfortable and stylish.
Choose a yarn that feels soft, make a gauge swatch, and read through the complete pattern before beginning. Take your time with the sleeve seams and assembly, and adjust the measurements to create the fit you love.
Whether you choose classic ivory, warm beige, or a favorite seasonal color, this original crochet shrug pattern offers plenty of opportunities to make something personal. Enjoy the process, experiment with the texture, and create a handmade garment you will be happy to wear throughout the year.
Tags
Crochet Shrug
Shrug Crochet Pattern
Oversized Crochet
Crochet Cardigan
Chunky Crochet
Crochet Clothing
DIY Crochet Pattern
Handmade Fashion
