

For the last section skip six, slip stitch, work four singles, four half-double increases, two doubles, skip two, two doubles, four half-double increases, four singles and slip stitch. Finish with skip six and one slip stitch. The source chart preserves the relationship between this last edge and the earlier front shaping.
Backing Petal Rounds 1–2
Begin a separate backing petal with a magic ring, chain three and ten double crochets. Tighten and join with a slip stitch. For the second round work a single-crochet increase, eight double-crochet increases and another single-crochet increase, producing twenty complete stitches.
The two single-crochet increases occupy the ends of the listed sequence and are shorter than the double increases between them. They help form the attachment area. Do not turn the whole row into twenty ordinary doubles or read the shared-anchor increases as decreases.
Backing Petal Round 3: Incorporate Wire
Work the third round around the support wire: a single-crochet increase, eighteen double-crochet increases and another single-crochet increase. Twenty originals become forty complete stitches. Join with a slip stitch, lock with two chains and cut the yarn.
The source photograph shows the hook enclosing the perimeter support as this round is worked. Keep the wire with that crochet edge rather than installing it only as a loose central stem afterward. The source does not supply a wire cutting length or exact bend diameter.
Prepare the Backing Pair and Main Support
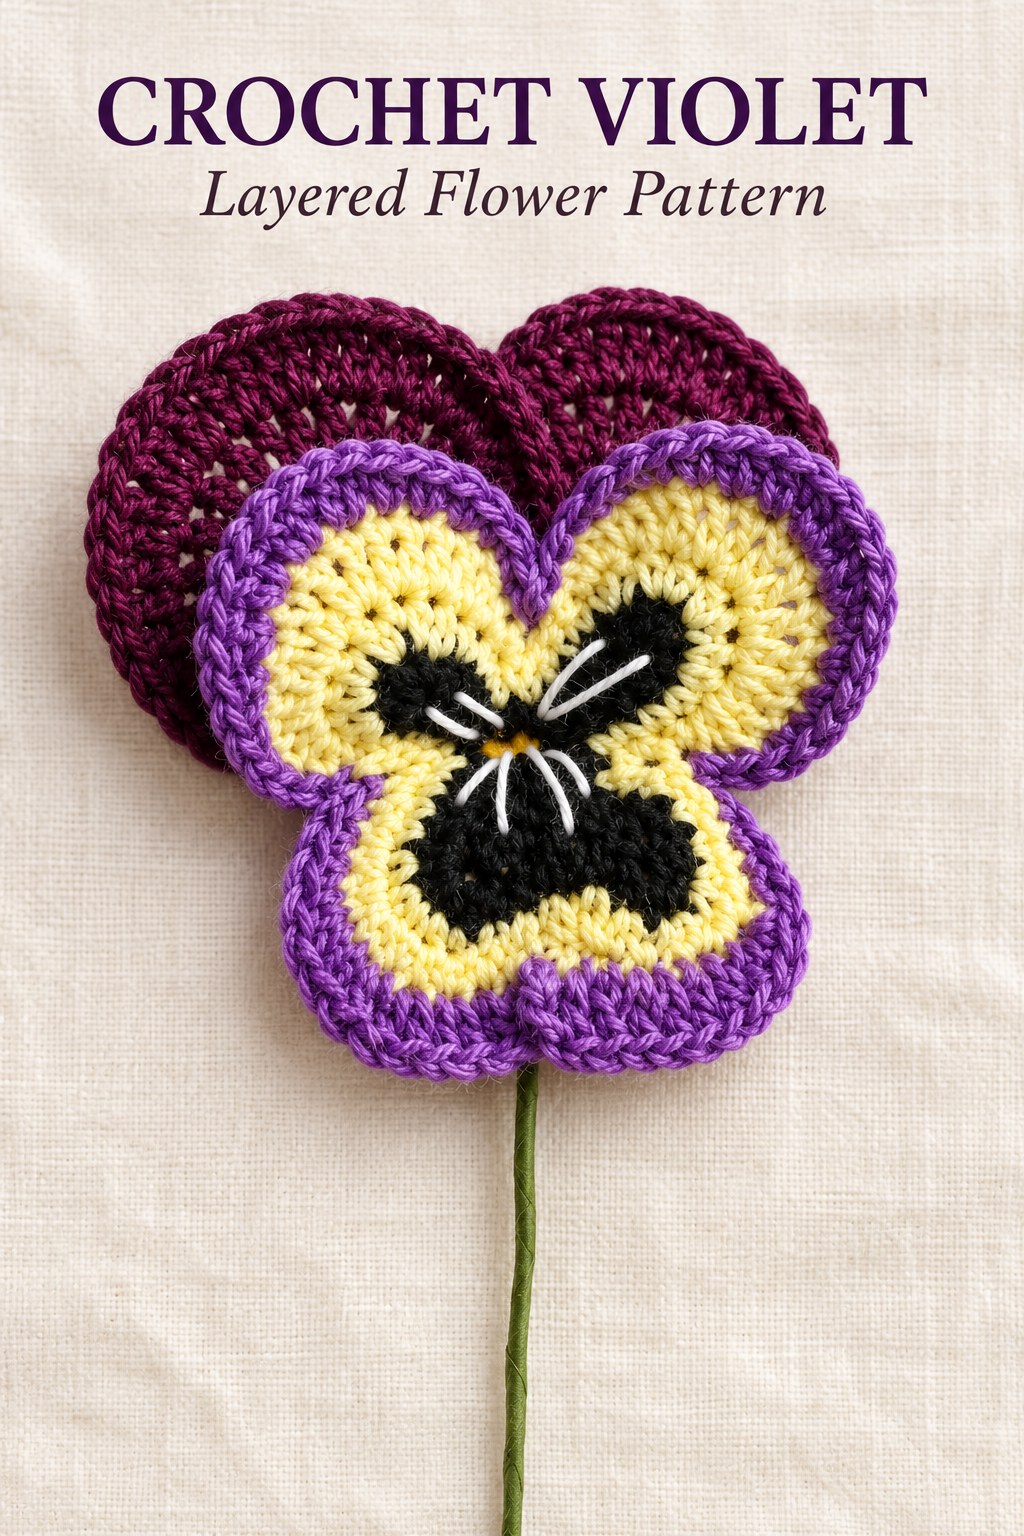
Twist the backing petal wire as shown by the red arrow in its process image. The source assembly photograph positions two dark rounded petals behind the shaped main flower. Prepare that pair for the pictured version, while noting that the prose gives one repeatable petal sequence rather than a separate numbered two-piece instruction.
Insert wire at the bottom of the main flower. The side-view photograph shows the support extending beneath it, with the front crochet held above the wires. Keep the wire attachment at the lower component base rather than crossing through the visible embroidered marking area.
Join the Dark Backing Petals behind the Front
Place the backing petals behind the upper part of the shaped flower, following the source process photograph. Join the layers and twist the supporting wires. The dark round pieces remain visible above the colored front instead of being folded entirely inside it.
The source gives no measured overlap angle, counted sewing seam or exact distance between the two backing centers. Use its actual image to retain the layered silhouette. No additional leaf, sepal cup or stuffing component appears in the written Violet instructions.
Layer checkpoint: Keep the two rounded dark petals behind the colored front. Twist their supports together at the base before covering the stem.
Embroider the White Center Lines
Use the listed needle and white yarn to embroider short lines in the flower center. The source photograph shows them radiating across the black marking area. Keep this separate embroidery stage distinct from the crochet color rounds and any naturally visible stitch gaps.
The source does not prescribe a numerical count or measured length for every embroidered ray. Match the photographed effect with your actual flower scale without presenting an invented ray count as a printed requirement. Secure the yarn ends neatly behind the visible front.
Cover the Stem with Floral Tape
Cover the joined support stem with green floral tape, following the final process photograph. The tape consolidates the wires beneath the flower. It is applied after the crochet layers are positioned and the support has been twisted, not used to replace the perimeter wire in the backing petals.
No exact tape length, stem length or finishing adhesive is given. Assess the covering with the actual supplies you use. Keep the visible petal rims and embroidered face clear of the tape, and support the flower at its lower base while completing the stem.
Check the Sequence before Changing the Design
If the front shape differs from the chart, compare its initial six-plus-one foundation, four-single turn and two-plus-one extension before checking the later outlining rounds. If the edge is too small, confirm that each together group creates two full stitches rather than a shared-top decrease.
If a backing petal fails to reach forty, review its ten-to-twenty-to-forty progression. If the finished flower lacks the layered upper silhouette, compare the two backing pieces with the source assembly image. Changing yarn thickness may change scale, but the source supplies no gauge formula for predicting exact alternate dimensions.
Source Credit and Care
This guide follows Violet on PDF pages eighty-three and eighty-four of the supplied 350 page 1 (1).pdf. The illustrations are actual finished examples, original charts and construction photographs. The expanded instructions retain the complete shaped-front paths and separate backing-petal sequence without claiming a physical crochet test or measured finished sample.
Follow care guidance appropriate to the cotton, wire and floral tape. No washing, stiffening, blocking or heat-treatment method is supplied. Support the taped stem and protect the embroidered front and wired rims from unnecessary pulling when moving the decorative flower.
At a Glance
- Work the shaped front and backing petals separately.
- Follow the partial chart paths and source-specific increases.
- The backing petals expand ten to twenty to forty around wire.
- Join the layers, add white center embroidery and tape the stem.
Finish Your Crochet Violet
Keep the detailed front sequence and separate backing rounds beside their charts while working. Position the dark petals behind the colored face, secure the wire support and complete the white rays and green taped stem. Click the Pin to see the crochet Violet pattern and illustrated guide, and save both component charts before beginning.
Tags
Crochet VioletCrochet FlowersCrochet PatternLayered PetalsEmbroidered CenterWired FlowersCrochet Charts
