

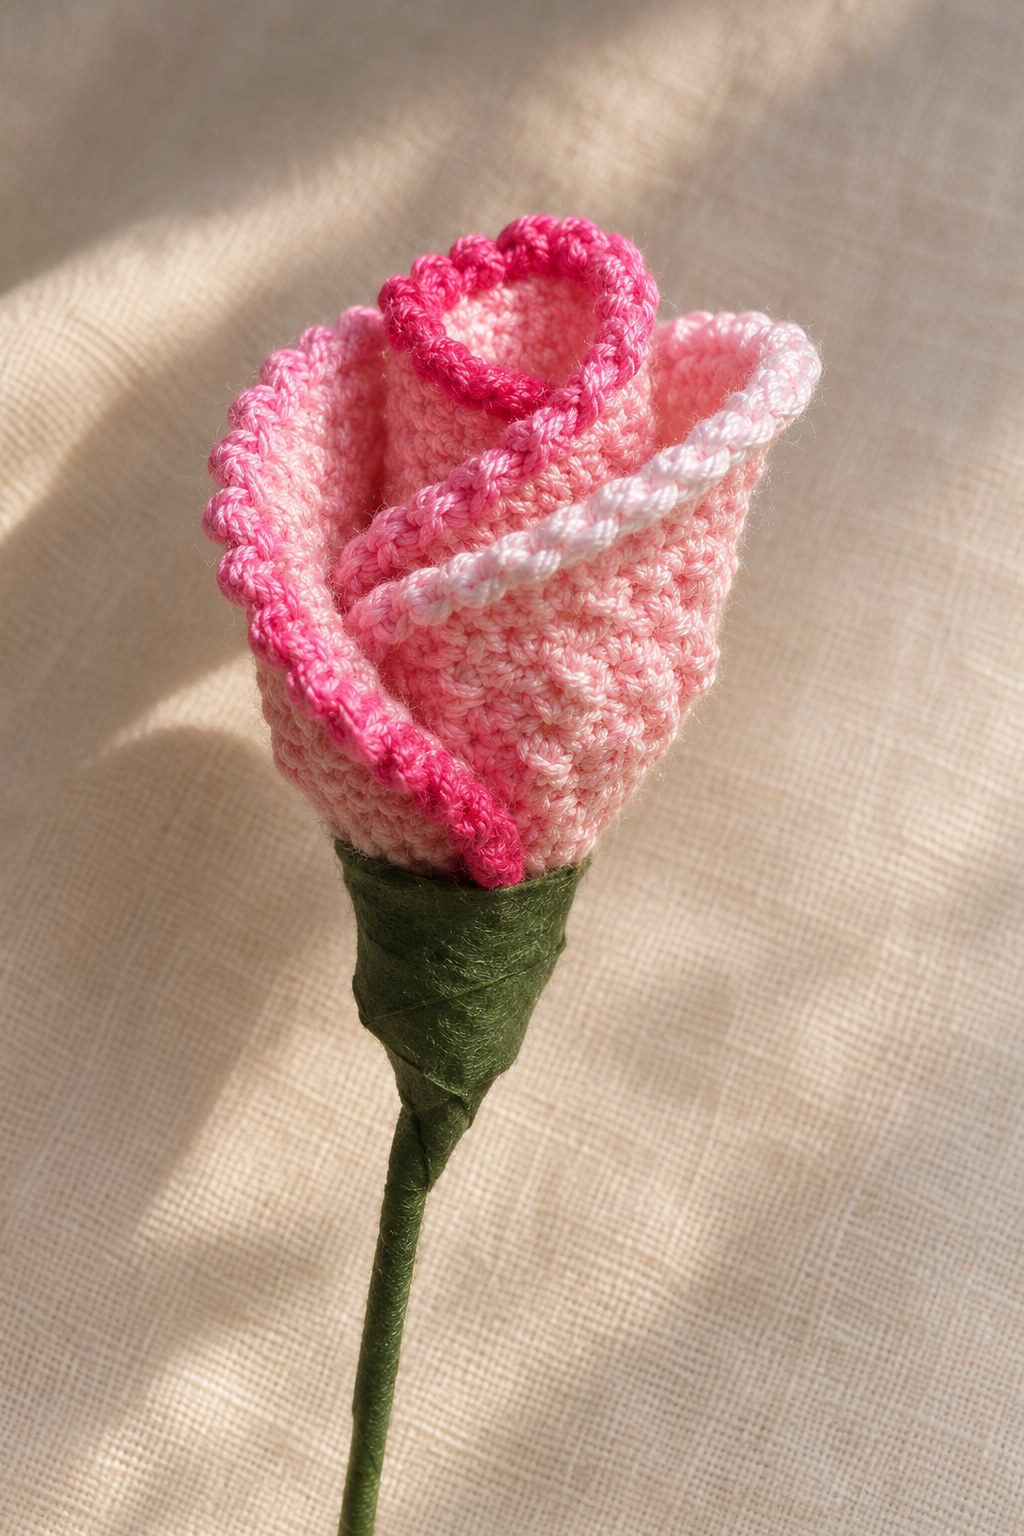
Repeat the complete four-round sequence twice more to reach three petals. Preserve the same foundation, increase method and edging on each. Keeping the components together while working makes it easier to compare their general diameter and edge handling before the wire obscures their lower attachment area.
No numerical gauge or individual finished petal diameter is supplied. Compare your three pieces with one another rather than promising a particular measurement from the photograph. If one differs noticeably, review its foundation and increase pairs before deciding whether its size difference is simply the result of a different role in the finished bud.
Increase checkpoint: The two-double groups share an anchor and keep separate tops. A shared-top decrease would reduce the available fabric and change the rounded component shown by the source chart.
Roll One Petal for the Center
Take one completed petal and roll it following Figure 1. The drawing shows the edge curling inward to form a narrow central roll. Keep the finished rim visible near the upper opening, where it becomes part of the little spiral seen at the top of the completed bud.
The source gives no measured overlap, prescribed roll diameter or number of turns. Follow the illustrated relationship of the round piece to its rolled shape. Keep the lower portion gathered as the future attachment area while allowing the upper rim to retain its curl. The next two pieces will wrap around this center rather than replace it.
Place the Two Outer Petals
Bring the remaining two petals to the rolled center as shown in Figure 2. The drawing places one on either side, with their lower portions directed toward the same base. Their curved upper edges form the outer wrap and overlap around the central roll, producing the compact bud profile.
Retain all three components in the assembly: the rolled center remains inside, and the two additional petals cover it from outside. Avoid spreading them into a flat three-lobed flower. The source’s finished image shows a narrow bud with a visible center opening and crossed curved edges, not a broad open bloom with several additional layers.
Attach the Components with Wire
Use the listed 0.8 mm wire to attach the petals, following the base attachment shown in the assembly drawings. The source does not crochet a wire into the petal rims. Its wire is introduced after the three edged petals have been prepared and arranged into the bud.
Figure 3 shows the lower portions held together while the support continues into the stem. Keep the upper finished edges available for shaping rather than binding the entire flower head into a tight tube. The source gives no counted sewing seam, wire-cut length or specified number of wraps around the base.
Twist the Support Ends Together
Twist the wire ends together as instructed and shown beneath the assembled bud in Figure 3. The twisted support connects the attached flower base to the stem. Check the arrangement of the rolled center and the two surrounding petals while the lower attachment remains easy to see.
The illustration identifies the relationship of the wire to the flower, without providing a numerical twist count. Preserve that supplied method rather than adding an unprinted requirement for glue, a wooden rod or a separate crocheted calyx. The listed green floral tape supplies the next finishing step around the stem.
Cover the Stem with Green Floral Tape
Wrap the stem with the listed green floral tape after twisting the support ends. The finished source example shows the tape extending into a small collar beneath the pink flower. This completes the visible transition from the gathered petal base to the narrow green support.
No separate crocheted leaf is supplied for this entry. Its material list and assembly sequence focus on the three petals, wire and floral tape. Keep the article’s finished example faithful to that construction, with the taped support beneath a single compact bud. Additional leaves would require another independently specified component pattern.
Assembly checkpoint: Roll one petal, wrap it with the other two, attach their lower portions with wire, twist the support ends and finish the stem with green floral tape.
Check the Bud Before Final Shaping
Look for the central roll, the two surrounding petals and the raised edging on their visible rims. The small opening at the top should still reveal the rolled component. If the flower seems to have more than three structural layers, trace the overlapping edges back to their individual petals before adding any extra pieces.
If the perimeter feels constricted, inspect the crab-stitch tension before pulling on the wire attachment. If one component is noticeably smaller, compare its two increase rounds with the chart. If the center has disappeared, review how the outer petals wrap around the roll rather than making a second rolled component to fill an invented gap.
Keep a Clear Crochet Record
Record your actual cotton, hook and chosen use of the two pink shades. The source supplies the palette and construction but no gauge or fixed color allocation. Those project notes help explain the appearance of your finished bud without presenting personal material choices as instructions printed in the collection.
Keep the petal chart alongside the three assembly drawings. The chart explains how the flat round component is made, while the drawings explain how three such components become a flower. A close photograph of the assembled bud is useful for its silhouette, but it cannot substitute for the hidden component sequence beneath the overlapping petals.
Source Credit and Care
This guide follows Rose Bud on PDF pages 162–163 of the supplied 350 page 1 (1).pdf. The captions distinguish the actual finished example, original stitch chart and assembly drawings. The expanded explanations retain the supplied component count and technique without claiming that this specific version has been physically crocheted or gauge-tested.
Use care suited to the actual cotton, wire and floral tape. No washing, pressing, stiffening or blocking procedure is supplied for this bud. Support the lower flower and stem when moving it, protecting the rolled center and raised rims from pulling. Store the source illustrations with the pattern so the attachment order remains easy to revisit.
At a Glance
- Three identical edged crochet petals make one rose bud.
- Each petal uses its central foundation, two increase rounds and a crab-stitch finish.
- One rolled petal forms the center; the other two wrap around it.
- Attach with 0.8 mm wire, twist the ends and cover the stem with green floral tape.
Finish Your Crochet Rose Bud
Complete the three round petals, check the same-anchor increases and finish their raised rims before assembling the flower. Roll the center, wrap the two outer pieces and secure the lower attachment with the supported taped stem. Click the Pin to see the crochet rose bud pattern and illustrated guide, and save the chart and three assembly figures before beginning.
Tags
Crochet Rose BudCrochet FlowersCrochet PatternCrab StitchThree Petal RoseWired FlowersCrochet Charts
