

Prepare a Three-Pearl Center
Place three white pearls onto a length of the specified green wire. Arrange them together as the small central cluster shown in the source process photographs, then twist the wire below the pearls. The twisted portion becomes the support that passes through the crochet flower.
The source does not specify a pearl diameter or exact wire-cut length. Work with the listed wire and selected pearl holes, keeping those practical dimensions separate from the source’s fixed count of three pearls per center. No yellow embroidery or crochet center disc is added to this pattern.
Center checkpoint: Each pistil has three white pearls. The fifteen pearls listed in the materials supply five such centers; their size and individual wire lengths are not specified.
Insert the Pearl Pistil into the Flower
Pass the wire pistil through the center of the completed three-bract piece so the pearls sit at its visible center. Twist the supporting wire below it to secure the arrangement, following the source photograph and its directional arrow.
Keep the dark-pink bracts cupped around the small pearl cluster instead of pulling the entire crochet opening tight over the beads. The source gives no measured height for the center above the bracts. Use the actual assembled shape and completed reference image without adding a fixed clearance measurement.
Complete the Other Flower Units
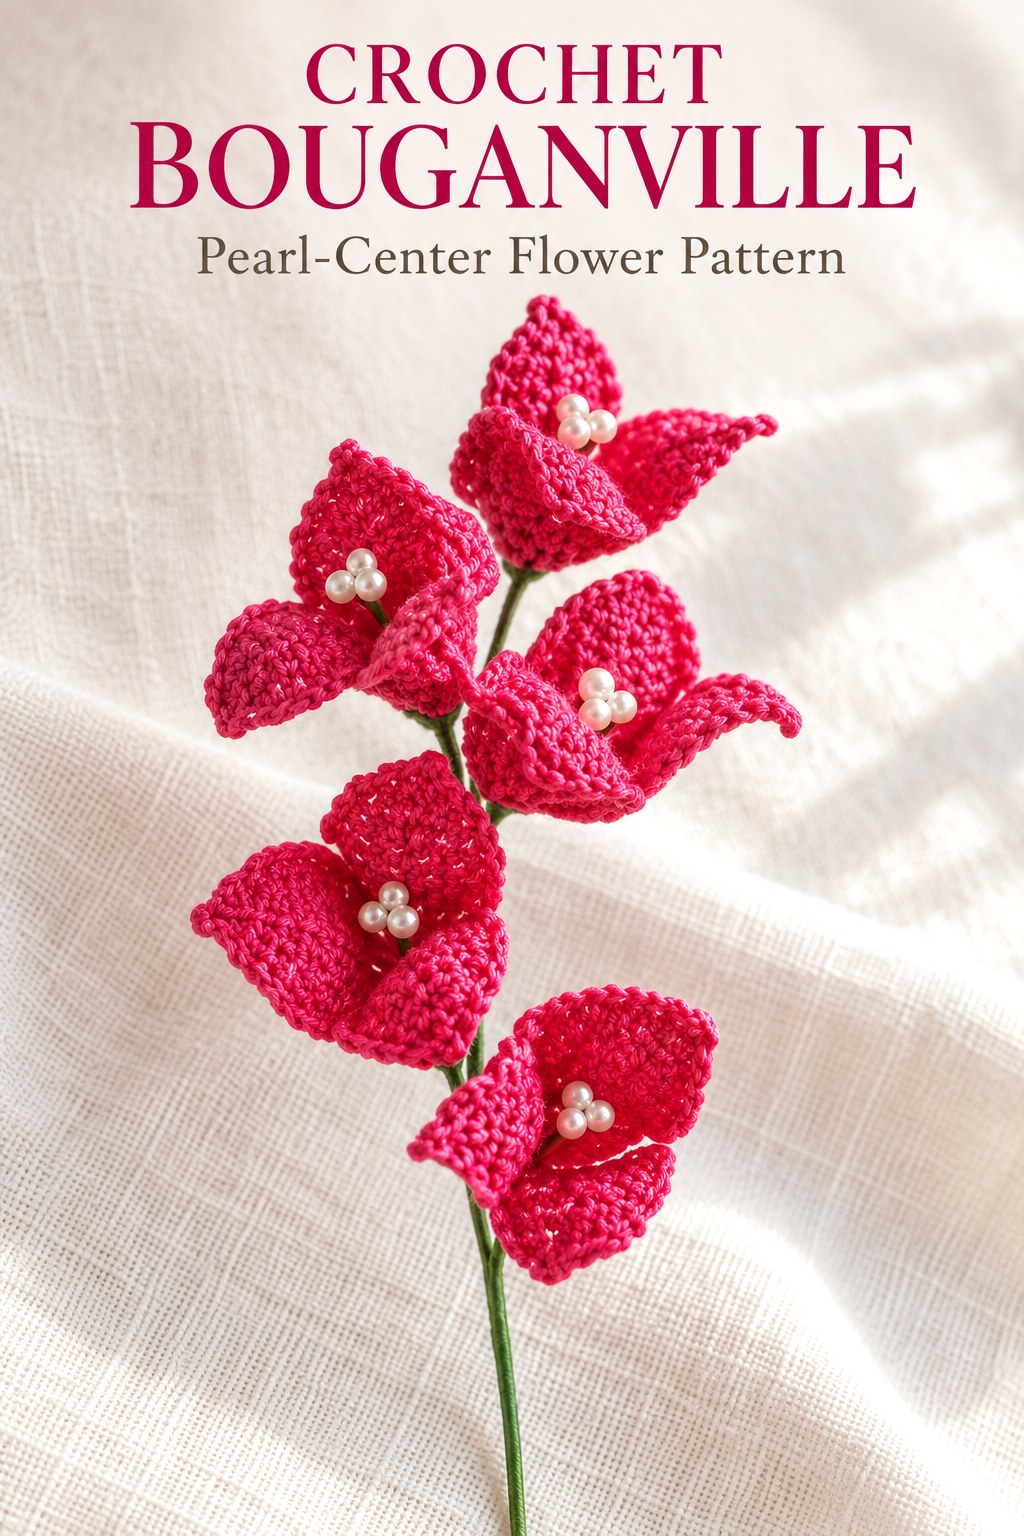
The listed fifteen pearls provide five centers when three are used in each. Work additional three-bract crochet pieces and wire pistils for that supply, retaining the same stitch sequence and dark-pink color. The finished sprig photograph shows the units distributed down the support.
There is no row-by-row color change inside a bract in the source. Using multiple pink shades would be a separate palette variation. Keep the single dark-pink material choice and white pearl centers clear when matching the supplied example.
Join the Sprig from Top to Bottom
Join the completed flower units by twisting their supporting wires together. Work from the top toward the bottom, as the source caption directs. The process image shows the pink units being brought onto the combined wire support rather than attached to a separately listed flower rod.
The source supplies no measured spacing between units or a fixed bend angle for each branch. Arrange the units using the completed reference while keeping the supporting twists secure. Do not borrow a half-inch interval from another design in the collection and present it as a Bouganville requirement.
Finish the Green Wire Support
Continue the top-to-bottom joining until the intended flower units are supported. The source ends with twisting the wires; no green floral-tape or yarn-wrapping stage is specified in this entry. Its green wire provides the visible stem color.
No total sprig length or wire-trimming measurement is given. Select the practical support length for your display while keeping it distinct from an actual printed size. The pattern does not supply an independent leaf, sepal cup or extra pearl component beyond the three-pearl centers.
Assembly checkpoint: Crochet and close each three-bract piece first, insert its pearl pistil, then join the separate units by twisting their wires from top to bottom.
Use the Process Photos as Construction References
The source provides actual photographs for threading and twisting the pearls, inserting the pistil and joining the flower units. These are genuine assembly views from the supplied page. The finished sprig photo shows the final display and is captioned separately from those working stages.
The chart and legend complement the written rows where the source uses compressed language. Keep the chart’s three-bract structure alongside the row sequence rather than inferring a different petal count from an overlapping section in the finished photograph.
Customize the Display without Altering the Pattern
A different cotton shade can change the visual palette while preserving the fifteen-chain start, connected short-row bracts and seven-slip-stitch join. The source lists dark pink, so another hue should be identified as a choice rather than a hidden printed color variant.
Using more or fewer flower units changes the display quantity and pearl requirement. The source’s material set supplies fifteen pearls, enough for five three-pearl centers. Keep that arithmetic explicit rather than claiming an unlimited branch length or a measured finished size for every arrangement.
Troubleshoot Bracts and the Joined Center
If a bract is too shallow relative to the source image, check that MD was translated to the two-bar tall stitch, US treble. If the connected piece develops an extra lobe, review the three-section repeat and the role of the eight-chain transitions. Do not restart all later bracts on fresh fifteen-chain foundations.
If the pearl cluster disappears into the crochet, reassess its placement before tightening the supporting twist. If the flower pieces remain unconnected at their bases, review the seven-slip-stitch lower join before adding wire. The crochet join and the wire securing perform different steps in the written method.
Source Credit and Care
This guide follows Bouganville on PDF page seventy-six of the supplied 350 page 1 (1).pdf, with the relevant symbol legend on page sixty-nine. The finished photograph, chart and process panels are actual source illustrations. The expanded explanations preserve the connected bracts, three-pearl centers and top-to-bottom wire assembly without claiming a physical crochet test.
Care for the arrangement according to the actual cotton, wire and pearls used. The source supplies no washing schedule, blocking recipe, stiffening mixture or heat treatment. Support the joined wire stem when moving the display and protect the cupped bracts and small pearl centers from unnecessary pulling.
At a Glance
- One flower has three connected dark-pink bracts.
- The initial fifteen-chain foundation is followed by short rows and eight-chain transitions.
- Seven slip stitches close the lower edges.
- Three pearls make each center; join units by twisting the green wires from top to bottom.
Finish Your Crochet Bouganville Sprig
Keep the short-row path and three-bract tally clear, complete the lower slipped join and prepare each three-pearl center before assembly. Twist the supported units together from the top down. Click the Pin to see the crochet Bouganville pattern and illustrated guide, and save the chart and process sequence before beginning.
Tags
Crochet BouganvilleCrochet FlowersCrochet PatternThree BractsPearl CentersWired SprigShort Rows
