

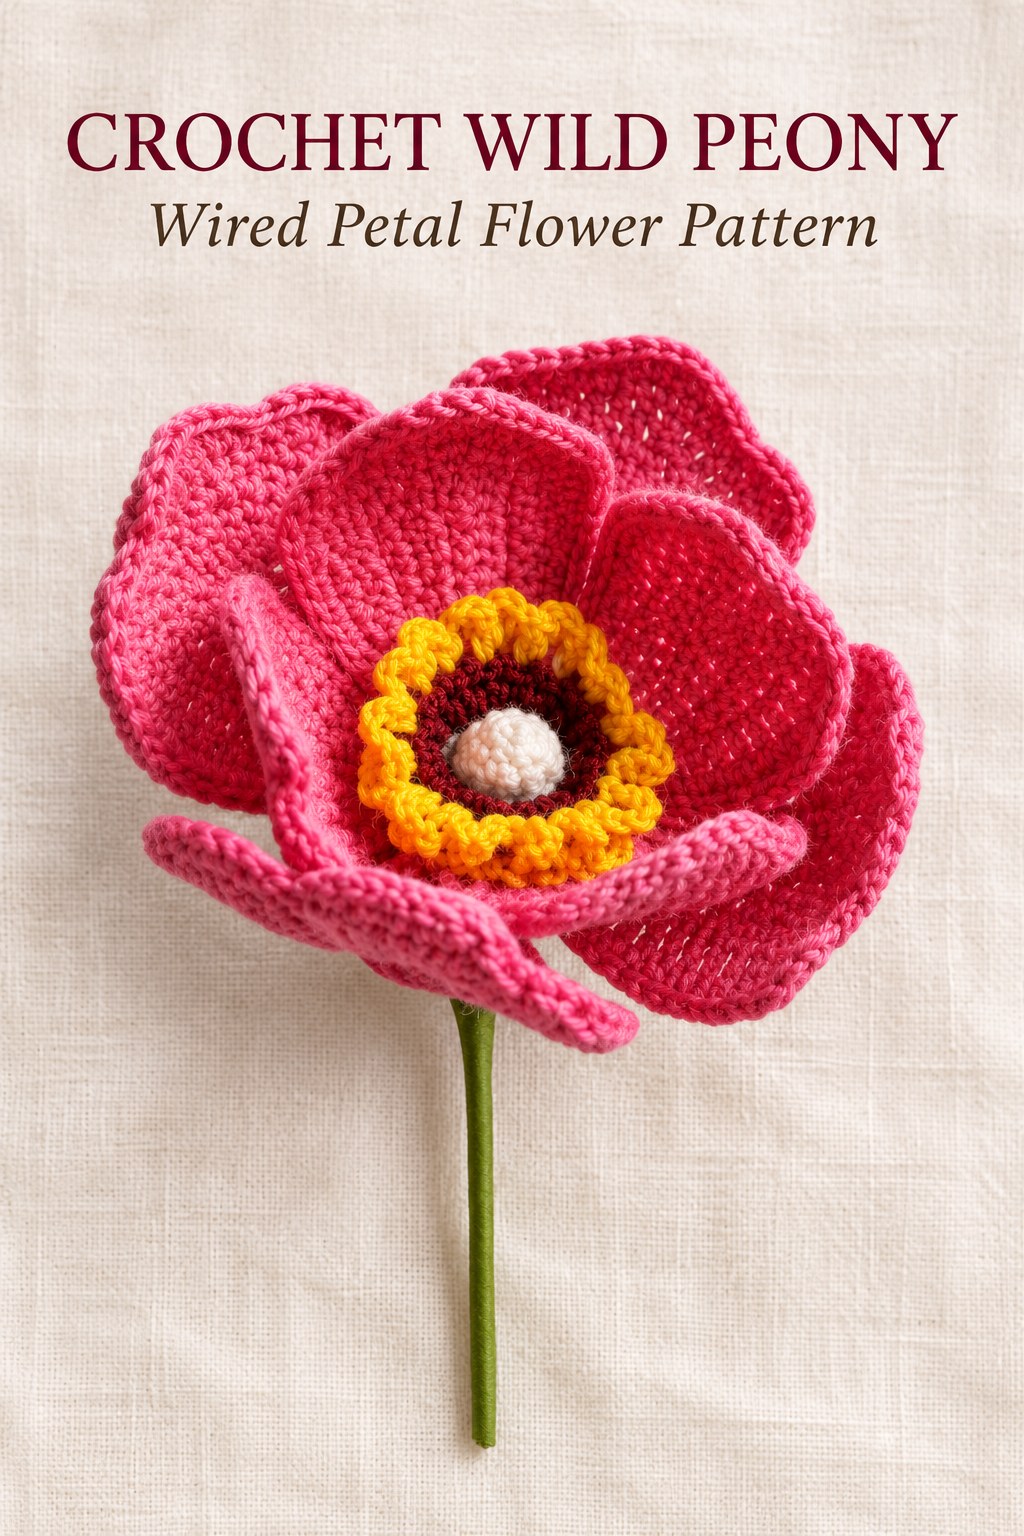
This crochet Wild Peony pattern makes a cupped pink flower from two sizes of wired petals around a separate double-corolla center. It follows PDF pages one hundred and two through one hundred and four of the supplied collection. Two dark-red/yellow rings are overlapped and joined underneath, then shaped and turned so a small white middle appears inside the looped rim. The source gives full component patterns but no fixed quantity of small versus large petals. This guide preserves that omission, both petal charts, the optional edge path and the actual assembly photographs.

Key Takeaways
- Use cotton in white, pink, dark pink, dark red and yellow with a 1.90 mm hook.
- The support materials are 0.6 mm wire, fabric glue and green floral tape.
- Small and large petals have separate foundation lengths and wired shaping sequences; their required quantities are not specified.
- The source’s together wording means complete stitches in the same original for these increases.
- Make two dark-red/yellow corollas, overlap them and join their bottoms with fifteen singles before shaping the white center.
- The petal loop edging is optional; the main finished photograph shows plain pink rims.
CROCHET WILD PEONY FLOWER PATTERN
Project: A cupped flower of small and large wired petals with an overlapped two-corolla center. The source does not state fixed small/large petal quantities.
| Skill level | Not explicitly graded for this entry. Uses oval petal charts, multiple stitch heights, wired edges and a joined center. |
|---|---|
| Yarn and hook | Cotton yarn in white, pink, dark pink, dark red and yellow; 1.90 mm hook. Yarn weight, quantity, gauge and finished dimensions are not supplied. |
| Support and assembly | 0.6 mm wire, fabric glue and green floral tape. Wire-cut lengths and mandatory petal quantities are unspecified. |
| US terminology | ch = chain; sc = single crochet; hdc = half double crochet; dc = double crochet; tr = treble crochet; ss = slip stitch. Inc means 2 complete named stitches in one original; 3dc/5dc group means that many complete doubles in one original. Source MD matches the chart’s tr symbol. |
| Small petal foundation and round 1 | Ch10 plus 1 height chain. Work around the chain as charted: 3 sc, 3 hdc, 3 dc, a 5-dc fan, a second 5-dc fan at the turning end, then 3 dc, 3 hdc, 3 sc. 28 worked stitches. |
| Small petal round 2 | 6 sc, 6 dc, 3 dc in one original, 2 sc, 3 dc in one original, 6 dc, 6 sc, ch1. 32 worked stitches. |
| Small petal wired round 3 | Incorporate wire: 10 sc; hdc inc, dc inc, hdc inc; sc; hdc inc, dc inc, dc inc, hdc inc; sc; hdc inc, dc inc, hdc inc; 10 sc. 42 worked stitches. Twist wire and ss join. |
| Small optional edge | 10 ss; 21 times; 10 ss. Retain this printed decorative path without adding another loop. Twist the support, ch2 to lock, cut and knot. |
| Large petal foundation and round 1 | Ch13 plus 1 height chain. Around the chain as charted: 3 sc, 3 hdc, 3 dc, 3 tr, a 5-dc fan, a second 5-dc fan at the turning end, then 3 tr, 3 dc, 3 hdc, 3 sc. 34 worked stitches. |
| Large petal round 2 | 5 sc, 10 dc, 3 dc in one original, 2 sc, 3 dc in one original, 10 dc, 5 sc, ch1. 38 worked stitches. |
| Large petal wired round 3 | Incorporate wire: 12 sc; hdc inc, dc inc, dc inc, hdc inc; sc; hdc inc, dc inc, dc inc, hdc inc; sc; hdc inc, dc inc, dc inc, hdc inc; 12 sc. 50 worked stitches. Twist wire and ss join. |
| Large optional edge | 12 ss; 25 times; 12 ss. Retain the printed decorative path. Twist support, ch2 to lock, cut and knot. |
| Petal finish without optional edge | When omitting round 4, secure and cut the completed wired petal after its joined round 3. The source shows both plain-rim and optionally edged examples. |
| Corolla foundation, make 2 | Ch15 and ss join into a circle. |
| Each corolla round 1 | Ch3, work 15 tr, ss join. Source color marker is dark red. |
| Each corolla round 2 | around, ss join. Cut and knot. Source color marker is yellow. |
| Join center round 3 | Overlap the 2 corollas and join their bottoms with 15 sc. The process photo shows white yarn for the shaped joined center. |
| Center round 4 | around, 5 groups. 10 sc. |
| Center rounds 5–6 | 10 sc each round, 2 rounds. 20 sc worked in total, with 10 remaining in the circumference. |
| Center round 7 | around, 5 groups. 5 sc. Tighten with ss and cut yarn. |
| Turn and attach center | Turn the corolla inside out. Either glue it into the flower center, or insert wire into its back, place it in the center and twist the support. |
| Final assembly | Join small and large petals by twisting their wires, position the completed center and cover the stem with green floral tape. The source supplies no fixed petal quantity or measured overlap angle. |
Separate Component Instructions from Unspecified Quantities
The source supplies a small petal pattern, a large petal pattern and a center made from two corollas. It does not say to make a fixed number of small or large petals. Preserve that distinction rather than inventing a three-and-three or four-and-five recipe from overlapping shapes in the finished photograph.
Work the two petal sizes for the arrangement you are preparing, using the photographed cup form as a visual guide. The exact quantity remains a choice, while the stitches for each component remain the source instructions. The center quantity is different: two corollas are explicitly required and are shown separately before being overlapped.
Interpret the Chapter’s Stitch Symbols
The general legend on PDF page sixty-nine defines two or three stitches together as complete stitches worked into one original for its increase symbols. A five-double fan likewise places five complete doubles in its indicated anchor. These are not US joined-top decreases.
The large-petal prose uses MD, while its diagram shows the two-slash stitch identified by the source legend as triple crochet. This guide uses US treble crochet, tr, for those positions. The source abbreviation ST means slip stitch, written ss here to keep it distinct from an ordinary stitch count.

Gather the Listed Cotton and Support Materials
Use cotton yarn in white, pink, dark pink, dark red and yellow with a 1.90 mm hook. The listed support materials are 0.6 mm wire, fabric glue and green floral tape. Formal yarn weight, quantity, gauge, final flower dimensions and wire-cut lengths are not supplied.
The photograph guides the pink petals and dark-red/yellow center with its raised white middle. The prose and colored chart markers establish the center roles, while no numbered pink shade schedule is supplied for the petals. Keep color guidance separate from a claim that every component has an exact printed color-change row.
There is no separate leaf, bead, stuffing or flower-rod component in the material list. The center’s white projection is formed by joining and shaping the corollas, not by adding a pearl. Preserve that textile construction when interpreting the finished example.
Quantity checkpoint: Two corollas are specified. Small and large petal quantities are not. Keep the omission visible rather than converting an estimated photo count into a mandatory pattern quantity.
Small Petal Round 1: Work around the Chain
Begin with ten chains plus one height chain. Follow the oval chart around the foundation: three singles, three half doubles and three doubles, then the two five-double fans at the turning end. Return along the other side with three doubles, three half doubles and three singles.
The diagram shows the foundation running down the petal center and the fan stitches opening around its far end. Keep the two sides connected around that foundation rather than extending the chain to fit a straight-row interpretation. The written groups produce twenty-eight worked stitches around the small petal.
Small Petal Round 2: Broaden the Upper Curve
Work six singles, six doubles, three doubles in one original, two singles, three doubles in one original, six doubles and six singles, then chain one. The two three-double increases add four to the twenty-eight incoming positions, giving thirty-two.
Keep the two singles between the fans. That short central section separates the rounded upper portions shown in the chart. Do not replace the fans with three doubles across three separate originals, which would remove the widening needed for the next wired edge.
Small Petal Round 3: Enclose the Wire
Work ten singles, then a half-double increase, double increase and half-double increase. Work one single, then half-double increase, two successive double increases and half-double increase. Work one single, repeat the first three-increase group and finish with ten singles.
Incorporate the support wire throughout this edge round. The ten increases take thirty-two originals to forty-two worked stitches. Twist the wire and join with a slip stitch. The source photograph shows this support enclosed in the crochet edge rather than stitched across the visible middle of the petal.
Choose the Optional Small-Petal Loop Edge
The optional fourth round works ten slip stitches, then single crochet and chain three twenty-one times, followed by ten slip stitches. Keep that printed decorative path and loop count. It is not another increase round or an instruction to add enough extra loops to force a different circuit total.
Twist the support, chain two to lock, cut and knot as instructed. The source’s main finished photograph uses plain pink rims, while another finished example includes the optional pale edging. If omitting the optional round, secure the completed wired petal after its joined third round.
Two Petal Sizes
The small petal’s worked counts progress 28 → 32 → 42; the large progresses 34 → 38 → 50. Their optional decorative paths use 21 and 25 chain loops respectively, with plain slip-stitch sections toward the base.
Large Petal Round 1: Add the Taller Treble Sections
Begin with thirteen chains plus one height chain. Work around the foundation as charted: three singles, three half doubles, three doubles and three trebles, then two five-double fans at the turning end. Return with three trebles, three doubles, three half doubles and three singles.
The trebles lengthen the taller central portions of the large petal. Do not substitute another three doubles there simply because the printed abbreviation MD is unfamiliar. The chart’s two-slash symbol identifies the intended height, and the full written groups produce thirty-four worked stitches.
Large Petal Round 2: Increase to Thirty-Eight
Work five singles, ten doubles, three doubles in one original, two singles, three doubles in one original, ten doubles and five singles, then chain one. The two fans add four, taking thirty-four to thirty-eight.
The longer double-crochet runs distinguish this size from the small petal’s six-double runs. Keep the five-single ends and two-single center as written rather than scaling every run by the same factor. The source gives this separate complete sequence, not a numerical enlargement formula.
Large Petal Round 3 and Optional Edge
Incorporating wire, work twelve singles, then half-double increase, two double increases and half-double increase. Work one single and repeat that four-increase group, then one single and the group a third time. Finish with twelve singles. Twelve increases take thirty-eight to fifty. Twist the wire and slip stitch to join.
The optional edge is twelve slip stitches, twenty-five repeats of single crochet and chain three, then twelve slip stitches. Retain that stated path and finish with the source’s wire twist, chain-two lock, cut and knot. It supplies decorative loops rather than another petal size or an additional foundation row.
