

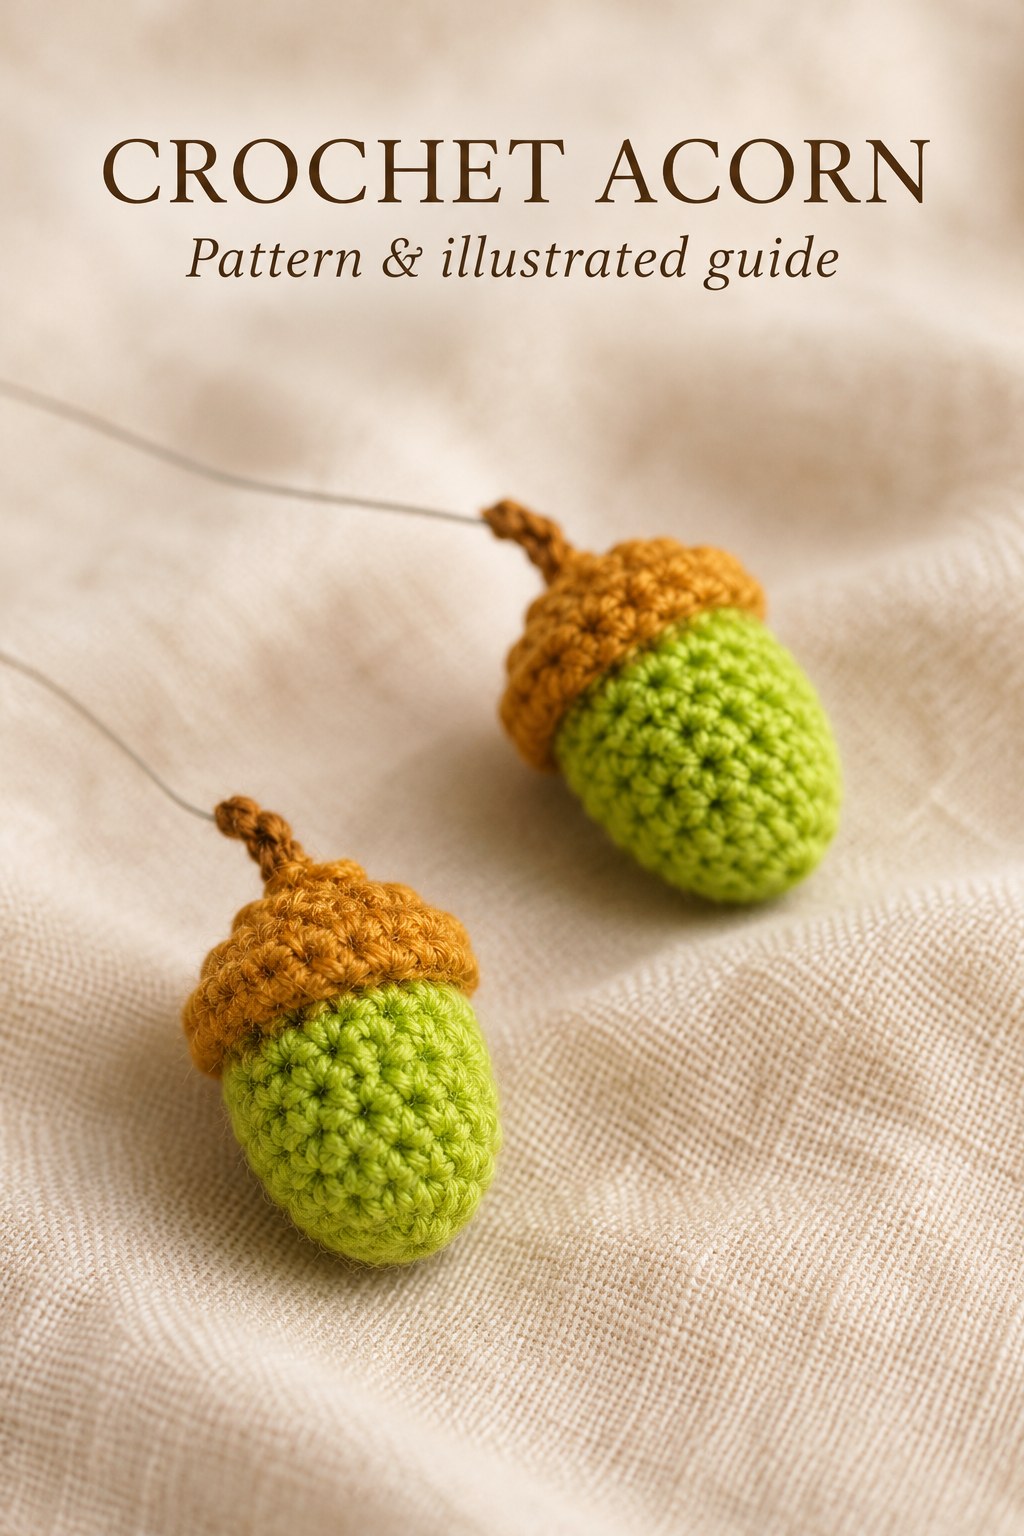
This crochet acorn pattern makes a small stuffed green nut with a separate light-brown cap and a short crocheted stem. The design appears on PDF page 128 of the supplied collection. It uses cotton yarn, a 1.90 mm hook and 0.6 mm wire, with fabric glue joining the two crocheted components. This illustrated guide keeps the original body and cap rounds, including the optional two-or-three-round plain body section, and places the actual charts beside the corresponding explanations. The source shows a finished pair, but the instructions below describe one complete acorn at a time.

Key Takeaways
- The source palette is green for the stuffed nut and light brown for its separate cap.
- Use cotton yarn, a 1.90 mm hook, 0.6 mm wire, stuffing and fabric glue.
- The body increases from ten to twelve to fifteen working stitches before its plain section.
- Work two or three plain fifteen-single-crochet rounds, preserving the choice shown in the source.
- The cap starts with an eighteen-chain ring and ends with a five-chain stem loop.
- Glue the cap to the body, insert wire at the cap top and twist the wire as shown.
CROCHET ACORN PATTERN
Project: A stuffed green acorn with a separately crocheted light-brown cup cap, a short chain stem and wire support.
| Skill level | No difficulty label is printed. Uses circular increases, skipped-position narrowing, stuffing, a separate cap and glued assembly. |
|---|---|
| Yarn and hook | Cotton yarn in light brown and green; 1.90 mm crochet hook. Weight designation, brand and quantities are not supplied. |
| Finishing materials | 0.6 mm wire, fabric glue and stuffing. Cut lengths, adhesive quantity and stuffing weight are not specified. |
| Gauge and size | No gauge, finished dimensions or prescribed stem-support length is stated. |
| US abbreviations | ch = chain; sc = single crochet; dc = double crochet; ss = slip stitch, source ST. In this collection, 2 sc together means 2 complete sc in the same original, not sc2tog. |
| Body, Base 1: foundation and round 1 | Make a magic ring. Ch3 and work 10 dc into it. Tighten the ring and ss to join. Keep the height chain separate from the 10 working dc. |
| Body round 2 | 2 sc in the first original, sc in each of the next 4, 2 sc in the next original, sc in each of the last 4. 12 sc. |
| Body round 3 | 3 times. 15 sc. |
| Body plain section, source rounds 4–6 | Work 15 sc per round for either 2 or 3 rounds. The source explicitly allows 30–45 sc worked across this section. Add stuffing after the plain section. |
| Body round 7, retaining the source label | 5 times. 10 sc. |
| Body round 8 | 5 times. 5 sc. |
| Body round 9 | Tighten the remaining opening with 2 ss. Cut the yarn. |
| Cap, Base 2: foundation | Ch18 and ss to form a ring. |
| Cap rounds 1–2 | 18 sc in each of 2 rounds. 36 sc worked across the section; 18 remain around each round. |
| Cap round 3 | 6 times. 12 sc. |
| Cap round 4 | 6 times. 6 sc. |
| Cap round 5 | 3 times. 3 sc. |
| Cap round 6 | Ch5 and join back to round 5 with a ss, forming the short stem loop shown by the source chart. Ch2 to lock, cut the yarn and hide its end inside. |
| Assembly | Glue Base 2, the cap, to Base 1, the stuffed body. Insert wire at the top of the cap and twist the wire. Repeat both components and assembly for another acorn if making the pictured pair. |
Understand the Two-Part Acorn Construction
The green body and brown cap are separate pieces. Base 1 is the nut, built outward from a magic ring, held at fifteen singles for its plain section, stuffed and narrowed. Base 2 begins at its open rim with eighteen chains and narrows toward the stem. Their foundations therefore start at different parts of the finished decoration.
Keep those labels beside your work until assembly. The cap is not an extra green body round, and the body is not crocheted directly into the cap foundation. The source photograph clearly shows the separate brown piece receiving glue before it is placed over the completed green shape.
Gather the Listed Supplies
The printed material list gives cotton yarn in light brown and green, a 1.90 mm crochet hook, 0.6 mm wire, fabric glue and stuffing. It does not name a cotton brand, formal yarn weight or quantity. Set out both colors and the finishing supplies before beginning the pair of components.
Choose a workable cotton within that material description and assess your own stitch fabric. A small hook size does not establish a guaranteed acorn measurement. The photograph provides a shape reference, while the written specification supplies the hook and wire sizes; neither should be converted into an invented gauge or yarn allowance.
Keep the components clear: Green Base 1 is stuffed before it is closed. Light-brown Base 2 remains a separate cap until the source’s glued assembly step.
Read the Source-Specific Increase Wording
The collection uses the phrase two singles together for two complete single crochets made in the same original stitch. Its general legend illustrates that increase. In this acorn, the progression from ten to twelve and then fifteen confirms the meaning. It is not the common joined-top sc2tog decrease.
Complete the first single crochet fully, then place the second complete single in the same original. Move to the following original only after both are finished. Later narrowing rounds use explicit skipped positions instead. Keeping those two methods distinct prevents the body from becoming smaller when it should be expanding.

Body Round 1: Form the Starting Circle
Make a magic ring. Chain three, then work ten double crochets into the ring. Pull the loose end to tighten the center and join with a slip stitch. The next round operates on ten working positions, so keep the initial height chain separate when counting the double crochets.
Count the ten completed doubles before moving on. Their tops form the originals used by the next round. An extra counted chain would alter the two evenly distributed increases in round two. Keep the ring closure and join distinguishable from the actual ten stitch tops so neither becomes an accidental eleventh working position.
Body Round 2: Increase to Twelve
Work two complete single crochets in one original, followed by one single in each of the next four originals. Repeat that sequence once more. The two groups each consume five incoming positions and produce six singles, taking the body from ten positions to twelve.
This round contains exactly two increases, separated by four ordinary singles on either side. Do not double every original, which would produce twenty. If the count differs, locate the original receiving each pair before moving on. Correcting the increase positions here keeps the following three equal groups straightforward to follow.
Body Round 3: Increase to Fifteen
Repeat two complete singles in one original followed by one single in each of the next three originals. Work that group three times. Each group consumes four positions and produces five singles, using the twelve incoming positions and creating fifteen for the plain body section.
The three increases distribute the new width around the body. Count the singles around the circumference rather than counting the two members of an increase as one. A pair shares its insertion point, but each single has its own completed top and counts separately in the fifteen-stitch total.
Choose Two or Three Plain Body Rounds
The source labels this section rounds four through six and explicitly says fifteen singles for two or three rounds, giving thirty to forty-five stitches worked across the section. Preserve that choice: work fifteen singles around for either two rounds or three rounds before adding stuffing.
The live circumference stays at fifteen throughout. Thirty and forty-five are combined worked totals, not instructions to widen the body. The chart highlights the plain section with the same two-or-three repetition note. Keep the later narrowing steps associated with their printed labels even if you choose the shorter plain section.
Body Length Note
The permitted two-or-three-round plain section changes the amount of straight body fabric before narrowing. It does not change the fifteen-stitch circumference or the later ten-then-five closure sequence. No measured length difference is supplied.
Add Stuffing before the Opening Narrows
Insert stuffing after completing the chosen plain section. The actual source photograph shows the white filling visible inside the green piece. Place the filling while the opening is still accessible, then retain the ordinary crochet path for the two narrowing rounds that follow.
No filling weight or volume is stated. Assess the shape in your own work without assigning an unsupported quantity. The filling supports the nut form beneath the cap, but should not replace missing stitches or force the fabric to a size inferred from the photograph. Keep the working stitch visible while handling the filling.
Count before narrowing: The body must have fifteen originals when its skip-one, work-two sequence begins. Stuffing belongs after the plain section and before that opening becomes ten stitches wide.
Body Rounds 7–8: Reduce to Ten and Five
For the step labeled round seven, skip one original and work one single in each of the next two. Repeat five times. Each group passes three originals and creates two singles, so fifteen incoming positions become ten. The source specifies skipping, rather than joining two incomplete singles together.
