

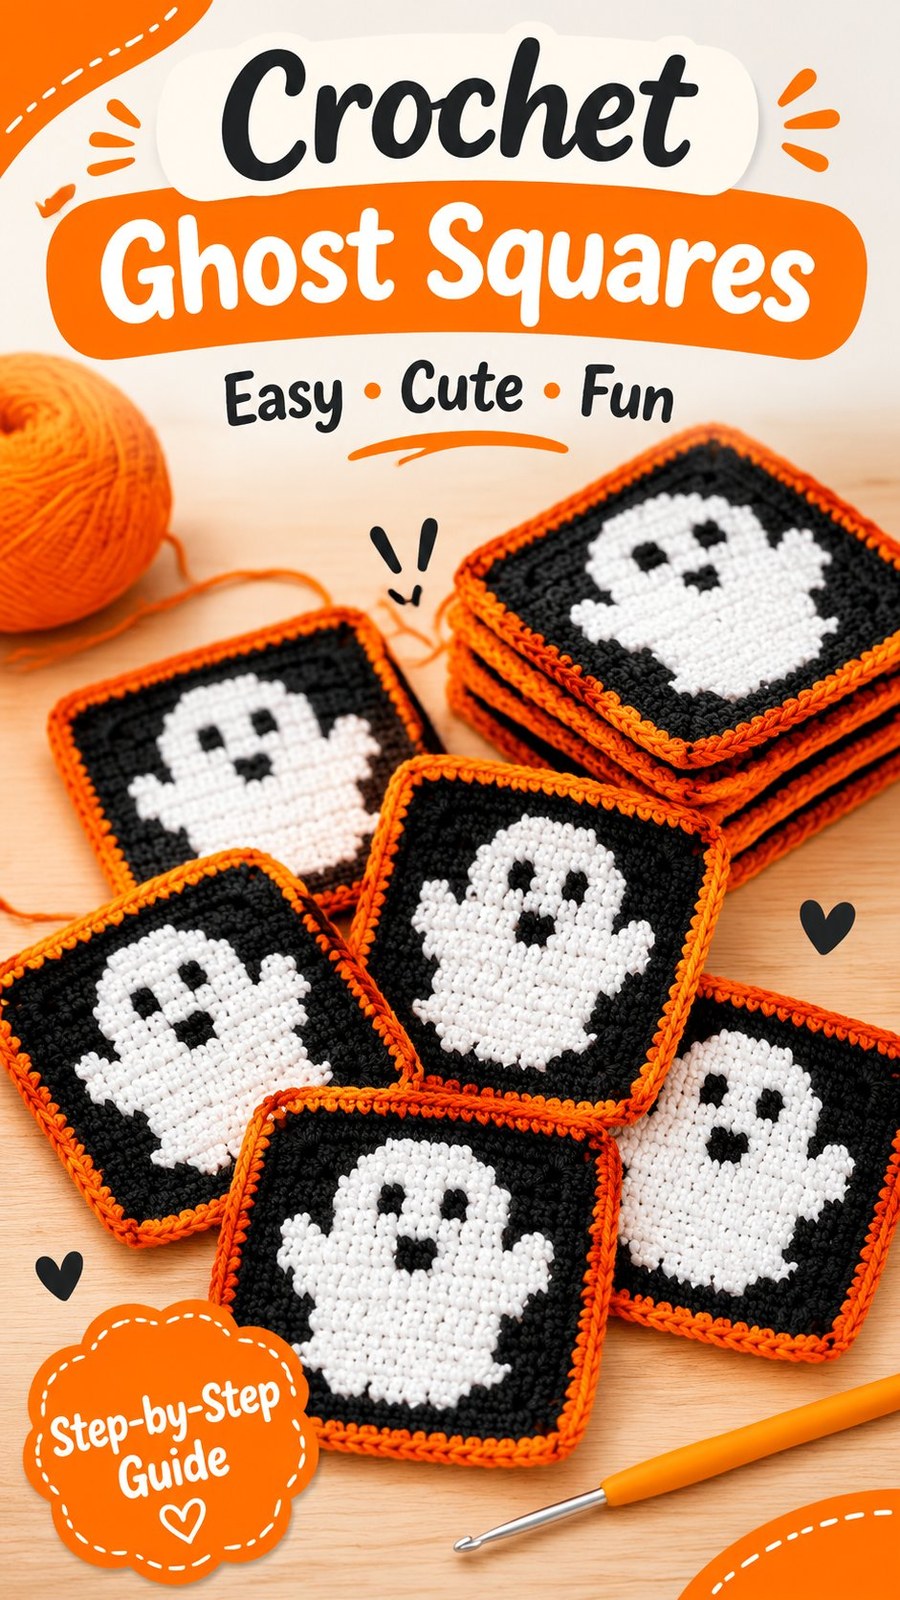
Part 3: Complete the Square
After finishing the 17 chart rows, continue using black yarn to create the bottom background.
- Row 21: Ch 1, sc in each of the 21 sts across. Turn. (21 sc)
- Row 22: Ch 1, sc in each of the 21 sts across. Turn. (21 sc)
Fasten off the black yarn, leaving a tail long enough to weave in securely.
At this stage, the square contains 22 rows in total: three initial black rows, 17 chart rows, and two final black rows. For the intended 21-row square, omit one of the initial black foundation rows before starting the chart. The final layout should consist of two black rows above the chart, 17 chart rows, and two black rows below it, giving 21 rows altogether.
For a precise 21-row version, use the following corrected row arrangement: foundation row 1, followed by one additional black row, then chart rows 1 through 17, followed by two black finishing rows. This gives 21 rows in total.
Fasten off and prepare the square for edging.
Part 4: Add the Orange Border
Join orange yarn with a slip stitch in any corner of the square. Work around the entire outside edge using single crochet stitches.
- Ch 1.
- Work 21 sc evenly along the first side.
- At the corner, work 3 sc into the corner stitch.
- Continue working 21 sc along the next side.
- Work 3 sc into the next corner stitch.
- Repeat the same process for the remaining two sides.
- Join with a sl st to the first sc.
- Fasten off and weave in the orange yarn securely.
Place your stitches evenly along the side edges. Avoid adding too many stitches because this can cause the border to ripple. If the edge pulls inward, add a little more spacing between stitches.
The orange border creates a clear outline around the ghost and gives the motif a polished Halloween-inspired appearance.
Making Multiple Ghost Squares
To create a coordinated collection, repeat the complete pattern for each additional square. Make as many motifs as needed for your intended project.
- One square: A small decorative motif.
- Four squares: A small cushion front or decorative panel.
- Six squares: A small wall hanging or table accent.
- Twelve squares: A compact blanket panel arranged in three columns and four rows.
- Twenty squares: A larger blanket panel arranged in four columns and five rows.
Use the same hook, yarn category, and tension for every motif. Consistent measurements will make joining easier and help the finished project lie flat.
Joining the Crochet Squares
If you are making a blanket, pillow cover, or decorative panel, the squares can be joined using a simple slip stitch seam or single crochet seam.
Place two squares together with their right sides facing outward. Align the edges carefully, then join the black or orange yarn at one corner.
- Insert the hook through the corresponding edge stitches of both squares.
- Yarn over and pull through both layers.
- Continue with slip stitches along the entire edge.
- Repeat for the remaining squares until the desired arrangement is complete.
- Weave in all joining ends securely.
A slip stitch seam creates a relatively subtle join, while a single crochet seam adds a more visible textured line. Orange joining yarn can emphasize the Halloween color scheme, while black yarn produces a quieter finish.
Customizing Your Pixel Crochet Ghost Squares
One of the most enjoyable features of pixel crochet is how easily the design can be personalized. Once you understand the basic chart construction, you can experiment with different colors, sizes, and arrangements.
Change the Ghost Colors
Although white and black create a traditional ghost design, you can easily change the colors to match your preferred style.
- Use cream and dark brown for a softer vintage appearance.
- Choose lavender and charcoal for a playful Halloween palette.
- Try pale green against black for a fun spooky effect.
- Use pastel pink or blue for a cute character-inspired square.
Keep the background darker than the ghost if you want the character to remain clearly visible.
Adjust the Square Size
The simplest way to change the finished dimensions is to use a different yarn weight and hook combination while maintaining the same chart proportions.
For a larger motif, use a thicker yarn and an appropriately larger crochet hook. For a smaller motif, choose a finer yarn and a smaller hook.
You can also increase the black background around the chart by adding extra stitches at both sides and extra rows above and below the ghost. Always add the same number of stitches to both sides to keep the motif centered.
Sizing Reminder: When changing the square dimensions, preserve the original 17-stitch ghost chart unless you are deliberately redesigning the character. Add background stitches around the motif rather than stretching its proportions unevenly.
Create a Halloween Crochet Blanket
Several ghost squares can be arranged into a charming seasonal blanket. Place the motifs in regular rows and columns, joining them with black yarn to create a continuous background effect.
For a more playful layout, alternate ghost squares with solid black squares, orange squares, or other simple pixel motifs. Small pumpkin, bat, and spider designs can add variety without making the blanket visually crowded.
Turn the Motifs into Handmade Gifts
These crochet squares can also become thoughtful handmade gifts. Sew a single motif onto a larger crochet panel, add several squares to a decorative tote, or use them to create a seasonal cushion cover.
For a cushion, make two panels with matching dimensions and join them around the edges, leaving an opening for an appropriately sized insert. For a bag, reinforce the finished fabric with a lining if the project will carry heavier items.
Common Pixel Crochet Mistakes and How to Fix Them
Colorwork is relatively simple once you become familiar with chart reading, but a few common issues can affect the finished appearance. Paying attention to stitch placement and yarn tension will help keep your ghost square neat.
Uneven Square Edges
If the sides look uneven, check that every row contains exactly 21 stitches. It is easy to accidentally skip the final stitch or add an extra stitch near the turning chain.
Place a stitch marker in the first and last stitch of each row until you become comfortable identifying the row edges.
Visible Color Gaps
Small holes can appear when changing from black to white yarn. Make sure you complete the final pull-through of the preceding stitch using the new color.
Also avoid pulling the new yarn too tightly. The goal is to maintain even tension while keeping the color changes clean.
The Square Pulls Inward
This usually happens when carried strands are too tight. Gently stretch the fabric sideways after each colorwork row to check whether the unused yarn has enough slack.
If long black or white sections create too much bulk, use separate bobbins instead of carrying the yarn across the entire row.
The Ghost Shape Looks Uneven
Check that you are reading the correct chart row and working in the correct direction. Remember that the work is turned after each row, so the chart reading direction alternates.
It is also useful to count the stitches in each color section before moving to the next section. This prevents small mistakes from changing the ghost’s outline.
The Orange Border Waves
Wavy edges usually mean that too many stitches have been added around the square. Work evenly along each side and use only three single crochet stitches in each corner stitch.
If the border curls inward, the opposite problem may be occurring. Try distributing the edge stitches more evenly or using a slightly larger hook for the border.
Finishing, Blocking, and Caring for Your Crochet Squares
Finishing is an important part of pixel crochet because it helps the motif maintain its square shape and makes the colorwork look more polished.
Weave in the Yarn Ends
Use a yarn needle to weave each loose end through several stitches on the wrong side. Change direction once or twice to help secure the strand.
Do not pull the ends too tightly because this can distort the fabric. Trim the remaining yarn close to the surface only after checking that the ends are secure.
Block the Finished Motif
Blocking can improve the shape of the square and help the edges lie flat. Lightly dampen the finished motif according to the yarn care instructions, then place it on a flat blocking surface.
Gently shape the square until the corners are even and the sides are straight. Allow it to dry completely before removing it from the blocking surface.
For acrylic yarn, use gentle shaping without applying excessive heat. Always follow the care instructions for the selected fiber.
Washing and Storage
Choose washable yarn if you plan to use the motifs in blankets, cushions, or frequently handled accessories. Many acrylic and machine-washable yarns are practical choices for seasonal decorations.
- Check the yarn label before washing.
- Use a gentle washing method appropriate for the fiber.
- Avoid twisting or wringing the crochet fabric.
- Lay the square flat to dry when recommended.
- Store finished Halloween decorations in a clean, dry place.
If you combine the motifs into a blanket or cushion cover, follow the care instructions for the least washable component.
Creative Ways to Use Pixel Crochet Ghost Squares
Once you have completed a few motifs, there are many ways to incorporate them into your handmade collection.
- Halloween blanket: Join several ghost squares with black or orange yarn for a seasonal throw.
- Decorative cushion: Use a ghost square as the center of a cushion front.
- Halloween tote bag: Add the motifs to a sturdy crochet bag for a playful seasonal accessory.
- Wall hanging: Arrange several squares vertically and add a simple hanging loop.
- Table decoration: Use a larger arrangement of squares as a festive table accent.
- Gift projects: Incorporate a single ghost motif into handmade accessories for friends and family.
These motifs are also a great way to use leftover yarn. Small quantities of black, white, and orange yarn can produce several squares without requiring a large supply of materials.
Pixel Crochet Ghost Squares at a Glance
- Best yarn: Smooth medium-weight worsted yarn in black, white, and orange.
- Skill level: Advanced beginner, with basic single crochet and color-changing experience.
- Main technique: Flat single crochet rows with a pixel-style color chart.
- Suggested hook: 4 mm (US G-6).
- Finishing: Orange single crochet edging, secure weaving, and gentle blocking.
Make Your Own Pixel Crochet Ghost Collection
These pixel crochet ghost squares are a fun way to bring seasonal creativity into your crochet projects. With their simple single crochet construction, contrasting black and white colorwork, and bright orange edging, they make charming motifs for Halloween decorations and handmade accessories.
The pattern is a useful opportunity to practice reading crochet charts, changing colors, maintaining even tension, and finishing square motifs. Once you complete your first ghost, making additional squares becomes a great way to build confidence with pixel crochet.
Choose your favorite yarn colors, check your gauge, and read through the complete instructions before beginning. You can keep the classic ghost design or experiment with different backgrounds, borders, and seasonal motifs to create a collection that reflects your own style.
Whether you use one square as a small decorative accent or join several into a cozy Halloween blanket, these little crochet ghosts are a delightful addition to your handmade projects. Save the pattern, gather your yarn, and enjoy creating your own spooky crochet decorations!
Tags
Pixel Crochet
Ghost Crochet
Halloween Crochet
Crochet Squares
Crochet Colorwork
Halloween Decorations
Free Crochet Pattern
Pixel Art Crochet
