

Check that the gusset lies flat and the body edge has not developed unwanted puckers.
Step 7: Attach the Second Body Side
Place the second mirrored body panel right sides together with the exposed side of the gusset. Align the neck, head, chest, belly, tail, and lower body notches.
Stitch around the second perimeter using the same 1/4-inch (6 mm) seam allowance. Leave a turning opening approximately 2 1/2 inches (6.4 cm) long along the lower belly or lower back area.
Backstitch securely at both ends of the opening. Check the entire seam before turning the body.
Trim excess seam allowance where needed. Clip concave curves and notch convex curves to reduce bulk, being careful not to cut into the stitching.
At tight corners, trim the seam allowance slightly closer, but keep enough fabric to protect the seam during stuffing.
Important Construction Tip: The gusset must follow the body outline without twisting. Check all matching marks before sewing the second side. If one section appears too long, redistribute the excess gradually rather than forcing the fabric into a single fold.
Step 8: Turn and Shape the Goose
Carefully turn the body right side out through the lower opening. Work slowly, especially around the narrow neck and head.
Use a blunt turning tool to shape the neck, crown, beak area, and tail. Do not push too hard against the seams.
Inspect the stitching from the outside. If any seam has opened, turn the body partially inside out and repair it before adding stuffing.
Step 9: Stuff the Body in Stages
Add small portions of polyester fiberfill through the lower opening. Begin with the head and neck, pushing the stuffing upward with a blunt tool.
Continue into the chest and upper body, distributing the stuffing evenly. Fill the rounded belly last, adding enough to create a smooth shape without stretching the seams.
Use slightly firmer stuffing in the neck to help it maintain an upright appearance. Keep the body softer so it retains a pleasant plush texture.
Do not overfill the toy. Excessive stuffing can distort the outline, stretch seams, and create an uneven surface.
Once the shape is satisfactory, fold the raw edges of the turning opening inward by 1/4 inch (6 mm). Close it with a ladder stitch, making small stitches that disappear into the folded edges.
Step 10: Attach the Feet
Position the two fabric feet along the lower front of the body, one on each side of the centerline. Angle them slightly outward to create a natural resting pose.
For this decorative version, place each ankle end approximately 1 inch (2.5 cm) from the lower front center of the body. Pin the feet in place and check that they appear balanced from the front and side.
Secure each ankle with several rows of small hand stitches. Pass the needle through the foot base and body fabric, taking care to anchor the stitches securely.
Adjust the feet before completing the attachment so they do not point in opposite directions unintentionally.
Step 11: Embroider the Eyes
Use black embroidery floss to create one small eye on each side of the head. Position the eyes approximately 1/2 inch (1.3 cm) behind the beak attachment area and slightly below the crown.
Make a small satin stitch or several closely spaced straight stitches to create a neat oval or dot. Keep both eyes at approximately the same height.
Secure the embroidery thread inside the body fabric, hiding the knots where possible.
Embroidered facial features are preferable to plastic eyes or buttons, particularly if the finished goose may be handled by children. Decorative handmade toys should always be inspected for loose stitching and accessories.
Step 12: Make the Decorative Bow
Place the two 10 x 5-inch (25.4 x 12.7 cm) bow pieces right sides together. Stitch around the perimeter with a 1/4-inch (6 mm) seam allowance, leaving a small opening along one edge.
Clip the corners, turn the fabric right side out, and press carefully. Close the opening with a ladder stitch.
Fold the bow gently into two loops and pinch the center. Wrap the smaller center piece around the gathered middle, with its raw edges folded inward.
Secure the center wrap with hand stitching on the back. Arrange the loops until the bow looks full and balanced.
Attach the bow to the neck with several small hand stitches. For a decorative display piece, it can also be made removable with a simple fabric band, provided the band is secured and used only where detachable accessories are appropriate.
Optional Fabric Interfacing and Reinforcement
Most lightweight quilting cottons do not require full-body interfacing for this stuffed toy. Adding interfacing to every panel could make the curves stiff and difficult to turn.
If your chosen beak fabric is particularly thin, apply a small piece of lightweight woven fusible interfacing to its wrong side before sewing. Follow the interfacing manufacturer’s pressing instructions.
For a firmer decorative wing, add a thin layer of lightweight batting between the wing fabric layers. Trim the batting slightly smaller than the stitching line to prevent excessive bulk.
Customize Your Goose Sewing Pattern
One of the nicest features of handmade fabric animals is how easily you can personalize their appearance. Small changes to the fabric, body proportions, and accessories can create completely different characters while using the same basic construction method.
Create Different Goose Sizes
To make a smaller or larger goose, scale the body silhouette and the gusset width together.
- Small goose: Reduce the body pattern to approximately 75% of the base dimensions.
- Standard goose: Use the original 15-inch (38 cm) finished-height target.
- Large goose: Increase the body pattern to approximately 125% of the original dimensions.
When scaling the pattern, multiply the gusset width, beak dimensions, wing dimensions, and feet dimensions by the same scale factor. Recalculate the gusset length by measuring the new stitching-line perimeter.
Make sure your sewing machine can comfortably handle the increased or reduced fabric thickness, especially around the neck and beak.
Experiment with Floral and Gingham Fabrics
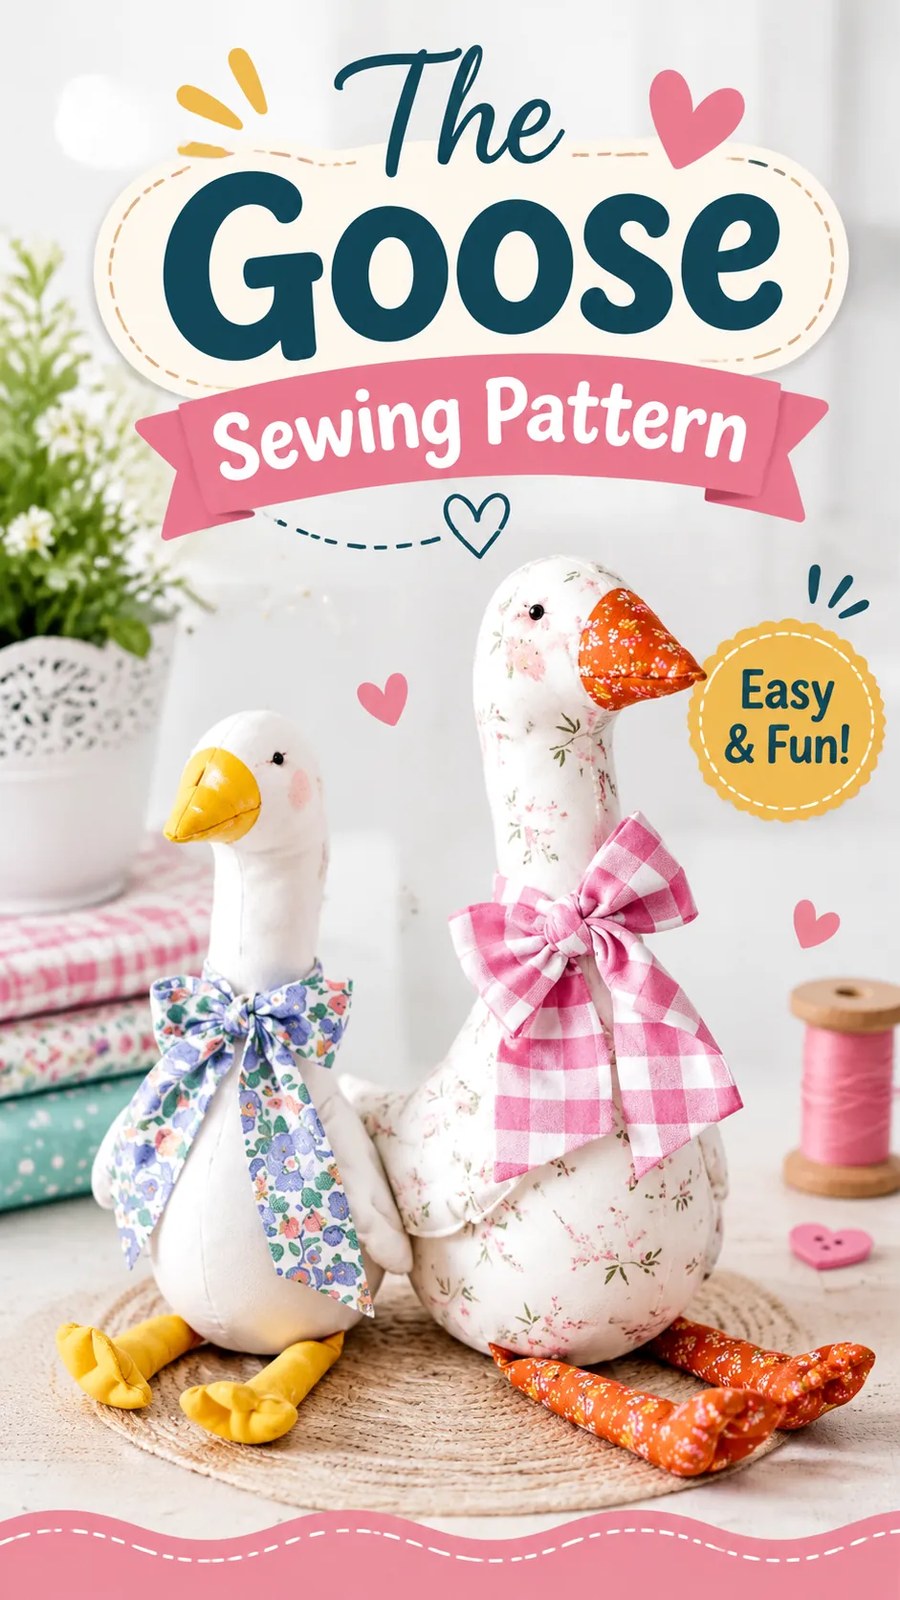
For a traditional cottage-style appearance, use small floral prints with white or cream body fabric. Soft pink, lavender, pale blue, and sage green are attractive choices for the wings and bows.
For a playful farmhouse look, combine gingham fabric with a solid white body and warm brown feet. Mustard yellow and rust-colored details also create a lovely contrast.
Try using the same print for the wings and feet to create a coordinated design, or use different prints for a patchwork-inspired appearance.
Make a Matching Pair
For a coordinated pair, sew two geese using the same body pattern but different fabrics. Give one a yellow beak and feet and the other a rust-colored floral combination.
You can also vary the bows, wing prints, and neck proportions. A slightly taller neck on one toy creates visual variety without requiring a completely different construction method.
Sewing Insight
The center gusset is the most important component for creating a rounded stuffed goose. Before attaching both side panels, check that the gusset is not twisted and that its matching marks align. Accurate matching makes the neck and body much easier to shape during stuffing.
Common Goose Sewing Mistakes and How to Fix Them
1. The Neck Looks Uneven
An uneven neck usually occurs when the two body panels are not aligned or when the gusset has been stretched while sewing.
Check that both side panels are mirrored correctly and that the neck notches match. Use clips at regular intervals and sew slowly around the narrow section. If the neck has already been stuffed unevenly, gently redistribute the filling before closing the opening.
2. The Gusset Creates Unwanted Folds
Folds may develop if the gusset is too long or if excess fabric is concentrated in one area. Check the stitching-line measurements before sewing and compare the gusset notches with the body markings.
For a slight difference, distribute the excess gradually between the matching points. If there is significant excess, remove the seam and correct the gusset length rather than forcing the fabric into position.
3. The Stuffing Looks Lumpy
Adding too much stuffing at once can create hard areas and uneven surfaces. Use small portions and distribute them gradually with your fingers or a blunt stuffing tool.
Pay particular attention to the neck, where the stuffing can become compressed. Work from the upper head toward the body, checking the silhouette frequently.
4. The Beak Looks Crooked
Mark the center of the face before attaching the beak. Pin the beak in place and compare its position from both sides. If necessary, temporarily hand-baste the piece before sewing it permanently into the seam.
5. The Feet Do Not Look Balanced
Before attaching the feet, place the goose on a flat surface and compare their positions. Adjust the angle and spacing until the finished toy looks balanced.
Remember that this is a soft decorative plush, not a rigid standing sculpture. Its ability to stand independently will depend on the body shape, stuffing distribution, and foot placement.
6. The Curved Seams Look Pointed
Unclipped curved seam allowances can pull against the fabric and create sharp points after turning. Carefully clip inward curves and notch outward curves before turning the body right side out.
Keep the cuts shallow and avoid cutting through the stitches. A shorter stitch length around the narrowest curves can also help preserve the shape.
Pressing, Finishing, and Caring for Your Handmade Goose
Pressing is useful throughout this project, even though the final toy is stuffed. Press the fabric components before sewing, open the gusset joining seam, and gently flatten the beak and bow before attaching them.
Avoid pressing the completed stuffed body with a hot iron. Instead, shape it by hand and smooth the fabric with your fingers.
Final Finishing Checklist
- Check the body seams for gaps or loose stitches.
- Make sure the turning opening is securely closed.
- Confirm that the beak is centered and firmly attached.
- Check that both wings are positioned evenly.
- Inspect the feet and reinforce their attachment stitches if needed.
- Make sure the embroidered eyes are secure.
- Adjust the bow loops and trim loose threads.
- Remove all temporary marking lines and stray fabric fibers.
Care Recommendations
For the best results, follow the care requirements of the chosen fabric and stuffing materials. A lightly damp cloth can be used to spot-clean small marks on the finished goose.
If the toy needs more thorough cleaning, check whether the fabric and stuffing are suitable for washing before attempting it. Hand washing in cool water is a gentler option for many cotton-filled decorative toys, but drying must be thorough to prevent moisture from remaining inside.
Keep decorative bows and delicate accessories away from excessive friction and heat. Remove loose threads promptly and repair damaged seams before further use.
Safety Reminder: This project is designed as a decorative stuffed animal. For items intended for young children, embroider all facial features, avoid detachable bows and small accessories, and inspect every seam and attachment carefully. Handmade construction does not establish that a toy has passed product safety testing.
At a Glance: Fabric Goose Sewing Pattern
- Best fabric: Lightweight quilting cotton, cotton poplin, or soft woven floral fabric.
- Skill level: Confident beginner to intermediate.
- Key technique: Sewing two shaped body panels with a continuous center gusset.
- Finished size: Approximately 15 inches (38 cm) tall.
- Finishing: Polyester stuffing, embroidered facial features, fabric feet, and optional decorative bows.
Make Your Own Adorable Handmade Fabric Goose
This fabric goose sewing pattern is a lovely way to turn beautiful cotton prints into a charming handmade decoration. Its rounded body, long neck, contrasting beak, and soft fabric feet create a recognizable silhouette, while the decorative wings and bows provide plenty of opportunities for personal expression.
Choose a stable cotton fabric, prepare it carefully, and check all your measurements before cutting. Read the complete sewing instructions first, mark the body and gusset matching points, and test your machine settings on fabric scraps before beginning the main construction.
Take your time with the curved seams, distribute the stuffing gradually, and make sure every attachment is secure. You can personalize your finished goose with floral prints, gingham details, contrasting feet, or a matching pair in complementary colors.
Whether you make one for a cozy shelf display, a seasonal decoration, or a handmade gift, this DIY fabric goose is a delightful addition to your collection of creative sewing projects.
Tags
Goose Sewing Pattern
Fabric Goose Plush
Stuffed Animal Sewing
DIY Soft Toys
Beginner Sewing Projects
Handmade Fabric Animals
Cottage Style Sewing
Floral Cotton Crafts
