

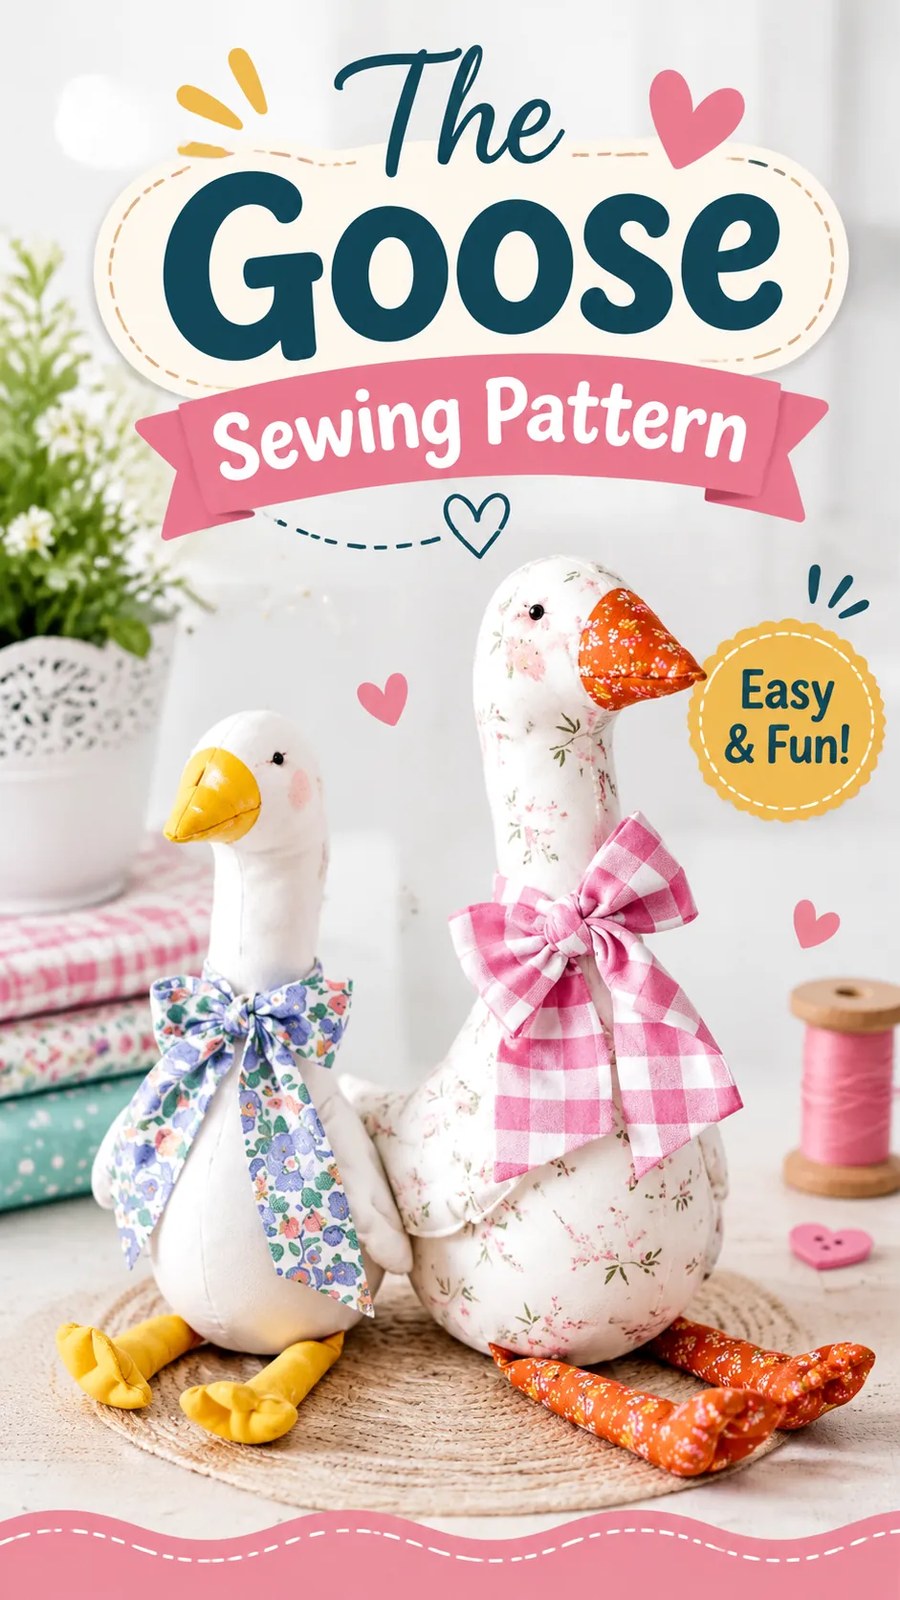
Create a charming handmade goose plush with soft floral fabrics, a sweet little beak, decorative wings, and oversized fabric feet. This delightful fabric goose sewing pattern is inspired by the popular cottage-style stuffed animals that bring a cozy, whimsical touch to bedrooms, nurseries, shelves, and seasonal displays. Its long neck, rounded body, and gentle silhouette make it a lovely project for anyone who enjoys sewing soft toys and experimenting with pretty cotton prints.
The pictured geese feature different fabric combinations, including delicate floral prints, warm brown patterned feet, yellow beaks, and decorative bows. One has a pink gingham bow, while the other wears a colorful floral accessory. For this original sewing tutorial, we will create a similar decorative goose using a shaped body, a separate belly gusset, stuffed fabric feet, embroidered facial features, and optional fabric accessories.
Key Takeaways
- Create an adorable stuffed fabric goose with a long neck and rounded body.
- Use lightweight woven cotton, quilting cotton, or soft floral fabric.
- Learn how to sew shaped body panels, a center gusset, wings, and fabric feet.
- Add personality with embroidered eyes, contrasting beaks, and decorative bows.
- Suitable for confident beginners and intermediate sewing enthusiasts.
- Customize the size, fabric combinations, and accessories to suit your decor.
Meet the Handmade Fabric Goose Plush
This fabric goose is a decorative stuffed animal with an elegant upright neck, small rounded head, prominent beak, plump body, and extended webbed feet. Its silhouette combines the recognizable proportions of a goose with the softness of a traditional handmade plush toy.
The most distinctive feature is the contrast between the simple white body and the colorful fabric accessories. Floral prints create a delicate vintage appearance, while gingham bows introduce a cheerful cottage-inspired touch.
The original pictured design includes two geese with slightly different proportions and fabric combinations. One has a bright yellow beak and matching yellow feet, while the other uses warm rust-colored floral fabric for its beak and feet. Their decorative bows make each toy look individual.
For this original interpretation, the goose is constructed using two mirrored side panels connected with a narrow center gusset. This method creates a rounded stuffed body rather than a completely flat soft sculpture. Separate fabric pieces form the feet and wings, while the beak is made using layered contrasting fabric.
Fabric Choices and Construction Details
Recommended Fabrics
Lightweight woven fabric is the most practical choice for this stuffed goose. Quilting cotton is especially convenient because it is easy to cut, stable during sewing, and available in many floral, gingham, and small-scale decorative prints.
- Main body: White cotton, cotton poplin, lightweight linen, or soft printed quilting cotton.
- Wings: Floral cotton, tiny botanical prints, or a contrasting solid fabric.
- Beak: Yellow, mustard, rust, or orange quilting cotton.
- Feet: Coordinating cotton or a slightly heavier woven fabric.
- Gusset: Matching body fabric for a seamless appearance.
- Bow: Lightweight gingham, floral cotton, or soft cotton lawn.
Avoid fabrics with excessive stretch because they can distort around the curved neck and body. Very thick upholstery materials may also make the smaller curves difficult to sew accurately.
How the Goose Is Constructed
The main body consists of two mirrored fabric panels. A long center gusset connects their outer edges, adding depth to the body, neck, and head. The gusset is sewn around the perimeter of the body, with a small opening left for turning and stuffing.
The wings are separate padded or lightly stuffed pieces attached to both sides. The feet are made from paired fabric layers and attached near the lower front of the body. Embroidered eyes and a contrasting beak complete the face.
The photograph does not establish the exact internal construction of the original toys. This practical version uses washable polyester stuffing, simple woven-fabric components, and reinforced seams to create a similar decorative silhouette.
Needle, Thread, and Sewing Machine Settings
- Needle: Universal sewing machine needle, size 80/12. Use size 90/14 for slightly heavier cotton.
- Thread: Good-quality all-purpose polyester thread.
- Stitch: Straight stitch for woven fabric.
- Stitch length: Approximately 2.0 to 2.5 mm for general seams.
- Short curves: Use a 1.8 to 2.0 mm stitch length for additional control.
- Seam finish: Trimmed and clipped seams enclosed inside the stuffed toy.
Fabric Selection Tip:
Choose fabrics with similar weights for the body, gusset, wings, and feet. Lightweight cotton is easier to manipulate around tight curves, while stable woven fabric helps the stuffed goose retain its shape.
Free Sewing Pattern: Handmade Fabric Goose Plush
This original goose sewing pattern creates an approximately 15-inch (38 cm) tall decorative stuffed bird with a rounded body, upright neck, separate wings, and fabric feet. The measurements below are recommendations for a manageable home-sewing project rather than measurements of the pictured toys.
The pattern uses a shaped side-panel method with a continuous center gusset. The body is drafted using a coordinate-based outline, allowing you to draw the pattern directly onto paper without needing an additional template.
Pattern Overview
| Specification | Details |
|---|---|
| Project | Decorative stuffed fabric goose |
| Skill level | Confident beginner to intermediate |
| Estimated sewing time | 4 to 6 hours, excluding fabric preparation |
| Finished height | Approximately 15 inches (38 cm) |
| Body width | Approximately 7.5 inches (19 cm) |
| Body depth | Approximately 2.5 inches (6.4 cm) |
| Main fabric | Quilting cotton or lightweight woven cotton |
| Main fabric quantity | 1/2 yard (0.46 m), 44 to 45 inches (112 to 114 cm) wide |
| Contrast fabric | 1/4 yard (0.23 m), 44 to 45 inches (112 to 114 cm) wide |
| Needle | Universal 80/12 or 90/14 |
| Seam allowance | 1/4 inch (6 mm), included in cutting dimensions where specified |
| Stuffing | Approximately 3 to 4 oz (85 to 113 g) of polyester fiberfill, as needed |
| Closure | Hand-stitched turning opening |
Materials and Sewing Supplies
- 1/2 yard (0.46 m) of main body fabric.
- 1/4 yard (0.23 m) of contrasting cotton fabric.
- Small scraps of yellow, orange, or rust-colored cotton for the beak.
- Polyester fiberfill stuffing.
- All-purpose polyester sewing thread.
- Embroidery floss for the eyes.
- Hand-sewing needle.
- Universal sewing machine needle, size 80/12.
- Fabric scissors or rotary cutter.
- Measuring tape and ruler.
- Pattern paper and pencil.
- Fabric marking pen or chalk.
- Straight pins or sewing clips.
- Point turner or blunt turning tool.
- Iron and ironing board.
No zipper, buttons, or other closure is required. The stuffed goose is permanently closed with hand stitching.
Sewing Terminology and Abbreviations
- RS: Right side of the fabric, or the printed or finished surface.
- WS: Wrong side of the fabric.
- SA: Seam allowance, the fabric between the stitching line and raw edge.
- R: Right side when identifying the left and right sides of the finished goose.
- WST: Wrong sides together.
- Basting: Temporary stitching used to hold pieces in position.
- Backstitch: A few reverse stitches used to secure the beginning and end of a machine seam.
Seam Allowance and Fabric Preparation
Use a consistent 1/4-inch (6 mm) seam allowance for the main stuffed body, wings, beak, and feet. The gusset width includes seam allowances along both long edges. Do not add another allowance to pieces whose cutting dimensions are already specified.
Wash and dry washable cotton fabric according to its intended care instructions before cutting. Press it flat and remove creases. Check the fabric for flaws and make sure directional prints face the intended direction.
Drafting the Goose Body Pattern
The main body is drafted as one continuous side silhouette. The finished outline should include the head, neck, chest, rounded belly, back, and tail. Two mirrored copies form the sides of the goose.
For this base size, use a coordinate grid measuring approximately 10 inches (25.4 cm) wide by 16 inches (40.6 cm) high. The dimensions are approximate drafting guides, and the finished toy may vary slightly with curve shaping and stuffing.
Step 1: Establish the Coordinate Grid
- Draw a vertical line 16 inches (40.6 cm) long on pattern paper.
- Draw a horizontal baseline 10 inches (25.4 cm) long at its bottom.
- Mark the lower-left corner as point A, with coordinates (0,0).
- Measure all subsequent points horizontally from A and vertically upward from the baseline.
Step 2: Mark the Body Outline
Plot these reference points in the order given. Connect them with smooth, flowing curves rather than sharp straight segments.
- A: (0.6, 7.0), tail tip.
- B: (1.8, 7.3), upper back.
- C: (3.8, 7.1), back center.
- D: (5.2, 8.3), shoulder.
- E: (5.8, 11.0), rear neck.
- F: (5.9, 14.4), back of head.
- G: (6.8, 15.1), crown.
- H: (7.8, 14.6), forehead.
- I: (8.3, 13.5), beak attachment area.
- J: (7.4, 12.9), lower face.
- K: (7.2, 10.7), front neck.
- L: (7.4, 8.7), chest.
- M: (8.5, 6.4), front belly.
- N: (8.8, 3.3), lower front body.
- O: (7.7, 1.4), lower body.
- P: (5.4, 0.8), bottom center.
- Q: (3.0, 1.1), lower back.
- R: (1.3, 2.4), underside.
Connect R back to A with a gently curved tail and rump outline. Refine the lines so the silhouette resembles a plump bird with a long upright neck and a slightly rounded head.
The beak is a separate attachment, so the head should have a small, clearly defined front attachment area around points I and J. Smooth this area into a short, nearly vertical face edge rather than drawing a sharp beak point into the body.
Step 3: Add the Seam Allowance
Once the outline looks balanced, draw a second line 1/4 inch (6 mm) outside the entire silhouette. This is the cutting line. The original outline is the stitching line.
Mark the grainline vertically through the body. Transfer matching notches at the neck base, chest, belly, rump, and tail. These marks help distribute the gusset evenly during sewing.
Cut out the paper pattern and label it BODY SIDE. Cut two mirrored fabric pieces, either by folding the fabric right sides together or by turning the paper pattern over before cutting the second side.
Drafting the Center Gusset
The center gusset creates the three-dimensional depth of the goose. It is a long fabric strip that runs around the body perimeter between the two side panels.
- Measure the stitching-line perimeter of the paper body pattern using a flexible tape measure or a piece of string.
- Record the measurement as P.
- Add 1 inch (2.5 cm) to P for the short joining seam at the gusset ends.
- Cut one gusset strip measuring P plus 1 inch (2.5 cm) in length and 3 1/2 inches (8.9 cm) in width.
The 3 1/2-inch width includes two 1/4-inch seam allowances, leaving an approximate finished body depth of 3 inches (7.6 cm). If a slightly slimmer toy is preferred, reduce the strip width to 3 inches (7.6 cm), producing approximately 2 1/2 inches (6.4 cm) of finished depth.
For the base version, use the 3 1/2-inch strip. Mark its midpoint and transfer the body matching notches onto both long edges, keeping the marks in corresponding positions.
Join the short ends of the gusset with a 1/4-inch (6 mm) seam to create one continuous loop. Press the joining seam open. Keep the gusset flat and avoid twisting it.
The final gusset length is determined by the actual drafted body perimeter. This is more reliable than assigning an arbitrary fixed length because smooth curve adjustments can change the perimeter.
Complete Cutting List
All dimensions below are cut dimensions. The 1/4-inch (6 mm) seam allowance is included in the specified pieces unless the instructions explicitly state otherwise.
| Pattern Piece | Material | Quantity | Cut Dimensions | Notes |
|---|---|---|---|---|
| Body side | Main cotton | 2 mirrored | Drafted silhouette | Includes 1/4-inch SA |
| Center gusset | Main cotton | 1 | P + 1 inch x 3 1/2 inches | Includes SA |
| Wing | Contrast cotton | 4 | 4 x 3 inches (10.2 x 7.6 cm) | Two wings, two layers each |
| Beak | Contrast cotton | 2 | 2 1/2 x 2 inches (6.4 x 5.1 cm) | Folded wedge construction |
| Feet | Contrast cotton | 4 | 3 1/2 x 2 1/2 inches (8.9 x 6.4 cm) | Two layered feet |
| Optional bow | Lightweight cotton | 2 | 10 x 5 inches (25.4 x 12.7 cm) | Bow loops |
| Bow center | Lightweight cotton | 1 | 2 x 3 inches (5.1 x 7.6 cm) | Center wrap |
For the optional bow, the dimensions are generous starting measurements. You can shorten the loops for a smaller decoration or use a larger piece of fabric for a fuller bow.
Step-by-Step Goose Sewing Tutorial
Step 1: Cut and Mark All Fabric Pieces
- Cut two mirrored body side pieces from the main fabric.
- Cut one center gusset strip using the measured perimeter and specified width.
- Cut four wing pieces from the contrasting fabric.
- Cut two beak pieces and four foot pieces.
- Transfer all body notches, wing placement marks, and gusset matching points using a removable fabric marker.
- Keep paired components together so the mirrored pieces remain correctly oriented.
Arrange directional prints so flowers, leaves, or other motifs appear upright when the goose is standing. This is particularly important for the neck and head.
Step 2: Prepare the Beak
Place the two beak pieces right sides together. Sew around the two angled edges using a 1/4-inch (6 mm) seam allowance, leaving the short base edge open.
Clip the seam allowance at the corners without cutting the stitching. Turn the beak right side out and gently shape the tip with a blunt turning tool.
Press lightly. The result should resemble a small pointed fabric pocket. If you want a more dimensional beak, add a very small amount of stuffing before attaching it.
Place the open base of the beak against the front face attachment area of one body panel. Align its center with the face midpoint and baste it within the seam allowance. The pointed end should extend outward from the face.
Repeat the placement on the opposite side, making sure the beak layers remain aligned. The gusset will later enclose the attachment edges, creating a neat finished join.
Step 3: Sew the Fabric Wings
Place two wing pieces right sides together. Stitch around the perimeter using a 1/4-inch (6 mm) seam allowance, leaving a 1 1/2-inch (3.8 cm) opening along the straighter lower edge.
Trim the seam allowance at the rounded corners and clip the curves carefully. Turn the wing right side out and press its edges gently.
Add a small amount of stuffing if you want softly raised wings. Alternatively, leave the wings flat for a lighter, more delicate appearance.
Close the opening with a ladder stitch. Repeat with the remaining two wing pieces to make the second wing.
Position one wing on each body side, approximately 4 inches (10.2 cm) below the neck base and centered over the rounded body area. Pin and sew around the wing perimeter using small, neat hand stitches.
Step 4: Make the Fabric Feet
For each foot, place two fabric pieces right sides together. Draw a simple webbed-foot outline inside the rectangular cutting area.
Create a rounded ankle section approximately 3/4 inch (1.9 cm) wide, followed by a broader front section with three softly rounded toe projections. Keep the shape simple so it can be turned without difficulty.
Stitch around the outline using a 1/4-inch (6 mm) seam allowance. Leave a 1-inch (2.5 cm) opening along the ankle edge.
Clip the curved areas, especially between the rounded toes, without cutting through the stitching. Turn the feet right side out, shape the toes, and add a small amount of stuffing if desired.
Close the openings with ladder stitches. Place the feet aside until the lower body is assembled.
Step 5: Join the Gusset Ends
Fold the long gusset strip right sides together at its short ends. Sew the ends with a 1/4-inch (6 mm) seam allowance to create a continuous loop.
Press the joining seam open and mark its position. This seam will be placed near the lower back of the goose where it is less noticeable.
Divide the gusset into matching sections using the body notches. The corresponding marks should line up with the head, neck, chest, belly, and tail areas.
Step 6: Attach the First Body Side
Place the first body panel right side up on your work surface. Position the gusset on top with right sides together, matching the raw edges and all transferred notches.
Begin stitching near the lower back. Sew around the perimeter using a 1/4-inch (6 mm) seam allowance. Work slowly around the head and neck, stopping frequently to adjust the fabric and prevent small folds.
Use a shorter stitch length around the narrow curves. Avoid stretching either fabric layer.
Stop before completing the seam if the fabric begins to bunch. Lift the presser foot with the needle down when repositioning around tight curves, then continue sewing.
