

Ami_kare 300×250

Brown Pumpkin Stem
Make 1 with brown yarn.
Round 1: 6 sc in MR. (6)
Rounds 2–7: 6 sc (6 rounds). (6)
Round 8: FLO, 6 inc. (12)
Round 9: 12 sc. (12)
Fasten off, leaving a long tail for sewing. The narrow tube forms the upright stem, and the widened base provides the attachment edge. See Photo 9.
Green Curly Vine – First Piece
Use green yarn.
Ch 13.
Work 2–3 sc into each chain stitch along the foundation chain, allowing the strip to curl naturally.
Fasten off, leaving a tail for sewing. See Photo 10.
Ami_kare 300×250
Green Curly Vine – Second Piece
Use green yarn.
Ch 19.
Work 2–3 sc into each chain stitch along the foundation chain.
Fasten off, leaving a tail for sewing. The longer chain creates the second curled vine. See Photo 11.
Ami_esnek (yatay)
Purple Witch Hat
Make 1. Start with purple yarn.
Round 1: 6 sc in MR. (6)
Round 2: 6 sc. (6)
Round 3: 6 inc. (12)
Rounds 4–6: 12 sc (3 rounds). (12)
Round 7: (sc, inc) × 6. (18)
Rounds 8–9: 18 sc (2 rounds). (18)
Change to black.
Rounds 10–11: 18 sc (2 rounds). (18)
Change to purple.
Round 12: FLO, (2 sc, inc) × 6. (24)
Round 13: Working through both loops, (3 sc, inc) × 6. (30)
Fasten off, leaving a long purple tail for sewing.
Using yellow yarn and a needle, embroider a small rectangular buckle at the front center of the black band. The final two purple rounds form the flared brim. See Photos 12–15.
Ami_esnek (yatay)
Assembly
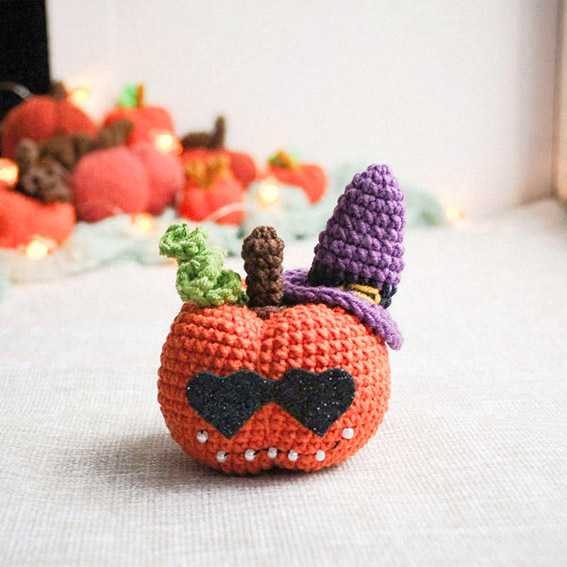
- Sew the brown stem to the upper center of the pumpkin, securing its widened base. Attach both green curly vines beside the stem, leaving their curled lengths free. See Photos 16–19.
- Position the purple witch hat on the upper right side of the pumpkin, tilted outward as shown in Photo 24. Use the remaining purple yarn tail to sew the brim to the orange body.
- Using black thread, embroider a curved smile across the lower front. Attach small white beads along the smile to form the teeth, securing them individually. See Photos 20–21.
- Draw two connected heart-shaped lenses on the back of black glitter craft foam or felt, approximately 1.5 cm high and 2 cm wide per heart. Cut out the glasses and glue them above the smile. Allow the glue to dry. See Photos 22–24.
Copyright & Credits
The crochet pattern, design, and photos belong to Natalya Margevich @margevich_toy. The written instructions and photos on this page may not be copied, republished, translated, or used for commercial purposes without permission. Please credit @margevich_toy when sharing finished items.
Pick Your Favorite & Pin It
CONTENT END 1
