

Bottom Base
Use black yarn (Photo 3).
Round 1: 6 sc in MR (6)
Round 2: 6 inc (12)
Round 3: (1 sc, inc) x 6 (18)
Round 4: (2 sc, inc) x 6 (24)
Ami_kare 300×250
Ears (Make 2)
Use black yarn (Photo 4).
Round 1: 3 sc in MR (3)
Round 2: 3 inc (6)
Round 3: (1 sc, inc) x 3 (9)
Rounds 4–5: 9 sc (9)
Fold each ear in half and crochet 4 sc across the folded edges (Photo 4).

Tail
Use black yarn (Photo 6).
Round 1: 5 sc in MR (5)
Rounds 2–16: 5 sc (5)
Ami_kare 300×250
Witch Hat
Start with orange yarn (Photo 5).
Round 1: 5 sc in MR (5)
Rounds 2–3: 5 sc (5)
Round 4: inc, 4 sc (6)
Round 5: 6 sc (6)
Round 6: (1 sc, inc) x 3 (9)
Round 7: 9 sc (9)
Round 8: (2 sc, inc) x 3 (12)
Round 9: 12 sc (12)
Round 10: (3 sc, inc) x 3 (15)
Round 11: 15 sc (15)
Round 12: (4 sc, inc) x 3 (18)
Round 13: 18 sc (18)
Ami_esnek (yatay)
Change to black yarn.
Round 14: 18 sc (18)
Change back to orange yarn.
Round 15: 18 inc (36)
Rounds 16–17: 36 sc (36)
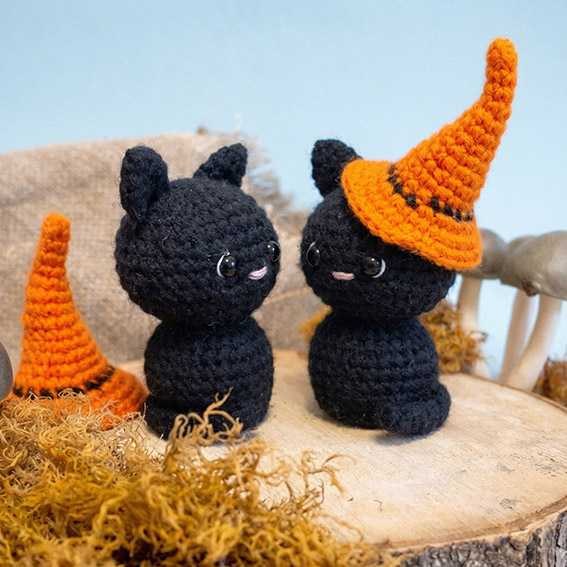
The finished hat has a pointed orange crown, a narrow black band and a wide orange brim (Photos 5 and 10).
Assembly
- Stuff the head and body. Attach the 24-stitch bottom base to the 24-stitch body opening, using the working yarn left for finishing the lower edge (Photo 3).
- Attach both folded ears to the head and the narrow tail to the lower back of the body, following the finished shape (Photos 4, 6 and 9).
- Embroider the small mouth and white facial accents around the eyes, using the supplied threads and Photos 7, 8 and 11 for reference.
- Position the orange witch hat at an angle over one ear (Photos 9 and 12).
Copyright & Credits
The crochet pattern, design, and photos belong to Oksana Kameneva @oksana__kameneva. The written instructions and photos on this page may not be copied, republished, translated, or used for commercial purposes without permission. Please credit @oksana__kameneva when sharing finished items.
Ami_esnek (yatay)
Pick Your Favorite & Pin It
CONTENT END 2
