

Align the outer curves, scallops, and pointed sections carefully. Use plenty of clips around the scalloped edge because the curved sections can shift during sewing.
Stitch around the perimeter using a 1/4-inch (6 mm) seam allowance. Leave the straight inner attachment edge open.
Clip the seam allowances around the curves and trim away excess fabric at the scallop valleys. Make small notches where necessary so the wing can turn smoothly.
Turn the wing right side out through the open inner edge. Use a blunt tool to shape each scallop without stretching the fabric.
Finger-press the edges. Topstitch approximately 1/8 inch (3 mm) from the finished outer edge if desired, using a slightly longer 3 mm stitch length.
Repeat for the second wing. Check that the wings are mirrored and that the floral sides will face outward when attached to the body.
Step 5: Sew the Body
Place the two pink plush body panels together with their right sides facing. Match the top, side curves, and tapered lower edges.
Clip the perimeter, leaving an opening approximately 2 inches (5.1 cm) long near the lower side of the body.
Sew around the remaining edges with a 1/4-inch (6 mm) seam allowance. Backstitch at the beginning and end of the opening to reinforce it.
Trim bulky areas of the seam allowance and clip the curved sections. Turn the body right side out through the opening.
Use your fingers to smooth the tapered sides. Add polyester fiberfill gradually, concentrating on the center of the body and keeping the lower section slightly softer.
The body should remain flexible rather than becoming a firm, rigid stuffed shape. Leave enough room at the upper edge to attach the head securely.
Close the stuffing opening using a ladder stitch.
Step 6: Attach the Ears to the Head
Place the head on a flat surface with its embroidered face pointing upward.
Position the ears along the upper edge of the head, approximately 1/2 inch (1.3 cm) inward from each side. Angle them slightly outward to create a playful bat expression.
The lower edges of the ears should overlap the head seam area slightly. Pin or clip the ears in place and check their height before stitching.
Use strong matching thread and small backstitches to secure each ear. Sew through the ear base and the head fabric, catching the gusset or seam area where practical.
Reinforce the attachment points with a second row of hand stitches if the ears feel loose.
Step 7: Attach the Head to the Body
Place the stuffed body vertically with its wider end at the top. Center the head above the body so the face points forward.
The lower edge of the head should overlap the upper body edge by approximately 1/2 inch (1.3 cm).
Use clips or temporary hand-basting stitches to hold the components together. Check that the face remains centered and that the body hangs straight beneath the head.
Attach the head with a strong hand-sewn whipstitch or ladder stitch. Work around the lower edge, taking small stitches through both layers.
Make additional securing stitches at the left and right sides to prevent the head from tipping forward or backward.
Step 8: Position and Attach the Wings
Lay the bat face-up and arrange the wings at the left and right sides of the upper body.
Place each wing so that its floral surface faces forward. Position the inner attachment edge approximately 1 inch (2.5 cm) below the head-to-body joining seam.
The upper edge of each wing should angle slightly upward, while the scalloped edge extends outward and downward.
Pin the wings in place and compare their angles. Measure from the head center to each wing attachment point to make sure the placement is balanced.
Hand-sew the inner edge of each wing securely to the body using small backstitches. Reinforce the upper and lower attachment points because these areas receive the most handling.
For a flatter decorative bat, sew the wings directly to the body. For a slightly movable appearance, attach only the inner section while securing the upper and lower ends firmly.
Step 9: Final Shaping and Details
Gently distribute the fiberfill inside the head and body by massaging the fabric with your fingertips.
Check that the head is centered, the ears stand at similar angles, and the wings extend evenly from both sides.
Brush the plush pile gently to remove trapped fibers from the seams. If necessary, use a blunt needle to release fibers caught in the stitching.
Inspect all hand-sewn attachments and reinforce any loose areas before using the finished toy as a decorative object.
Customization and Size Adjustments
One of the nicest things about this free plush bat sewing pattern is how easily the design can be adapted to different fabrics, colors, and sizes.
Make a Smaller or Larger Bat
To create a smaller version, reduce the body length, head diameter, ear dimensions, and wing dimensions proportionally. For a larger decorative bat, increase all pattern pieces while checking that the head and body remain visually balanced.
For example, reducing the overall pattern dimensions to approximately 80% creates a smaller character around 9 inches (23 cm) tall. Increasing the pattern to approximately 120% produces a larger character around 13 inches (33 cm) tall.
When scaling the pattern, remember that seam allowances should not necessarily be scaled with the rest of the design. Keep the 1/4-inch (6 mm) seam allowance for small and medium versions, and consider increasing it slightly for a much larger toy made from thick fabric.
Experiment with Colors and Prints
Pink and floral cotton create a soft, romantic appearance, but this design works with many different color combinations.
- Use black plush with purple floral wings for a classic Halloween-inspired bat.
- Choose lavender plush and pastel star-print cotton for a whimsical character.
- Combine cream plush with tiny rose prints for a delicate nursery-style decorative toy.
- Use dark burgundy plush with metallic-looking printed cotton for a dramatic seasonal decoration.
- Try contrasting inner ears and wings in a coordinated solid fabric for a simpler finish.
Change the Facial Expression
The face can be customized with different eye shapes and embroidery styles. Small oval eyes create a sweet expression, while slightly larger circular eyes give the bat a more cartoon-like appearance.
You can also add embroidered eyebrows, a tiny smiling mouth, or subtle cheek details. Keep the embroidery secure and avoid loose decorative elements on toys intended for young children.
Sewing Insight: Getting Beautiful Bat Wings
The wing shape is one of the most distinctive elements of this project. For a cleaner finish:
- Use smooth curves instead of sharp angles when drafting the scalloped edge.
- Clip deeply enough into the seam allowance at the valleys without cutting the stitching.
- Turn the wings carefully and shape each scallop before topstitching.
Common Sewing Mistakes and How to Fix Them
Small stuffed toys require careful handling because even minor differences in seam placement or stuffing distribution can change their appearance.
The Head Looks Flat Instead of Rounded
This usually happens when the gusset is too narrow, the fiberfill is unevenly distributed, or the stuffing is insufficient.
Work the filling toward the sides and center of the head. Add small amounts gradually until the shape becomes evenly rounded. If the gusset is twisted, check the quarter-point markings and seam alignment.
The Wings Have Uneven Scallops
Uneven scallops are often caused by inaccurate cutting or by stretching one side while sewing.
Use a paper pattern for both mirrored wings and clip the fabric carefully around the curved edges. When turning the pieces, use a blunt tool rather than pulling sharply on the points.
The Plush Fabric Shifts During Sewing
Plush fabric can move because its pile creates friction between the layers. Reduce this problem by using clips, sewing slowly, and supporting the fabric with both hands.
If your machine has an adjustable presser-foot pressure setting, reducing the pressure slightly may help. Test the setting on a scrap first.
The Head Tilts to One Side
Check the head-to-body seam and compare the placement of the left and right sides. The head may tilt if the attachment seam is uneven or the stuffing is heavier on one side.
Redistribute the filling before attaching the head permanently. If necessary, remove a small section of the hand stitching and reposition the head.
The Ears Look Too Floppy
If the ears collapse, try using a slightly firmer cotton fabric or adding a thin layer of lightweight woven interfacing to the floral fronts. Apply the interfacing before joining the ear pieces, following the manufacturer’s pressing instructions.
A tiny amount of fiberfill can also provide extra shape, but avoid overstuffing because this may make the ear bases bulky.
Pressing, Finishing, and Caring for Your Plush Bat
Good finishing makes a noticeable difference to the appearance of handmade plush toys. Although plush fabric does not require the same pressing routine as a cotton garment, the cotton components benefit from careful preparation and finishing.
Pressing the Fabric Components
Press the floral cotton before cutting and use a moderate temperature suitable for its fiber content. Avoid pressing directly onto the plush pile unless the manufacturer’s care instructions permit it.
After turning the wings and ears, finger-press their edges into shape. If you need additional definition, use a cool iron with a pressing cloth on the cotton side only, testing a scrap first.
Inspecting the Finished Toy
Before considering the project complete, check all the seams and attachment points.
- Make sure the head is firmly attached to the body.
- Check that both ears are securely stitched.
- Inspect the wing attachments for loose threads.
- Confirm that the stuffing openings are fully closed.
- Check that embroidery ends are secured and hidden.
- Brush the plush fabric gently to remove fibers trapped in the seams.
Pay particular attention to the points where the wings meet the body. These areas should have enough stitching to withstand ordinary decorative handling.
Cleaning and Storage
Follow the care recommendations for the chosen plush and cotton fabrics. For a handmade toy with mixed materials, gentle spot cleaning is often the most practical approach.
Use a slightly damp cloth and a small amount of mild fabric-safe cleaning solution when appropriate. Test the cleaning method on an inconspicuous area first.
Avoid aggressive rubbing, excessive heat, and strong detergents that could damage the plush pile or distort the stuffing.
Allow the toy to dry completely before storing it. Keep it in a clean, dry place away from direct sunlight to help preserve the fabric colors and texture.
Safety reminder: For toys intended for babies or young children, use securely embroidered facial features rather than detachable eyes or buttons. Avoid loose embellishments, inspect all seams regularly, and remember that this handmade decorative project has not been safety tested or certified as a children’s product.
Free Bat Sewing Pattern at a Glance
- Best fabric choice: Short-pile pink plush combined with lightweight floral cotton.
- Skill level: Confident beginner, with basic machine sewing and hand-stitching experience.
- Key techniques: Sewing curved seams, making mirrored pieces, clipping scallops, stuffing, and hand-sewing attachments.
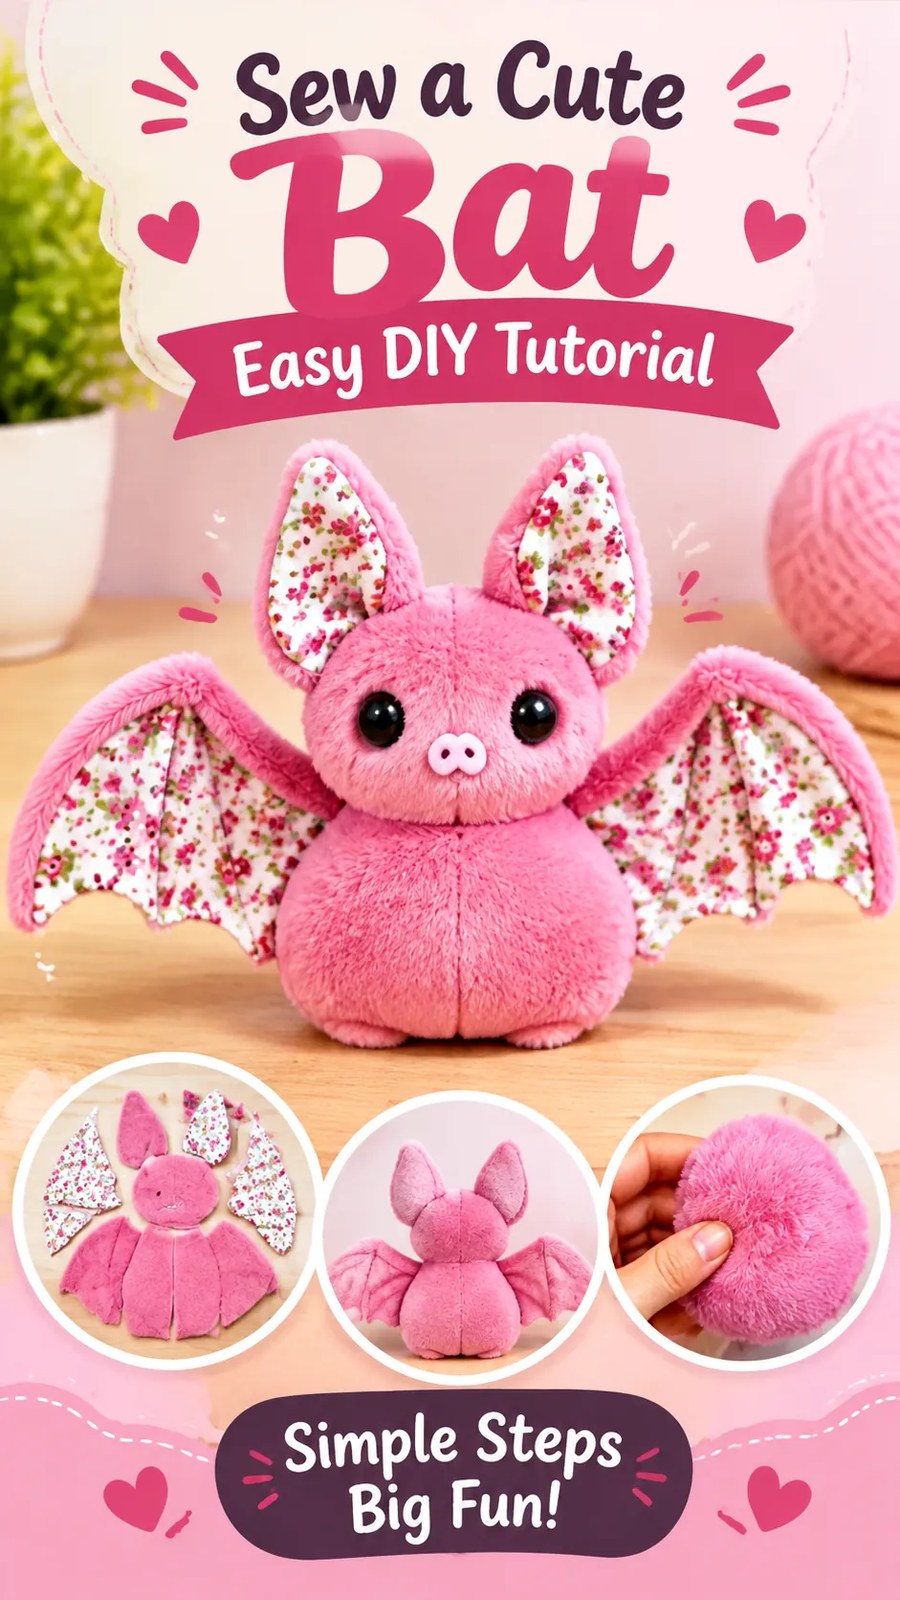
- Finished dimensions: Approximately 11 inches (28 cm) tall with a 10.5-inch (27 cm) wingspan.
- Finishing method: Ladder-stitched openings, reinforced component attachments, and optional wing topstitching.
Create Your Own Sweet Handmade Plush Bat
This free bat sewing pattern is a lovely way to turn soft plush fabric and pretty printed cotton into a charming handmade character. The rounded head, oversized ears, tapered body, and decorative floral wings give the project plenty of personality while keeping the construction manageable for home sewing enthusiasts.
Choose a suitable plush fabric, prepare and press your cotton, and check every pattern measurement before cutting. Read through the complete sewing instructions first, and test your machine needle and stitch length on fabric scraps, especially if you are working with thick or stretchy plush.
Take your time when sewing the curved head seams and shaping the scalloped wings. Accurate clipping, careful turning, and evenly distributed stuffing will help create a neat and attractive finish.
Most importantly, make the project your own. Experiment with different floral prints, soft pastel colors, expressive embroidered faces, and wing shapes to create a unique collection of handmade bats. Whether you make one as a seasonal decoration or sew several as thoughtful handmade gifts, this little plush character is a fun project to add to your sewing list.
Gather your favorite fabrics, prepare your sewing supplies, and enjoy creating your own adorable pink bat!
Tags
Free Bat Sewing Pattern
Plush Bat Tutorial
Stuffed Animal Sewing
DIY Plush Toys
Halloween Sewing Projects
Beginner Sewing Projects
Handmade Plush Animals
