

Bigger Outlines — Make 4
Using Pistachio.
Ch 7. Starting in the 2nd ch from the hook:
Row 1: 6 sc. (6)
Ch 1 and turn. Do not count the turning ch as a stitch.
Row 2: 6 sc. (6)
Fasten off.
Smaller Outlines — Make 2
Using Pistachio.
Ch 6.
Fasten off.
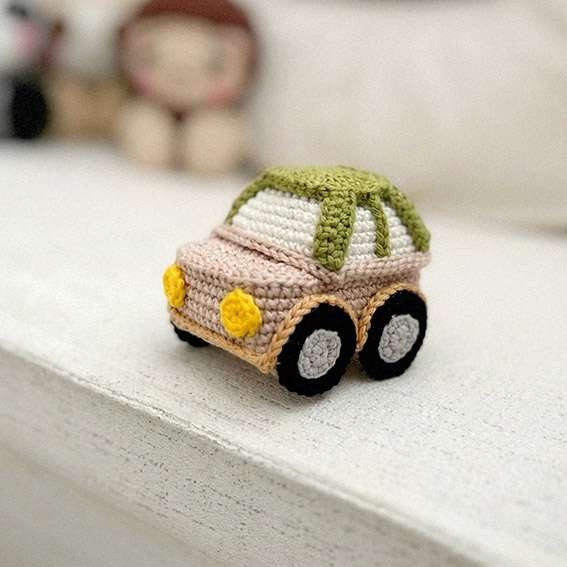
Glue the Bigger and Smaller Outlines to the car as shown.
See Photo 2.
Ami_kare 300×250
Car Hood
Using Almond Beige.
Work back and forth. At the end of each Row, ch 1 and turn. Do not count the turning ch as a stitch.
Ch 14. Starting in the 2nd ch from the hook:
Row 1: 13 sc. (13)
Row 2: Dec, 9 sc, dec. (11)
Row 3: Dec, 7 sc, dec. (9)
Row 4: 9 sc. (9)
Fasten off. Sew the Hood to the front of the car. Finish stuffing the car as you sew.
Ami_esnek (yatay)
Car Outline
Using Almond Beige.
Ch 41. Starting in the 2nd ch from the hook:
Row 1: 40 sl st. (40)
Fasten off. Glue to the car.
See Photo 3.
Wheels — Make 4
Start with Gray.
Rnd 1: 7 sc in MR. (7)
Rnd 2: 7 inc. (14)
Change to Black.
Rnd 3: (Sc, inc) x7. (21)
Fasten off. Glue the Wheels to the car.
Ami_esnek (yatay)
Wheel Outline
Using Caramelito / yellowish brown.
Ch 90.
Fasten off. Glue around the Wheel area.
See Photo 3.
Car Headlights — Make 2
Using Canary Yellow.
Rnd 1: 8 sc in MR. (8)
Fasten off. Glue to the front of the car.
See Photo 3.
Ami_esnek (yatay)
Assembly
- Insert the acetate reinforcement and stuff the Main Part; sew the Hood over the front while finishing the stuffing.
- Glue the Pistachio Top and the 4 Bigger and 2 Smaller Window Outlines in position.
- Attach the 4 Wheels, Car Outline, and Wheel Outline as shown in Photo 3.
- Glue the 2 Canary Yellow Headlights to the front.
Copyright & Credits
The crochet pattern, design, and photos belong to Pontinha da Agulha @pontinhadaagulha. The written instructions and photos on this page may not be copied, republished, translated, or used for commercial purposes without permission. Please credit @pontinhadaagulha when sharing finished items.
Pick Your Favorite & Pin It
CONTENT END 1
