

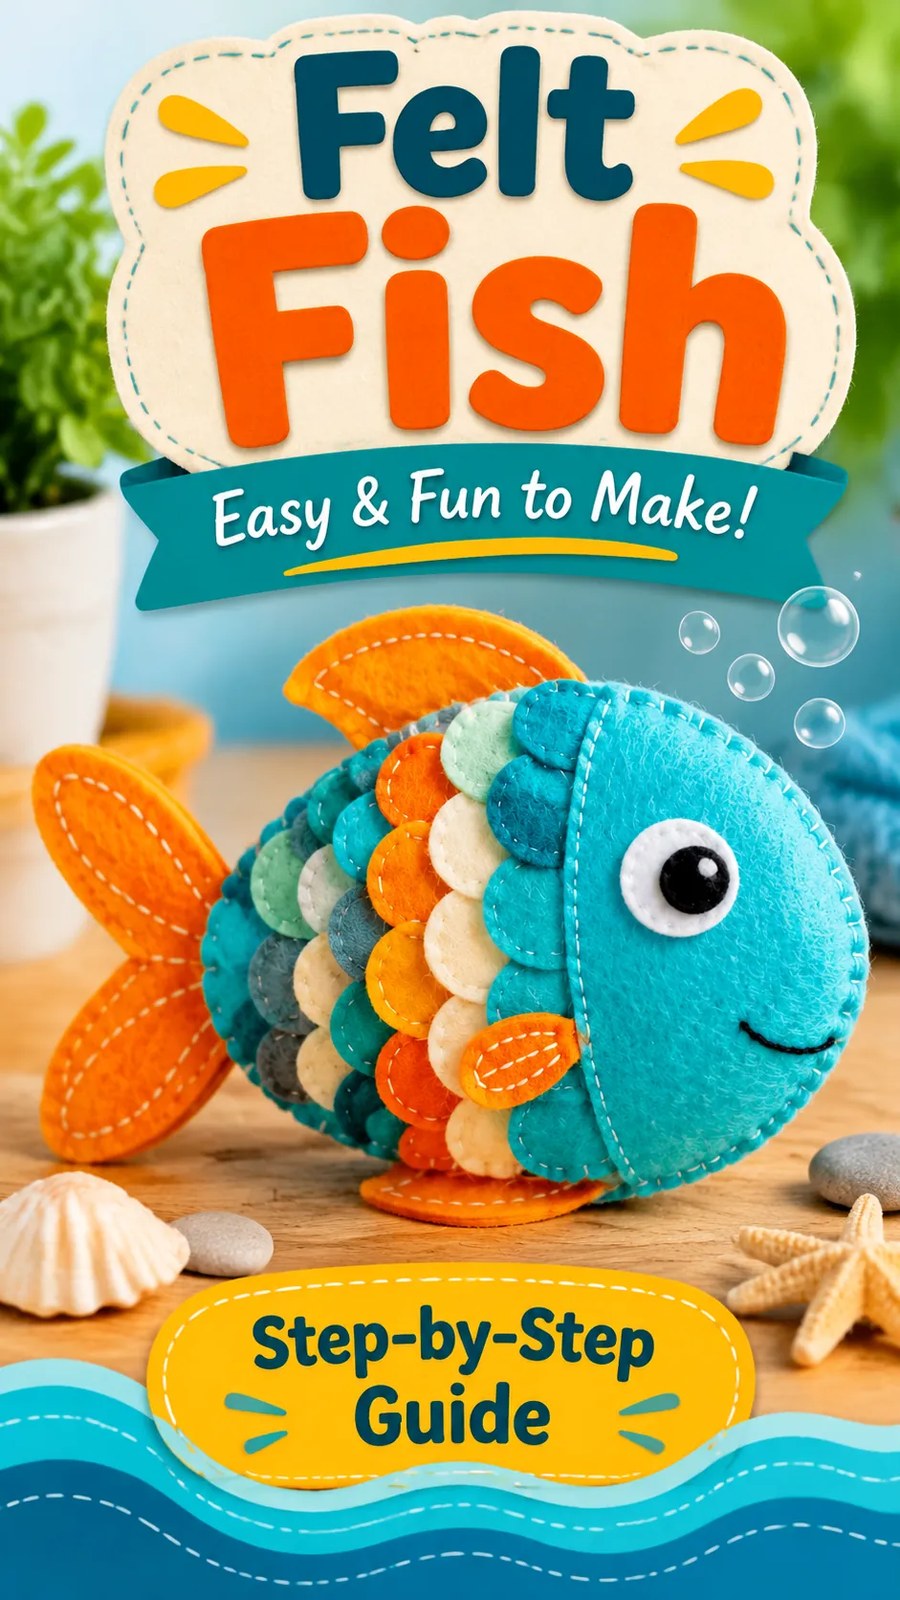
Place one face appliqué over the front section of each body panel. Align its rounded nose edge with the nose area and ensure that the rear curve overlaps the decorative scales slightly or meets them neatly.
- Position the face patch approximately 4.6 inches (11.7 cm) from the tail attachment edge at its upper rear reference point.
- Pin or clip the patch in place.
- Attach it with evenly spaced blanket stitches around the curved edge.
- Position the white eye circle approximately 1.1 inches (2.8 cm) behind the nose tip and 1.5 inches (3.8 cm) above the horizontal centerline.
- Attach the white circle with small running stitches or blanket stitches.
- Center the black pupil on the white circle and secure it with small stitches.
- Repeat on the other body panel, reversing the eye position as needed to maintain symmetry.
- Embroider a short curved smile below the eye using black embroidery floss.
Use short, secure stitches for facial features. If the fish is intended for a young child, embroider both the white eye outline and pupil instead of attaching small felt pieces that might detach.
Step 8: Assemble the Tail and Fins
Place the two tail pieces together with their right sides facing outward. Felt does not have a traditional right side in every case, so select the more attractive surface for the outside.
- Align the tail edges carefully.
- Blanket stitch around the two rounded lobes and outer curved edges.
- Leave the straight base edge open.
- Do not add heavy stuffing. A very small amount may be placed between the layers if a padded effect is desired.
- Set the tail aside.
Repeat the same procedure for the dorsal, lower, and two side fins. Each fin should have two felt layers joined around its exposed perimeter, leaving its base open for insertion.
Use white running stitches or decorative blanket stitches along the orange fins to create the visible contrasting detail. Keep the open bases free from decorative stitching so they can be attached cleanly.
Step 9: Position the Fins Between the Body Panels
Place the two decorated body panels together with their right sides facing inward. Before sewing, position the fins between the layers so their bases extend slightly into the seam allowance.
Use the following approximate placement measurements, measured from the tail attachment edge along the body centerline:
- Tail: Center the 1.2-inch (3 cm) base on the rear body edge.
- Dorsal fin: Position its base along the upper edge approximately 2.8 inches (7.1 cm) from the tail attachment.
- Lower fin: Position its base along the lower edge approximately 3.8 inches (9.7 cm) from the tail attachment.
- Side fins: Place one on each side of the fish, approximately 4.5 inches (11.4 cm) from the tail attachment edge.
For the side fins, keep the finished decorated pieces on the outside of the fish rather than inserting them into the body seam. They will be attached later as surface appliqué.
Clip the tail and top and bottom fins between the body layers. Make sure their raw bases are caught within the 1/4-inch (6 mm) seam allowance.
Use a few temporary hand-basting stitches to prevent the pieces from shifting. Check that the fins point outward and that the decorative stitching will remain visible once the body is turned right side out.
Step 10: Sew the Main Body
Start sewing at the lower front section of the body, leaving a turning opening approximately 2 inches (5.1 cm) long along the lower curved edge, away from the inserted fins.
- Align the two body panels with their right sides together.
- Match the tail attachment edge, upper curve, nose, and lower curve.
- Check that the inserted tail, dorsal fin, and lower fin remain correctly positioned.
- Sew around the body using a 1/4-inch (6 mm) seam allowance and a straight stitch approximately 2.5 to 3 mm long.
- Backstitch at the beginning and end of the opening.
- Reinforce the stitching where the fins enter the seams.
- Stop at the marked turning opening rather than sewing the entire perimeter closed.
- Trim bulky seam allowances carefully where necessary, without cutting through the stitching.
- Clip small notches into tight concave curves, keeping the clips away from the seamline.
Because felt does not fray, overlocking or zigzag seam finishing is not necessary. However, a neat straight stitch and careful seam trimming will help the body sit smoothly.
Turn the fish right side out through the opening. Use a blunt turning tool to gently shape the nose, tail attachment, and curved edges. Avoid pushing too hard against the felt.
Step 11: Stuff the Fish Body
Use small amounts of polyester fiberfill rather than inserting one large piece. Begin at the nose and gradually work toward the center and rear of the body.
- Separate the fiberfill into small, fluffy pieces.
- Push the stuffing gently into the nose and front curves.
- Add more stuffing through the opening, distributing it evenly along the body.
- Fill the center until the fish has a softly rounded profile.
- Keep the tail and fins relatively flat so they maintain their shape.
- Check the fish from both sides to make sure the stuffing is evenly distributed.
- Fold the seam allowance of the opening inward by approximately 1/4 inch (6 mm).
- Close the opening using a neat ladder stitch or small slip stitches with matching thread.
- Secure the final stitches with a discreet knot hidden inside the seam.
The body should feel softly padded rather than tightly packed. Excessive stuffing can stretch the felt and distort the decorative scale arrangement.
Construction Note:
Add the stuffing gradually and check the fish’s shape frequently. A softly filled body gives the project a rounded appearance while allowing the felt panels and decorative details to remain smooth.
Step 12: Attach the Side Fins
Place one completed side fin on each side of the fish, approximately halfway along the body and slightly below the horizontal centerline.
- Position each fin so its rounded tip points toward the tail.
- Allow the base to overlap the body by approximately 1/4 inch (6 mm).
- Attach the base with closely spaced backstitches or blanket stitches.
- Reinforce both ends of the attachment line.
- Check that the two fins are placed at similar heights.
Keep the decorative stitching on the fin visible. Avoid stitching through the entire stuffed body unnecessarily, as this can compress the fiberfill and create an uneven surface.
Step 13: Final Decorative Stitching
Inspect the fish and add any missing decorative stitches along the face, scales, fins, and body edges.
Use short running stitches to create small white accents on the orange fins. Add a few decorative stitches along selected scale edges to emphasize their layered appearance.
Check the embroidered smile and eye placement from both sides. Remove temporary marking lines and loose threads carefully.
Gently reshape the stuffing and smooth the felt with your hands. The fish is now ready for display or supervised play, depending on the materials and intended use.
Customization and Size Adjustments
One of the best features of this felt fish sewing pattern is how easily its colors and decorative details can be changed. The basic body silhouette can remain the same while the scales, fins, and face create an entirely different character.
Make a Smaller or Larger Fish
To create a smaller or larger version, enlarge or reduce the main body pattern proportionally before cutting. A scale factor of 0.8 creates a smaller version, while a scale factor of 1.2 creates a larger version.
For example, a body pattern originally measuring 7.5 inches long becomes 6 inches long when reduced to 80 percent. At 120 percent, the same length becomes 9 inches.
Scale the face patch, fins, and decorative pieces by the same factor so the proportions remain balanced. For very small versions, simplify the number of scales and use embroidered facial details rather than tiny layered felt circles.
Remember that the seam allowance should be checked after resizing. If the scaled seam allowance becomes too narrow to sew reliably, redraw it as a consistent 1/4 inch (6 mm) rather than relying on the resized allowance.
Experiment with Color Combinations
The colorful scale arrangement is an important feature of the fish. Try different palettes to create a distinctive handmade decoration.
- Ocean theme: Combine turquoise, navy, seafoam, and pale blue felt.
- Warm tropical theme: Use coral, orange, mustard, and cream.
- Soft nursery theme: Choose sage, dusty blue, beige, and pale gray.
- Rainbow fish: Arrange the scales in a gradual color sequence.
- Minimalist fish: Use one main color with contrasting decorative stitches.
Change the Fin and Face Design
Experiment with rounded fins, pointed fins, or longer decorative tail lobes. You can also make the face patch a contrasting color to create a more graphic appearance.
For an especially playful result, embroider different expressions such as a small smile, curved eyebrows, or tiny cheek details. Keep any small decorative elements firmly attached and avoid detachable pieces when making an item intended for young children.
Sewing Insight: Keep the Scales Even
The overlapping scales create most of the fish’s visual texture. Make a simple paper layout before stitching, leaving consistent spacing between rows. This makes it easier to balance the colors and avoid crowded areas near the face and tail.
Common Felt Fish Sewing Mistakes and Troubleshooting
Uneven Body Curves
If the upper and lower body edges do not match, the finished fish may look twisted or uneven. Check that both body panels were cut from the same pattern and aligned before sewing.
Use clips rather than stretching the felt to force the edges together. Small differences can be corrected by trimming excess felt before assembly, provided the seam allowance remains consistent.
Scales That Curl or Lift
Scales may curl if they are cut from thin felt or stitched too tightly. Use stable medium-weight felt and avoid pulling the embroidery floss excessively.
Keep the upper edge of each scale tucked neatly beneath the next row. If a scale lifts, secure its exposed edge with a few additional small stitches.
Lumpy or Uneven Stuffing
Large clumps of fiberfill can create an irregular body shape. Remove some stuffing if the fish feels too firm, then redistribute the filling into smaller sections.
Use a blunt tool to reach the nose and curved edges. Avoid pushing sharply against the felt, which could create holes or stretch the stitching.
Fins That Shift During Sewing
Fins can move when caught between the body panels. Baste their bases temporarily before machine stitching, and check that the outer sections point in the intended direction.
Slow down when sewing around the attachment points. Reinforce the seams with a few extra stitches where the fins meet the body.
Visible Gaps at the Turning Opening
If the opening is not closed neatly, the seam can look different from the surrounding body edges. Fold both raw edges inward by the same amount and use small ladder stitches to close the opening.
Keep the stitches evenly spaced and pull the thread gently so the seam closes without puckering.
Pressing, Finishing, and Felt Care
Felt does not require the same pressing process as conventional woven fabric. Excessive heat can flatten the fibers, change the texture, or damage some synthetic materials.
If pressing is necessary, check the manufacturer’s care guidance first. Use a low temperature appropriate to the fiber content, place a pressing cloth between the iron and felt, and test on an inconspicuous scrap.
Final Inspection
Before considering the fish complete, inspect the following areas:
- Both body panels are joined securely.
- The tail and upper and lower fins are firmly caught in the body seams.
- The side fins are attached securely.
- All decorative scales lie flat and have secure stitching.
- The eyes and smile are neat and balanced.
- The turning opening is completely closed.
- The stuffing is distributed evenly without excessive firmness.
- There are no loose threads, exposed knots, or sharp pins.
Cleaning and Storage
Felt care depends on its fiber content and the type of stuffing used. For a decorative fish, spot cleaning with a slightly damp cloth is a cautious starting approach. Avoid soaking the toy unless all materials are confirmed washable.
Do not scrub embroidered details aggressively. Allow the fish to dry completely in a well-ventilated area before storing it. Keep it away from excessive heat and prolonged direct sunlight to help preserve the colors and texture.
Important: If this project is intended for a young child, check every seam and decorative attachment regularly. Use embroidered facial features and avoid small detachable components. The decorative fish should not be treated as a certified or safety-tested toy.
At a Glance: DIY Felt Fish Sewing Pattern
- Best fabric: Medium-weight turquoise felt with assorted contrasting felt scraps.
- Skill level: Confident beginner to intermediate.
- Key technique: Layered felt appliqué combined with blanket stitching and stuffed-body construction.
- Size adjustment: Scale the body, face, scales, and fins proportionally while maintaining a practical seam allowance.
- Finishing method: Neat decorative hand stitching, light stuffing, and a concealed ladder-stitched opening.
Create Your Own Colorful Felt Fish
This felt fish sewing pattern is a cheerful way to explore fabric appliqué, decorative hand stitching, and simple soft-toy construction. Its rounded body, layered colorful scales, orange fins, and friendly embroidered face create a charming handmade decoration with plenty of room for personal creativity.
Choose felt that holds its shape, prepare the fabric carefully, and check every measurement before cutting. Read through the complete pattern first, organize the decorative pieces by color, and test your stitches on felt scraps before starting the main construction.
Take your time positioning the scales, securing the fins, and distributing the stuffing. Small details make a noticeable difference to the finished shape. You can also personalize the project with new color combinations, alternative fin shapes, or embroidered facial expressions.
Whether you are practicing new sewing techniques or creating a colorful handmade gift, this DIY felt fish is a rewarding project to add to your collection of easy felt sewing ideas. Enjoy experimenting with the details and creating a fish with its own personality!
Tags
Felt Fish Sewing Pattern
DIY Felt Fish
Stuffed Animal Sewing
Easy Felt Crafts
Handmade Fabric Toys
Felt Appliqué
Ocean Themed Crafts
Beginner Sewing Projects
