

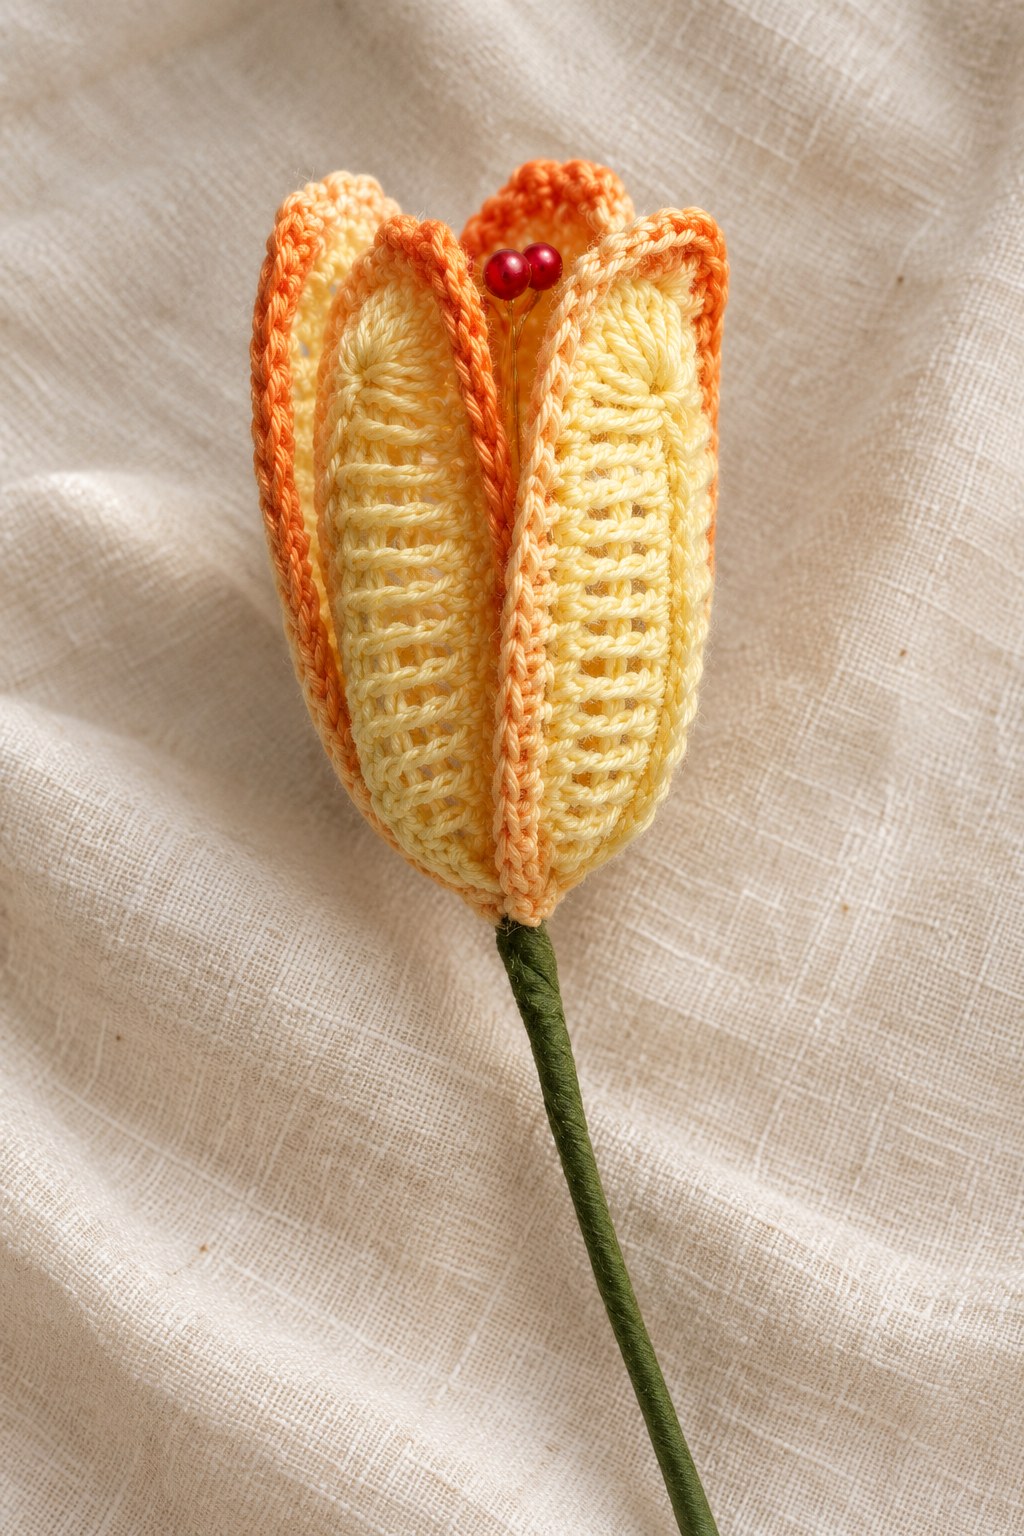
Shape the Two Small Upper Lobes
Work three complete doubles in the next shared anchor, then one single, then three complete doubles in the following shared anchor. Each three-double group has its own anchor, with the single between the groups separating the two raised portions. This is the exact central shaping printed for the outer round.
Do not combine all six doubles into one anchor or close either three-double group into a cluster. The chart shows the two separate fans and their lower middle stitch. That arrangement creates a subtle divided top rather than a sharp point, matching the rounded upper petal edges visible in the finished tulip.
Finish the Wired Petal
Continue with one double and fifteen singles, then the closing slip stitch, incorporating the wire through the round. Break off the yarn. The wired edging produces thirty-nine worked stitches before the closing join, following the source sequence around the thirty-five stitch tops of the first round.
The final slip stitch closes the supported round; it is not another increase at the tip. Compare the two sides and the small paired fans before moving on. Make four complete petals with this same sequence, keeping their lower wire ends available for assembling the flower around its pearl center.
Shaping checkpoint: The petal tip uses three doubles in one anchor, a single in the next, then three doubles in the next. The two fans stay separate and the support wire follows the outer perimeter.
Use the Source Palette as the Color Reference
Soft yellow and soft orange are the two listed cotton colors. The finished source example shows pale bodies with orange-toned rims, while its written crochet sequence does not prescribe a separate color for each named round. Keep the photograph beside the work when choosing how to apply the two shades.
Record your chosen color placement in project notes rather than presenting it as a printed fixed schedule. The structural requirements remain four petals, the tall first-round side stitches and the wired shaped border. Color variation should preserve those visible construction features instead of disguising a different petal shape beneath a similar yellow-and-orange palette.
Make the First Pearl Pistil
Pass 0.3 mm wire through one red pearl and twist the two wire ends beneath it, following Figure 1. The pearl is the visible tip of the pistil, while its twisted support extends below. Keep the bead at the upper bend rather than placing it halfway down an exposed straight wire.
The source supplies the wire diameter and pearl color but no cut length or bead size. Use the actual pearl opening and the illustrated support relationship without adding an unsupported numerical measurement. This pistil is a bead-and-wire component; it does not require an additional crocheted tube or yarn-covered bead.
Combine Three Pistils
Repeat the pearl-and-wire method to prepare three pistils in total. Twist their lower support ends together following Figure 2. The three red pearls form a small cluster that sits inside the assembled flower, visible through the opening between the upright petal rims.
Keep all three pearl-topped components in the center even if a particular front view hides one behind the petals. The diagram confirms the complete count. Their exact relative heights and wire lengths are not numerically specified, so preserve the illustrated small cluster rather than claiming a measured height difference from the source.
Attach All Four Petals around the Center
Bring the four wired petals to the combined pistils, following Figure 3. The drawing shows all four components directed toward the same lower attachment area. Their taller sides rise around the bead cluster to form the tulip’s narrow cup, with their shaped tips remaining near the upper opening.
Maintain the four-petal count during assembly and keep the pearl cluster inside. The source does not call for a six-petal arrangement, a second outer ring or a crocheted calyx. The upright overlap of these four long pieces supplies the flower head shown in the finished reference.
Twist the Support and Tape the Stem
Twist the corresponding petal and pistil wire ends together following Figure 4. This combines the separate supports into the stem beneath the flower. Keep the lower attachment gathered while preserving the upper cup opening and its three pearl pistils. The source gives no numerical twist count or separate adhesive step.
Cover the stem with green floral tape, as printed. The finished example has a small green transition beneath the petal bases and a slender taped support below. No separate leaf pattern accompanies this entry, and no additional leaf is needed to complete the supplied four-petal, three-pistil construction.
Assembly checkpoint: Prepare three pearl pistils, combine their supports, surround them with all four petals, twist the corresponding wires and finish with green floral tape.
Check the Flower and Preserve the Instructions
Look for four elongated petals with supported rims and the small red pearl cluster inside their upper opening. If a petal top looks sharply pointed, review its two separate three-double fans and the single between them. If its side is too short, verify the ten trebles on each side of round one.
Keep the original petal chart with all four assembly figures. The chart supplies the anchor placements around the chain, and the figures supply the bead and wire relationships. The finished photograph helps with the cup silhouette, but overlapping petals can hide a component, so it should not replace the explicit four-petal count.
Source Credit and Care
This guide follows Tulip on PDF pages 160–161 of the supplied 350 page 1 (1).pdf. Captions identify the finished source example, original chart and actual assembly drawings. The expanded guide retains the supplied stitches and component counts without claiming a physical crochet test or an exact finished size.
Use care appropriate to the actual cotton, pearls, wire and floral tape. No washing, pressing or stiffening method is provided. Support the base and stem when moving the flower, protecting the wired rims and pearl center from pulling. Keep your chosen cotton and color-placement notes with the source figures for future reference.
At a Glance
- Four two-round crochet petals use0.6mm perimeter wire.
- Three red pearls receive0.3mm wire supports.
- The petal bodies use long treble sides and a nine-double end fan.
- Attach the petals around the pearl center, twist the supports and tape the stem.
Finish Your Crochet Tulip
Complete both rounds on all four petals and prepare the three red pearl pistils before assembling the upright cup. Check the separate wire sizes, paired upper fans and common lower attachment, then finish the supported stem with green floral tape. Click the Pin to see the crochet tulip pattern and illustrated guide, and save the source chart and assembly figures before beginning.
Tags
Crochet TulipCrochet FlowersCrochet PatternWired PetalsPearl PistilsTreble CrochetCrochet Charts
