


There’s something wonderful about making something by hand for a little one. Every stitch adds a personal touch, turning a simple crochet project into something meaningful. If you enjoy making practical items with a handmade feel, this crochet Moses basket is a lovely project to try.
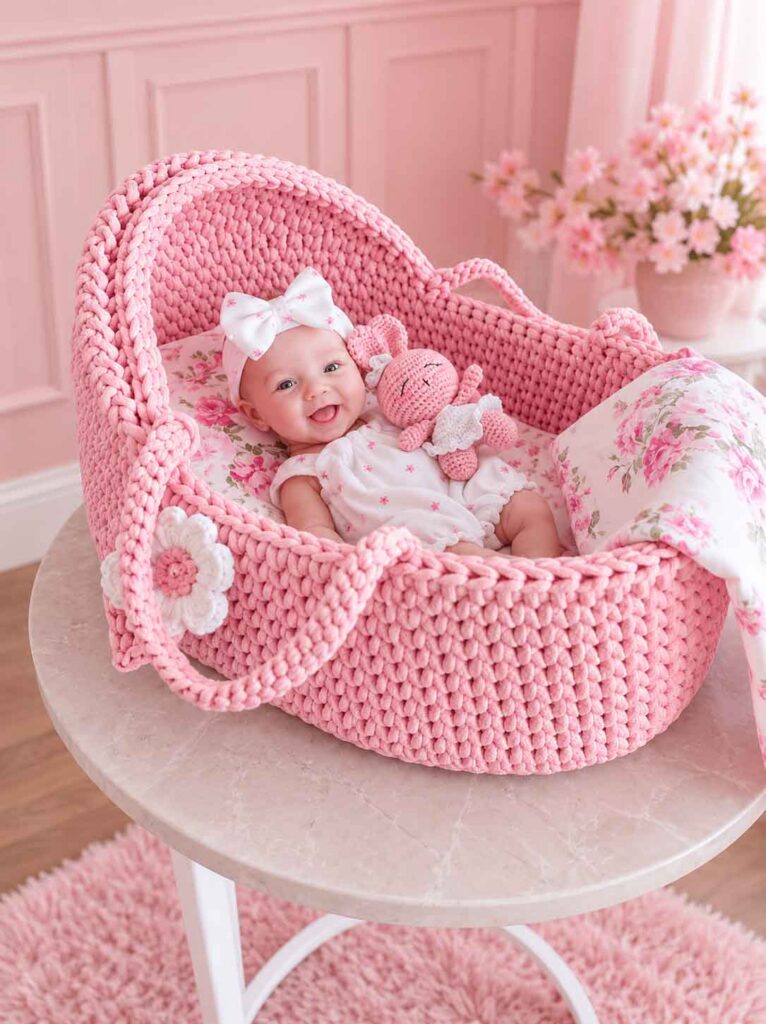
Made with sturdy T-shirt yarn, the basket has a modern look and a firm structure. Its oval base, crocheted sides, built-in handles, and rounded bonnet give it a charming appearance that would look beautiful in a nursery.
This project is a good choice for crocheters who enjoy working with thicker yarn and creating pieces that hold their shape. You could make it as a nursery decoration, a storage basket for baby blankets and toys, or a thoughtful handmade gift for an expecting parent.
Important: Although this pattern is inspired by a traditional Moses basket, a crocheted basket should not be assumed safe for infant sleep or carrying a baby. Use it for decorative purposes or baby-item storage unless the complete product has been independently assessed and approved for its intended use.
Crochet Moses Basket Pattern Details
- Skill level: Intermediate
- Yarn: Premium T-shirt yarn
- Crochet hook: Size 9, using the sizing system appropriate to your pattern
- Additional supplies: Stitch markers and a yarn needle
- Approximate base measurements: 45 cm long × 30 cm wide
- Construction: Worked in a continuous spiral and in rows
The pattern uses basic crochet stitches, increases, and decreases. The main challenge is maintaining even tension, especially when working with thick T-shirt yarn.
ad 26 3
Materials You’ll Need
Before you begin, gather the following supplies:
- 4 balls of premium T-shirt yarn
- Size 9 crochet hook
- Stitch markers to keep track of rounds
- Yarn needle for weaving in loose ends
The amount of yarn needed may vary depending on the thickness of your yarn, your personal tension, and the final size of your project.
Crochet Abbreviations
The pattern uses the following abbreviations:
ad 26 3
- sc: Single crochet, worked into the center of the stitch from the previous round
- ch: Chain
- dup: Work 2 stitches into the same stitch to increase
- length: Skip 1 stitch from the previous round
- dec: Decrease
Keep these abbreviations handy while crocheting so you can follow the instructions more easily.
ad 26 3
A quick note: The original instructions also use the abbreviation dc, which normally means double crochet in US terminology. Because some of the stitch descriptions and round totals are unclear, check the intended stitch before beginning those rounds.
Step 1: Crochet the Oval Base
The base is worked in a continuous spiral to create a smooth foundation without a visible joining seam.
Start by chaining 13. Begin working into the second chain from your hook, following the instructions below.
Base Instructions
ad 26 3
Round 1: Work 11 sc, 5 sc in the next chain, 10 sc, then 2 increases. (30 stitches)
Round 2: Work 12 sc, 3 increases, 12 sc, then 3 increases. (36 stitches)
Round 3: Work 12 sc, then repeat the specified increase sequence of 1 dc and 1 sc three times. Work 12 sc, then repeat the same sequence on the opposite end. (42 stitches)
Round 4: Work 12 sc, then repeat the specified sequence of 2 sc and 1 dc three times. Work 12 sc, then repeat the sequence on the opposite end. (48 stitches)
Round 5: Work 12 sc, then repeat the specified sequence of 1 dc and 3 sc three times. Work 12 sc, then repeat the sequence on the opposite end. (54 stitches)
Round 6: Work 12 sc, then repeat the specified sequence of 4 sc and 1 dc three times. Work 12 sc, then repeat the sequence on the opposite end. (60 stitches)
Round 7: Work 12 sc, then repeat the specified sequence of 1 dc and 5 sc three times. Work 12 sc, then repeat the sequence on the opposite end. (66 stitches)
Round 8: Work 12 sc, then repeat the specified sequence of 6 sc and 1 dc three times. Work 12 sc, then repeat the sequence on the opposite end. (72 stitches)
Round 9: Work 12 sc, then repeat the specified sequence of 1 dc and 7 sc three times. Work 12 sc, then repeat the sequence on the opposite end. (78 stitches)
Round 10: Work 12 sc, then repeat the specified sequence of 8 sc and 1 dc three times. Work 12 sc, then repeat the sequence on the opposite end. (84 stitches)
Round 11: Work 1 sc in every stitch around. (84 stitches)
Tips for a Neat, Flat Base
As you work, lay the base on a flat surface every few rounds to check its shape. The edges should remain relatively flat rather than curling or becoming wavy.
If the base begins to distort, check your stitch count and tension before continuing. The original pattern suggests adjusting the increase placement, but the stitch counts and increase sequences should be verified before making those changes.
Step 2: Crochet the Basket Sides
Once the base is complete, you can begin building the sides.
Continue working around the oval without adding any more increases for nine rounds.
For the first round of the sides, work into the back loop only. This creates a defined ridge between the base and the walls of the basket.
For the remaining rounds, continue with the same stitch used for the base, maintaining consistent tension throughout.
As you work, the sides should gradually rise from the oval foundation. Because T-shirt yarn is thick, take your time and check that the walls remain even.
Tip: Use stitch markers to identify the beginning of each round. They are especially helpful when working in a continuous spiral.
Step 3: Add the Handles
The handles are created by chaining across sections of the basket and skipping stitches to leave openings.
Follow the instructions below for the handle round.
