

For round three begin six plus one chains and work six singles along the new stem. Continue with thirty-six singles around the petal and six slip stitches on the returning stem path. Cut the yarn. Make four Petals A before beginning their joining round.
For the joining path, skip eighteen, join yarn and work six slip stitches. Begin one plus one chains and work one single, then continue with six slip stitches. Join the next Petal A and repeat the source-charted path through the four pieces. Keep this as the partial joining route shown in the diagram, not an ordinary round that must work every perimeter stitch.
Petal B Foundation and First Round
Begin ten plus one chains for a shorter green petal. Work two singles, two half doubles, two doubles, two half doubles, four singles, two half doubles, two doubles, two half doubles and two singles around the chain. Twenty worked stitches result from the two sides of the ten-position foundation.
The green pieces repeat the larger petal’s general oval construction at a smaller scale, but their actual numbers differ. Keep the four-single far-end portion and two-stitch height groups rather than shortening a pink petal by an arbitrary number of rows.
Petal B Round 2: Reach Twenty-Four
Work two singles, two half doubles, two half-double increases, two half doubles and four singles. Continue with two half doubles, two half-double increases, two half doubles and two singles. Four increases take twenty to twenty-four.
The source’s chart shows this shorter component with its separate stem. The twenty-four count belongs to the petal body before that stem and joining path. Do not combine the stem’s six singles into the body count or substitute the pink petal’s thirty-six-stitch perimeter.
Petal B Stem and Joining Path
For round three begin six plus one chains and work six singles. Continue with one slip stitch at the base of the petal, then cut the yarn. Unlike Petal A, this instruction does not add a full thirty-six-single perimeter pass or a six-slip return around the whole petal.
Make four green pieces. For the joining round, skip eleven, join yarn and work seven slip stitches. Begin one plus one chains and work one single, then seven slip stitches. Join the next Petal B and repeat through the four-piece set. Retain the seven-slip tracks instead of copying the pink set’s six-slip tracks.
Joining checkpoint: Petals A use skip eighteen and six-slip tracks. Petals B use skip eleven and seven-slip tracks. Both sets contain four components, but their shaping and joining counts differ.
Insert Wire in the White Base
Insert the listed wire at the bottom of the completed stuffed core and twist it, following the source photograph. The wire supports the base from below. Its cut length, bend radius and number of twists are not numerically specified, so do not present an invented hardware dimension as a printed instruction.
Keep the stuffed surface intact while positioning the support. The source uses the wire below the white component rather than threading it through the upper petal rims. Compare the completed base and the wire-stage image before placing it inside the pink ring.
Place the Core inside Petals A
Insert the white base into the joined pink Petals A. The actual process image shows the white top appearing between the taller pink pieces while the lower component bases surround it. Keep the four pink sections connected around the core rather than sewing them as a flat flower face.
Lock the base of Petals A using yarn or wire, as the source permits. The text offers those two fastening materials but does not provide a counted sewing seam or measured overlap angle. Follow the pictured relationship and keep the attachment beneath the visible petal body.
Add Petals B and Cover the Stem
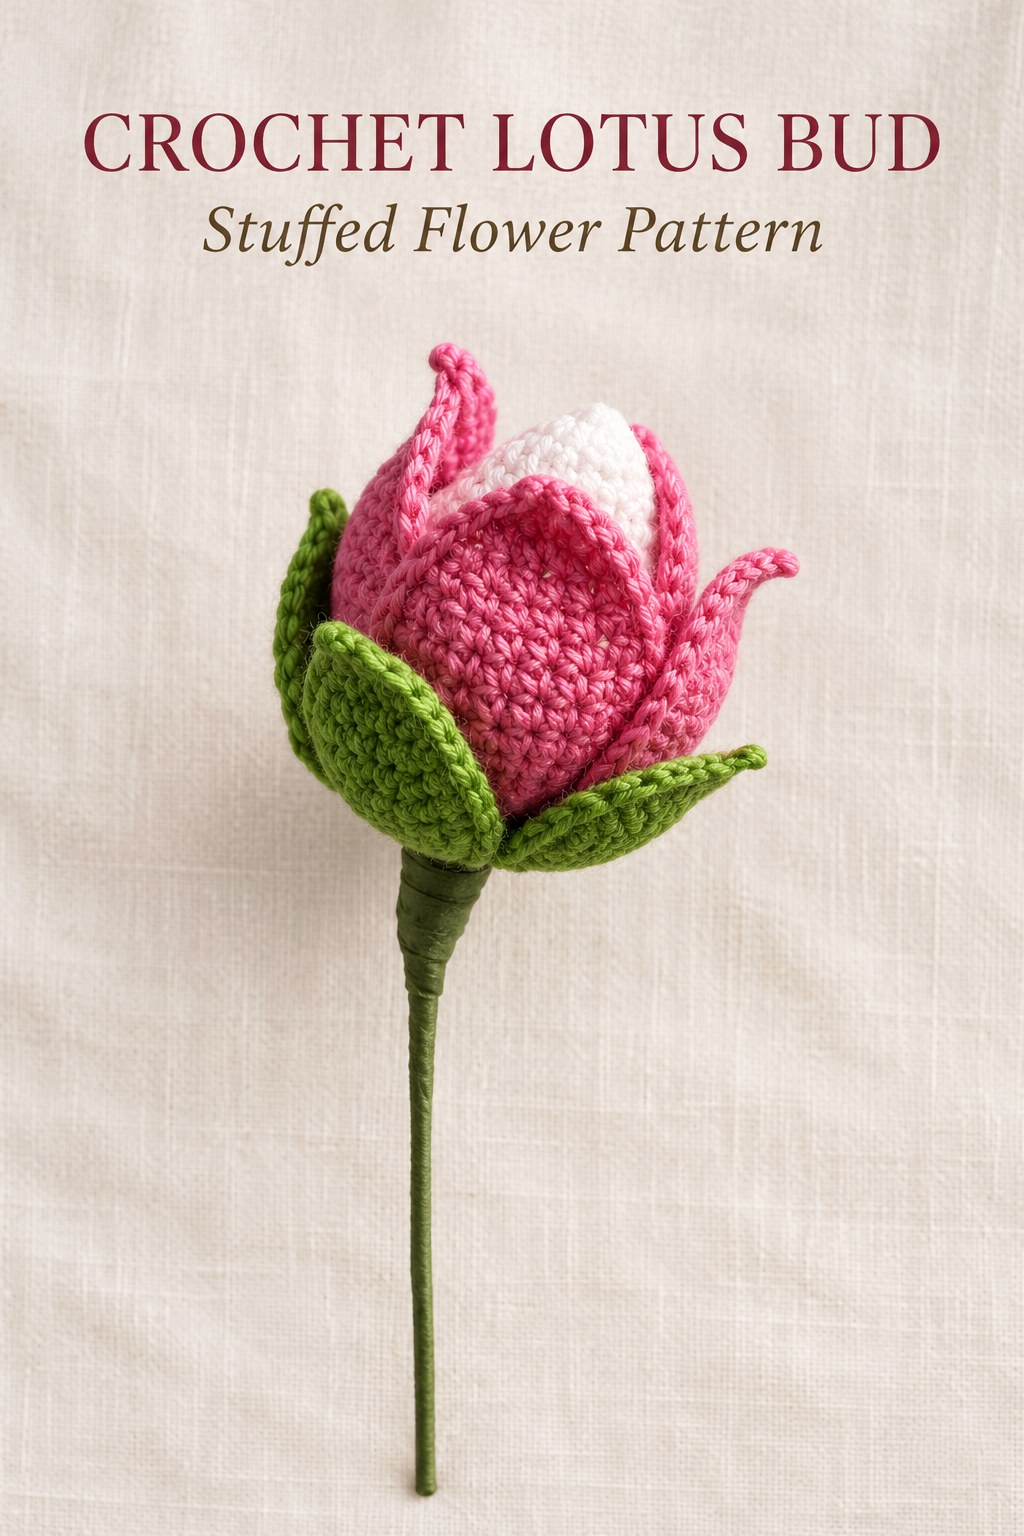
Place the joined green Petals B outside the pink set and secure using yarn or wire. The green pieces form the lower outer layer, framing the compact pink bud and partially visible white center. Do not alternate all eight pieces in one ring or put the shorter green set inside the pink one.
Cover the support stem with green floral tape. The final source photograph shows the completed nested bud and tape being applied below it. No additional leaf, bead, stamen or adhesive is listed in this design. Keep those unlisted components separate from the source method.
Check the Counts and Layer Order
If the core count becomes sixty, review the two-round and three-round combined totals rather than increasing the live circumference. If Petal A fails to reach thirty-six or Petal B twenty-four, count their six and four half-double increases. If a joining path differs, compare the separate six-slip and seven-slip tracks with the charts.
If the bud looks like an open flat flower, review the nesting of the stuffed core, pink set and shorter green set. The compact source shape comes from the joined rings placed around the filled base. No gauge or measured finished size is supplied to predict an exact alternate scale when changing cotton.
Source Credit and Care
This guide follows Lotus Bud on PDF pages eighty-five through eighty-seven of the supplied 350 page 1 (1).pdf. The illustrations are actual source charts, finished examples and construction photographs, with their roles identified in captions. The expanded explanations preserve the complete core and both petal sets without claiming a physical crochet test.
Follow care guidance appropriate to the actual cotton, stuffing, wire and floral tape. No washing, stiffening, blocking or heat-treatment procedure is supplied. Support the taped stem and lower bud when moving the decoration, protecting the raised petal tips from unnecessary pulling or crushing.
At a Glance
- One thirteen-round white core receives stuffing after round nine.
- Four pink Petals A form the larger joined inner ring.
- Four smaller green Petals B form the outer ring.
- Support the core with wire, nest and secure both rings, then tape the stem.
Finish Your Crochet Lotus Bud
Prepare the complete core and both four-piece petal sets, checking each component’s own stitch counts and joining path. Support the filled base, nest the pink and green layers in order and finish the taped stem. Click the Pin to see the crochet Lotus Bud pattern and illustrated guide, and save all three source charts and the assembly photographs before beginning.
Tags
Crochet Lotus BudCrochet FlowersCrochet PatternStuffed CoreJoined PetalsWired FlowersCrochet Charts
