


There’s something wonderfully satisfying about watching a C2C blanket grow. You start with just a tiny little cluster of stitches in one corner, and before you know it, you’re holding a full-sized blanket in your hands.
If you’ve never tried corner-to-corner crochet before, don’t let the name intimidate you. Once you understand how the little squares, or “tiles,” connect, the pattern becomes surprisingly easy to follow. Today, I’m walking you through the whole process, from that very first tile to the final corner.
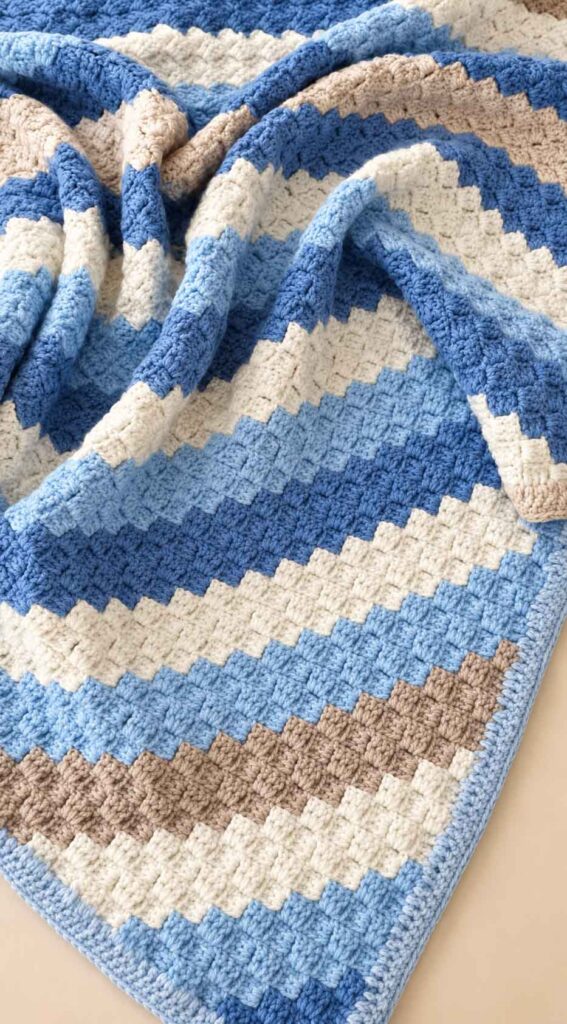
Unlike a traditional blanket that is worked back and forth in straight rows, a C2C blanket is worked diagonally. You begin in one corner, increase until the blanket reaches the desired width, and then decrease back down to the opposite corner.
One of my favorite things about this technique is how versatile it is. You can keep the colors simple, create stripes, make bold color blocks, or even use a graph to crochet pictures and letters. The little squares work almost like pixels, which makes C2C especially fun for personalized blankets.
For this pattern, we’ll keep things simple and make a classic square blanket. Once you get comfortable with the technique, you can easily experiment with different colors and sizes.
ad 26 3
The first few rows may feel a little awkward. That’s completely normal. Take your time and focus on how each new tile attaches to the previous row. After a few rows, your hands will start to remember the motion, and you’ll probably find yourself crocheting without having to think about every stitch.
Let’s get started!
What You Need to Know First
Skill level: Easy
ad 26 3
This blanket is a good project if you’re comfortable with basic crochet stitches such as chains, slip stitches, and double crochet. The only part that may be unfamiliar is how the individual tiles are joined together, but once you understand that little step, the rest follows a simple rhythm.
Materials
- Worsted weight (#4) yarn. The amount you need will depend on the finished size of your blanket. If you’re using multiple colors, it’s a good idea to have a little extra yarn from the same dye lot.
- 5 mm (H-8) or 5.5 mm (I-9) crochet hook, or the hook recommended on your yarn label
- Measuring tape
- Scissors
- Tapestry needle
Abbreviations – US Crochet Terms
- ch: chain
- sl st: slip stitch
- sc: single crochet
- dc: double crochet
- st(s): stitch(es)
- sp(s): space(s)
- * *: repeat the instructions between the asterisks as directed
Understanding the C2C Tiles
ad 26 3
Before starting the blanket, it helps to understand what makes up one C2C tile.
Each tile consists of a chain 3 and three double crochet stitches. The chain-3 creates a small open space along the side of the tile. This is the ch-3 space, and it is where the next tile will be attached.
That’s really the key to the entire technique.
ad 26 3
As the blanket grows, you add a new tile at the beginning of each row. Once you reach the widest point, you begin decreasing. Instead of adding another tile, you slip stitch across the final tile and turn, gradually reducing the number of tiles in each row.
Once you can recognize those ch-3 spaces, C2C becomes much easier to read.
Pattern Notes
Keep these points in mind while working:
- Turn your work at the end of every row.
- During the increase section, the row number tells you how many tiles should be in that row. For example, Row 1 has 1 tile, Row 2 has 2 tiles, and Row 10 has 10 tiles.
- For a square blanket, the number of tiles along each side will match the number of your final increase row.
- When changing colors, work the final yarn-over of the last double crochet with the new color.
- Try to keep your tension consistent throughout the blanket so the finished fabric stays even.
Corner to Corner (C2C) Blanket Pattern
Growing the Blanket – Increase Rows
This is the fun part because you can actually watch the blanket get bigger with every row.
Row 1
Ch 6. Dc in the 4th ch from the hook and in each of the next 2 ch.
(1 tile)
You have now made your very first C2C tile.
Row 2
Ch 6, turn.
Dc in the 4th ch from the hook and in each of the next 2 ch to create the new tile.
Sl st in the ch-3 space of the tile from Row 1. Ch 3, 3 dc in the same ch-3 space.
(2 tiles)
Row 3 and Every Increase Row After
Ch 6, turn.
Dc in the 4th ch from the hook and in each of the next 2 ch.
Sl st in the ch-3 space of the next tile from the previous row. Ch 3, 3 dc in the same ch-3 space.
Repeat from * across the row.
You should have one more tile than you had in the previous row.
Continue working the increase rows until the blanket reaches the desired size.
For example, if you want 40 tiles along each side, continue increasing until you have completed 40 increase rows.
Shrinking the Blanket – Decrease Rows
Once your blanket reaches the desired width, it’s time to start decreasing.
This section can look a little different at first, but the basic idea is simple: instead of adding a new tile at the beginning of the row, you slip stitch across the previous tile and begin working from the next ch-3 space.
Every Decrease Row
Turn.
