

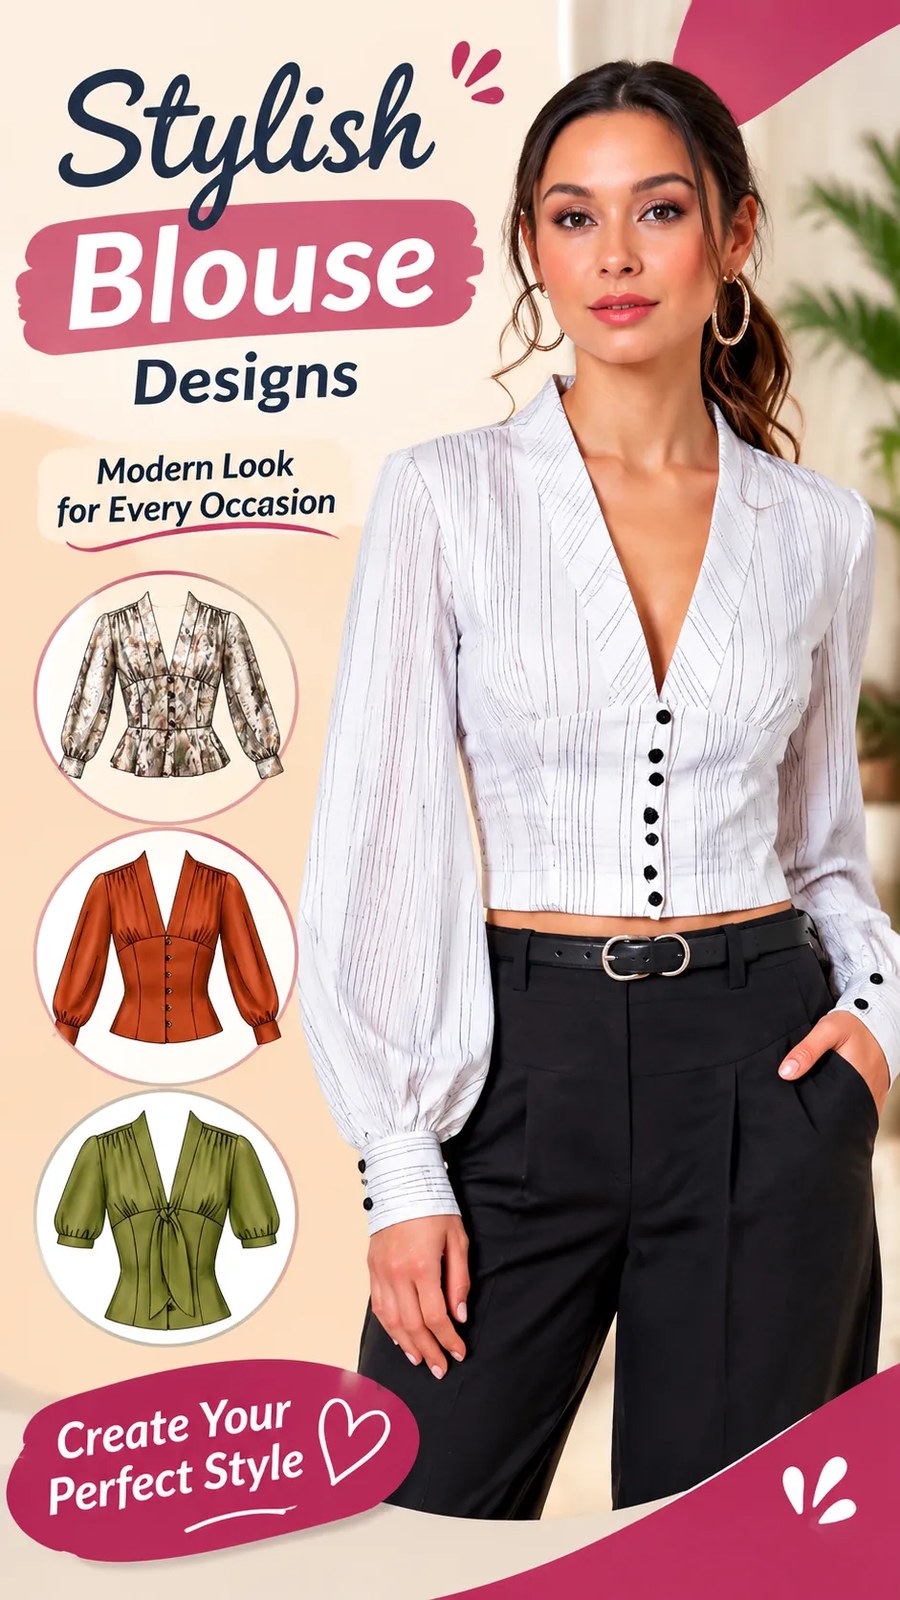
Create a beautifully tailored cropped blouse with a flattering V-neckline, elegant puffed sleeves, a shaped waist, and a classic button-front closure. This feminine blouse sewing pattern combines vintage-inspired details with a modern silhouette, making it a lovely addition to a handmade wardrobe. The design features a fitted bodice, softly gathered sleeve caps, voluminous long sleeves, and structured cuffs that balance the relaxed fullness of the sleeves.
The suggested fabric is a lightweight woven textile with enough drape to create soft sleeve volume while maintaining a neat bodice shape. A subtle plaid, check, or pinstripe fabric gives the blouse a particularly charming appearance, although solid colors and delicate prints work beautifully too. The original sewing interpretation below includes made-to-measure drafting instructions, a complete cutting guide, and step-by-step construction techniques.
Key Takeaways
- Project: A cropped, fitted button-front blouse with a deep V-neckline and long puff sleeves.
- Skill level: Intermediate, with techniques suitable for confident beginners who are comfortable sewing woven garments.
- Construction: Shaped front and back bodice pieces, waist darts, gathered sleeve caps, sleeve plackets, and separate cuffs.
- Recommended fabric: Lightweight cotton, cotton voile, lawn, poplin, rayon challis, or soft linen blends.
- Important techniques: Accurate dart sewing, neckline finishing, button placket construction, gathering, and sleeve setting.
- Customization: Adjust the neckline depth, cropped length, sleeve volume, and cuff details to suit your style.
Description of This Elegant Blouse Sewing Project
This blouse combines a structured upper bodice with soft, voluminous sleeves. Its defining feature is the deep V-shaped front neckline, which creates an open and flattering appearance without requiring a separate collar.
The front bodice has a close-fitting shape through the bust and waist, followed by a slightly cropped hem. A vertical row of small buttons provides the front closure and adds a decorative detail. The waist shaping creates a defined silhouette, while the long sleeves introduce a softer, more romantic element.
Distinctive Design Features
- Deep V-neckline: An open neckline that visually elongates the upper body.
- Fitted bodice: Shaped through waist darts and curved side seams.
- Button-front closure: A neat row of small buttons running from the V-neck point to the cropped hem.
- Long puff sleeves: Generous sleeve width with controlled gathering at the shoulder and wrist.
- Structured cuffs: Separate buttoned cuffs that hold the sleeve fullness in place.
- Cropped length: A hem that finishes around the natural waist or slightly below it.
The photographed style has a light-colored checked appearance. A woven fabric with fine intersecting lines can create a similar effect. The exact fiber content and internal construction are not visually established, so the pattern below uses a practical woven-fabric construction rather than attempting to reproduce unseen technical details.
Fabric and Construction Analysis
Choosing the Right Fabric
A lightweight woven fabric is the most practical choice for this blouse. It should drape comfortably around the sleeves while remaining stable enough to support the button placket, neckline, and fitted bodice.
Consider these fabrics:
- Cotton lawn: Lightweight, breathable, and comfortable for everyday wear.
- Cotton voile: Soft and airy, ideal for delicate sleeve volume. Check opacity before cutting.
- Lightweight cotton poplin: Provides a slightly crisper shape and makes pressing easier.
- Rayon challis: Offers beautiful drape and fluid movement, although it requires careful handling.
- Lightweight linen blend: Creates a relaxed texture with a little more body.
Avoid very heavy denim, thick canvas, bulky upholstery fabric, and highly elastic knits for this particular construction. They may prevent the bodice from maintaining its intended shape.
Visible Seams and Construction Details
The design is best interpreted as a separate front and back bodice joined at the shoulders and side seams. Waist darts provide shaping, while the sleeves are attached using a set-in sleeve construction.
The sleeve fullness can be created through a combination of moderate cap gathering and additional width around the lower sleeve. The gathered lower edge is then fitted into a structured cuff.
The front neckline and button opening require clean finishing. A lightweight interfaced facing or integrated facing extension is recommended to keep the neckline smooth and prevent the front edges from stretching.
Needle, Thread, and Sewing Machine Settings
- Needle: Universal or Microtex needle, size 70/10 or 80/12.
- Thread: Good-quality polyester all-purpose thread.
- Straight stitch: Approximately 2.0 to 2.5 mm.
- Gathering stitch: Approximately 3.5 to 4.0 mm.
- Buttonholes: Use a buttonhole foot and test the size on fabric scraps.
- Seam finish: Narrow zigzag, overlock, or French seams where appropriate.
Construction Note: The fitted bodice and gathered sleeves need different handling. Keep the bodice seams smooth and controlled, while distributing sleeve gathers evenly. Use lightweight interfacing only where structural support is needed so the blouse does not become unnecessarily stiff.
Free Sewing Pattern: Cropped V-Neck Puff Sleeve Blouse
Original project name: Romantic Cropped Button-Front Blouse
This original interpretation features a fitted cropped bodice, deep V-neckline, button-front opening, and full-length gathered sleeves. It uses separate front and back bodice pieces, waist darts, and a simple gathered sleeve construction. The drafting method is made to measure, so the garment can be adjusted to different body proportions.
Pattern Overview
| Specification | Details |
|---|---|
| Skill level | Intermediate |
| Estimated sewing time | 6 to 9 hours, excluding toile adjustments |
| Garment type | Cropped woven blouse |
| Finished length | Approximately 16.5 inches (42 cm) from shoulder neck point |
| Fabric | Lightweight woven fabric |
| Fabric quantity | 2.5 yards (2.3 m), 45-inch (114 cm) usable width, for the sample proportions |
| Interfacing | Lightweight fusible woven interfacing, approximately 1/3 yard (0.3 m) |
| Needle | Universal or Microtex 70/10 or 80/12 |
| Thread | Polyester all-purpose thread |
| Seam allowance | 3/8 inch (1 cm) |
| Bottom hem | 1 inch (2.5 cm) |
| Front closure | Five small buttons and matching buttonholes |
| Sleeve closure | One button and buttonhole per cuff |
Measurements and Sizing
This is a made-to-measure pattern rather than a graded commercial size range. The sample calculations below use a medium-size reference figure, but the formulas allow the bodice and sleeves to be drafted for individual measurements.
Measure over the undergarments intended for the finished blouse. Keep the measuring tape level and comfortably snug without pulling it tight.
| Body measurement | Sample size |
|---|---|
| Bust | 36 inches (91.5 cm) |
| Natural waist | 29 inches (73.5 cm) |
| Upper arm | 12 inches (30.5 cm) |
| Wrist | 6 inches (15 cm) |
| Shoulder length | 5 inches (12.5 cm) |
| Back waist length | 16 inches (40.5 cm) |
| Front waist length | 17 inches (43 cm) |
| Bust point to bust point | 7.5 inches (19 cm) |
Recommended wearing ease: Add 3 inches (7.5 cm) to the bust measurement, 2 inches (5 cm) to the waist measurement, and approximately 4 inches (10 cm) to the upper-arm measurement. These amounts create a relatively fitted bodice and a comfortable full sleeve.
For the sample measurements, the approximate finished bust circumference is 39 inches (99 cm), and the finished waist circumference is 31 inches (79 cm). These are garment measurements, not body measurements.
Measure the desired cropped length from the shoulder neck point to the hem. The sample length is approximately 16.5 inches (42 cm). Check this against your torso and preferred waistband position before drafting.
Materials and Notions
- 2.5 yards (2.3 m) of lightweight woven fabric, 45 inches (114 cm) wide, as a sample estimate.
- 1/3 yard (0.3 m) of lightweight fusible woven interfacing.
- Matching polyester sewing thread.
- Five front buttons, approximately 3/8 inch (1 cm) in diameter.
- Two cuff buttons, approximately 3/8 inch (1 cm) in diameter.
- One small spare button if desired.
- Fabric marking pen or tailor’s chalk.
- Measuring tape and clear ruler.
- Pattern paper, scissors, pins, and seam ripper.
- Iron and pressing cloth.
- Buttonhole foot and regular sewing machine foot.
For directional checks or plaid fabric, purchase additional fabric. A larger size, long sleeves, print matching, or a narrow fabric width may also increase the quantity required.
Sewing Terminology and Abbreviations
- RS: Right side of the fabric.
- WS: Wrong side of the fabric.
- CF: Center front.
- CB: Center back.
- SA: Seam allowance.
- Ease: Extra garment room beyond the body measurement.
- Gathering: Drawing longer fabric into a shorter section using gathering stitches.
- Notch: A small alignment mark on a pattern edge.
- Toile: A test garment made from inexpensive fabric to check fit.
All pattern calculations use inches as the primary drafting unit. Centimeter equivalents are supplied for convenience. Work consistently in one system during drafting, and avoid rounding individual measurements too early.
Seam and Hem Allowances
- Shoulder seams: 3/8 inch (1 cm).
- Side seams: 3/8 inch (1 cm).
- Sleeve seams: 3/8 inch (1 cm).
- Armhole seams: 3/8 inch (1 cm).
- Neckline facing seams: 3/8 inch (1 cm).
- Cuff seams: 3/8 inch (1 cm).
- Bottom hem: 1 inch (2.5 cm).
- Front placket: 1.5 inches (3.8 cm) of extension beyond the center-front stitching line.
The drafting instructions below establish stitching lines first. Add the stated allowances afterward. Do not add a second allowance to any edge that has already been included in a cutting measurement.
Drafting the Front Bodice
The front is drafted as one half-pattern and cut twice as mirrored pieces. The center-front edges are straight below the V point and include an extension for the button placket.
For this method, define the following variables:
- B: Full bust circumference.
- W: Natural waist circumference.
- F: Front waist length.
- A: Armhole depth, measured vertically from the shoulder level to the underarm level.
- S: Shoulder length.
- P: Bust point distance, measured between the two bust points.
- N: Half-neck width, measured from center front to the side-neck point on a well-fitting bodice block or determined from a fitted muslin.
For the sample, use B = 36 inches (91.5 cm), W = 29 inches (73.5 cm), F = 17 inches (43 cm), and P = 7.5 inches (19 cm). A suggested armhole depth is 8.5 inches (21.5 cm), but measure your own body or a fitted bodice toile for better accuracy.
- Draw a vertical center-front line on pattern paper. Mark the shoulder-level point as the origin and draw the line downward.
- Mark the front waist level at the measured front waist length. For the sample, mark 17 inches (43 cm) below the shoulder level.
- Mark the underarm level at the chosen armhole depth, 8.5 inches (21.5 cm) for the sample.
- Calculate the front bust width as B divided by four plus 3/4 inch (2 cm) ease. For the sample, this equals 9.75 inches (24.8 cm).
- Measure this distance horizontally from center front at the bust level and mark the side-seam point.
- At the waist, calculate the finished quarter-waist width as W divided by four plus 1/2 inch (1.3 cm) ease. For the sample, this is approximately 7.75 inches (19.7 cm).
- Mark the bust apex horizontally at half the bust point distance from center front. For the sample, this is 3.75 inches (9.5 cm).
- Place the bust apex vertically at the measured bust-point height. Mark a point approximately 1 inch (2.5 cm) below it for the end of the dart.
- Draft a waist dart centered on the vertical bust-apex line. Use an initial intake of 1 inch (2.5 cm), with each dart leg beginning 1/2 inch (1.3 cm) on either side of the center.
- Draw the dart legs to the point 1 inch (2.5 cm) below the bust apex. Keep both legs straight and mark the dart intake clearly.
- At the waist, the front panel’s undarted width must equal the finished quarter-waist width plus the dart intake. For the sample, this is 8.75 inches (22.2 cm).
- Join the underarm point to the waist side-seam point with a smooth inward curve. Blend the curve gently rather than creating a sharp angle.
For the shoulder and neckline, use the measured half-neck width as the horizontal position of the side-neck point. Draw a shallow neckline curve from center front at shoulder level to that point. Place the shoulder endpoint at the measured shoulder length from the side-neck point, allowing for shoulder slope. Use a fitted bodice block or toile to confirm the shoulder angle and armhole position.
To create the V-neck, mark the desired center-front V point approximately 6.5 inches (16.5 cm) below the shoulder level for the sample. Draw a smooth diagonal line from the side-neck point to this V point. The line should be clean and balanced. Below the V point, the center-front edge continues vertically to the hem.
Mark the cropped hem approximately 2.5 inches (6.5 cm) below the natural waist level. The resulting sample shoulder-to-hem length is approximately 19.5 inches (49.5 cm) if measured vertically along the drafting line; adjust the front waist and crop length to match your preferred garment length. For a 16.5-inch (42 cm) finished shoulder-to-hem length, position the hem using your measured shoulder-to-waist distance rather than assuming a fixed body length.
Finally, add the 1.5-inch (3.8 cm) button-placket extension beyond center front. This is a folding extension, not additional wearing ease. Add the 3/8-inch (1 cm) seam allowance at the shoulder, side seam, and neckline as appropriate, and the 1-inch (2.5 cm) hem allowance at the bottom.
Drafting the Back Bodice
- Draw a vertical center-back line using the back waist length as the vertical reference.
- Mark the back waist level using the measured back waist length, 16 inches (40.5 cm) for the sample.
- Mark the underarm level using the same armhole depth as the front bodice.
- Calculate the back bust width using B divided by four plus 3/4 inch (2 cm) ease. This gives 9.75 inches (24.8 cm) for the sample.
- Calculate the finished back waist quarter-width using W divided by four plus 1/2 inch (1.3 cm) ease.
- Mark a back waist dart centered approximately halfway between center back and the side seam. Use an initial intake of 3/4 inch (2 cm), adjusting to the wearer’s waist-to-bust difference.
- Make the dart approximately 5.5 inches (14 cm) long, tapering toward the waist and ending well below the shoulder blades.
- Draw the side seam from the underarm point to the waist, tapering smoothly toward the waistline.
- Draft a shallow back neckline using the fitted block or muslin as a guide. The back neckline should sit close to the base of the neck without pulling.
- Draft the back shoulder and armhole to match the front shoulder and armhole depth.
Cut the back on the fold with the center-back grainline parallel to the selvage. Add a 3/8-inch (1 cm) allowance at the shoulder and side seams and a 1-inch (2.5 cm) bottom hem allowance.
Drafting the Long Puff Sleeves
Use the finished armhole seamline measurements from the front and back bodice to draft the sleeve cap. Measure both armholes with a flexible tape placed on edge, following the stitching line rather than the cutting line.
- Add the front and back armhole seamline measurements together. Record this as the total armhole circumference.
- Add approximately 1 inch (2.5 cm) for sleeve-cap ease. This is a starting target for the gathered sleeve head.
- Measure the upper arm circumference and add 4 inches (10 cm) for comfortable fullness. This is the target sleeve width at the bicep level.
- Draw a vertical center sleeve line using the desired sleeve length. For a sample, use approximately 21 inches (53.5 cm) from the shoulder point to the cuff seam, subject to the wearer’s arm length and cuff height.
- Mark the bicep line perpendicular to the center line. The sleeve width at this line is the upper-arm measurement plus 4 inches (10 cm).
- Divide the sleeve width equally on both sides of the center line.
- Mark a sleeve-cap height of approximately 5.5 inches (14 cm) above the bicep line for the sample. This is a starting measurement, not a universal armhole measurement.
- Shape the cap from each underarm point to the center top with a smooth curve. Keep the front curve slightly flatter and the back curve slightly fuller.
- Mark one front notch and two back notches. Align these with the corresponding bodice armhole markings.
- Check the total sleeve-cap stitching-line length against the armhole measurement. Distribute the additional 1 inch (2.5 cm) of ease between the shoulder notches. Redraw the cap if the difference is substantially larger.
- Taper the sleeve toward the wrist while retaining enough width to gather into the cuff. Keep the sleeve’s lower opening approximately 1.5 to 2 times the finished cuff attachment length before gathering.
Cut two mirrored sleeves. Keep the center sleeve grainline parallel to the selvage. Mark the front and back notches and the shoulder point.
Drafting the Cuffs, Placket, and Facings
Cuffs: Measure the wrist circumference and add 1.5 inches (3.8 cm) for wearing ease. Add another 1 inch (2.5 cm) for the button overlap. The sample wrist measurement of 6 inches (15 cm) produces a cuff finished length of 8.5 inches (21.5 cm).
Cut two cuff rectangles measuring approximately 10 inches (25.5 cm) long by 5.5 inches (14 cm) wide. The finished cuff is approximately 2.25 inches (5.7 cm) deep after folding and seam allowances. Interface half of each cuff.
Sleeve placket binding: Cut two rectangles measuring 1.25 inches (3.2 cm) by 6 inches (15 cm). These finish the small vertical opening at each sleeve wrist.
Front neckline facing: Trace the V-neckline from the front bodice. Draw a facing approximately 2 inches (5 cm) wide along the neckline and continue it down the center-front button opening to the V point. Cut two mirrored facing pieces from the main fabric and two from lightweight interfacing. The facing must stop neatly at the V point without covering the lower button placket.
Front placket: Use the integrated 1.5-inch (3.8 cm) extension on each front piece. Mark the fold lines 1/2 inch (1.3 cm) and 1 inch (2.5 cm) from the center-front stitching line. The finished folded placket will be approximately 1 inch (2.5 cm) wide.
Complete Cutting List
| Pattern piece | Material | Quantity | Cutting details | Grain and allowance |
|---|---|---|---|---|
| Front bodice | Main fabric | 2 mirrored | Drafted to body measurements | Center-front grainline; integrated placket extension |
| Back bodice | Main fabric | 1 on fold | Drafted to body measurements | CB on fold; no center-back seam allowance |
| Sleeve | Main fabric | 2 mirrored | Drafted sleeve cap and full sleeve | Lengthwise grainline; 3/8-inch SA |
| Cuff | Main fabric | 2 | 10 x 5.5 inches (25.5 x 14 cm) | Straight grain; 3/8-inch SA included |
| Cuff interfacing | Fusible | 2 | 4.25 x 4.75 inches (10.8 x 12 cm) | One folded half of each cuff |
| Neckline facing | Main fabric | 2 mirrored | 2 inches (5 cm) wide along neckline | Follow neckline curve |
| Facing interfacing | Fusible | 2 mirrored | Same shape as facing | Fuse to facing wrong side |
| Sleeve binding | Main fabric | 2 | 1.25 x 6 inches (3.2 x 15 cm) | Straight grain |
The cutting dimensions for the cuffs, interfacing, and sleeve bindings are fixed for the sample wrist measurements. The bodice and sleeve dimensions must be drafted from the wearer’s measurements using the instructions above. The stated fabric quantity is an estimate, not a guaranteed layout for every size or fabric width.
Preparing and Cutting the Fabric
- Prewash the fabric according to its care requirements. Dry and press it before cutting so later shrinkage does not distort the finished blouse.
- Inspect the fabric for flaws, uneven checks, or directional motifs.
- Fold the fabric with selvages aligned and right sides together. Keep the grain straight.
- Position the center-back pattern piece on the fold.
- Cut two mirrored front bodice pieces and two mirrored sleeves.
- Cut both cuffs, facings, and sleeve bindings.
- Cut the interfacing pieces separately, following the required pattern shapes.
- Transfer all dart points, dart legs, sleeve notches, cuff marks, V point, and button positions to the fabric.
When using plaid or checked fabric, align prominent vertical lines across the center front and try to match the side seams. This may require additional fabric.
Step-by-Step Blouse Sewing Tutorial
Step 1: Sew the Front Waist Darts
Place one front bodice piece with its wrong side facing upward. Fold the fabric along the marked dart centerline, bringing the two dart legs together with right sides touching.
- Align the dart legs and pin from the waist edge toward the dart point.
- Stitch from the waist edge to the dart point, beginning with a short backstitch.
- Near the dart point, shorten the stitch length and sew directly off the fabric without making a bulky backstitch.
- Leave thread tails and tie them securely.
- Press the dart toward the center front or downward, depending on the fabric weight.
- Repeat on the opposite front piece and check that both darts are symmetrical.
Repeat the process for the back waist darts. Press these toward the center back.
Step 2: Join the Bodice Shoulders
- Place the front and back bodice pieces right sides together.
- Align the shoulder edges, matching the neck and armhole endpoints.
- Pin carefully, keeping the shoulder seamlines aligned.
- Sew both shoulder seams using a 3/8-inch (1 cm) allowance.
- Finish the raw edges with a narrow zigzag or overlocker.
- Press the seams toward the back bodice.
Check that the shoulder seams sit smoothly without twisting. This is a useful point to compare the bodice with your toile or intended body measurements.
