

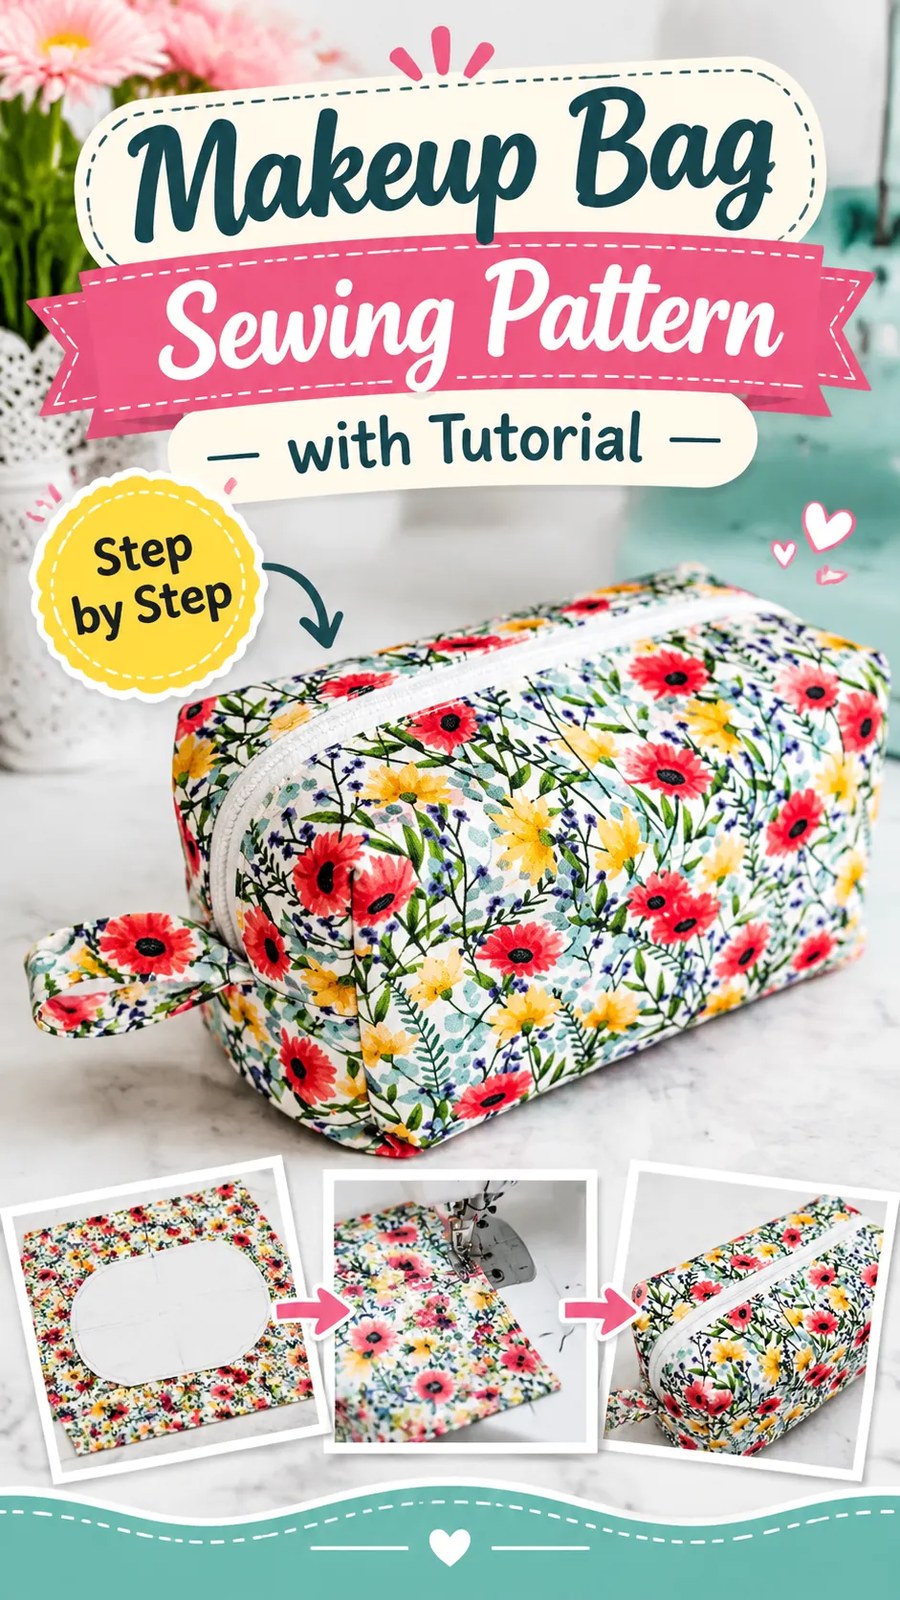
Create a beautiful and practical DIY makeup bag with this easy-to-follow pouch sewing pattern! This floral zippered cosmetic pouch features a cheerful botanical print, a roomy rectangular shape, a structured bottom, and a convenient zipper closure. Its soft curves and boxed corners give it a lovely finished appearance while providing plenty of space for everyday beauty essentials.
This original makeup bag sewing pattern uses simple fabric panels, a zipper, lightweight interfacing, and a matching lining. The construction is designed to make the project approachable for confident beginners who want to improve their zipper installation and bag-making skills. You will learn how to prepare the fabric, sew a neat zipper opening, create dimensional boxed corners, attach a lining, and finish the pouch with clean seams.
The suggested finished dimensions are approximately 9 inches wide, 5.5 inches high, and 4 inches deep. You can customize the fabric, add a small wrist loop, or adjust the dimensions to create a personalized pouch for makeup, toiletries, sewing supplies, or everyday accessories.
Key Takeaways
- Project: A rectangular fabric makeup bag with a zipper closure, lining, and boxed corners.
- Skill level: Confident beginner, with basic sewing machine experience recommended.
- Main technique: Zipper installation, panel construction, boxed corners, and bag lining.
- Recommended fabric: Medium-weight woven cotton with lightweight fusible interfacing.
- Finished size: Approximately 9 inches wide × 5.5 inches high × 4 inches deep.
- Customization: Experiment with floral prints, contrasting linings, decorative zipper pulls, and optional wrist loops.
What Makes This Floral Makeup Bag Sewing Project Special?
This makeup bag is a practical fabric accessory with a cheerful, feminine appearance. Its most distinctive feature is the colorful floral fabric, which combines bright red and yellow flowers with delicate green leaves against a light background. The busy botanical print gives the pouch plenty of personality without requiring additional embroidery or complicated decoration.
The bag has a rectangular, slightly rounded silhouette with a wide zipper opening across the top. Its dimensional body provides more storage space than a simple flat zipper pouch. Boxed corners create a structured base, helping the bag stand upright when placed on a dressing table or bathroom counter.
A light-colored zipper provides a subtle contrast against the printed fabric. The visible zipper follows the top opening and allows convenient access to the contents. A coordinating wrist loop can also be added to one side for easier carrying.
The practical interior is designed with a separate fabric lining. This gives the finished pouch a cleaner appearance and hides most raw construction edges.
Shape, Structure, and Intended Use
The simple rectangular construction makes this project versatile. The main fabric panels form the front and back, while the bottom corners are shaped to produce a flat base with approximately 4 inches of depth.
The zipper runs along the upper edge, creating a wide opening that makes it easy to reach brushes, makeup products, skincare containers, and small toiletries.
This style is suitable for:
- Everyday makeup and cosmetic storage.
- Travel toiletries and personal care essentials.
- Hair accessories, brushes, and small beauty tools.
- Small sewing supplies and craft accessories.
- Handmade birthday gifts and thoughtful gift sets.
Fabric and Construction Analysis
The floral surface appears to be a printed woven textile. The exact fiber content cannot be determined from its appearance, so a medium-weight woven cotton is a practical choice for recreating a similar look. Cotton quilting fabric is particularly suitable because it is easy to cut, press, stitch, and coordinate with different lining fabrics.
Choosing the Main Fabric
Choose a fabric that has enough body to hold its shape without becoming difficult to sew through multiple layers. A medium-weight woven cotton with a smooth surface is an excellent starting point.
Suitable fabric choices include:
- Cotton quilting fabric: Lightweight, easy to handle, and available in many floral prints.
- Cotton poplin: Smooth and closely woven, creating a neat finished surface.
- Cotton canvas: A slightly heavier option for a firmer pouch.
- Linen-cotton blends: Useful for a natural texture and a relaxed handmade appearance.
Avoid very stretchy knits and loosely woven fabrics for this particular construction. They can distort around the zipper and boxed corners. If using a lightweight material, add suitable fusible interfacing to improve stability.
Lining and Interfacing
A coordinating lining gives the interior a neat appearance. Choose cotton fabric in a solid color or a smaller print that complements the main fabric. White, cream, pale yellow, and soft green are attractive options for a floral exterior.
Lightweight woven fusible interfacing is recommended for the outer panels. It helps prevent the fabric from collapsing while maintaining enough flexibility for the pouch to turn smoothly.
For a firmer structure, you can substitute a slightly heavier fusible interfacing, provided your sewing machine can comfortably handle the additional thickness. Test the combination on fabric scraps before beginning.
Fabric Selection Tip:
When using a large floral print, check its direction before cutting. Position the most attractive flowers where they will be visible on the front panel. Cut both outer panels with their designs facing the intended direction.
Recommended Needle and Sewing Equipment
A universal sewing machine needle in size 80/12 is a good starting recommendation for medium-weight cotton. Use a fresh needle if the fabric has been stored for a long time or the needle has already been used extensively.
Choose a quality all-purpose polyester thread for the construction seams. Polyester thread offers useful strength and works well with most cotton fabrics.
A straight stitch with a stitch length of approximately 2.5 mm is suitable for the main seams. Use a slightly shorter stitch, approximately 2.0 mm, near zipper ends and other areas that need extra reinforcement.
Free Sewing Pattern: Floral Zippered Makeup Bag
This original interpretation uses two outer fabric panels, two lining panels, a zipper, and simple boxed-corner construction. It creates a practical rectangular pouch inspired by the floral cosmetic bag style, without relying on an unseen commercial template.
The dimensions below are suggested measurements for a medium makeup bag. All drafting calculations use inches as the primary measurement system, with metric conversions provided for convenience. The stated cut dimensions include the specified seam allowances where applicable.
Free Sewing Pattern
Pattern Overview
| Specification | Recommended Details |
|---|---|
| Project name | Floral Zippered Makeup Bag |
| Skill level | Confident beginner |
| Estimated sewing time | 2 to 3 hours |
| Finished width | Approximately 9 inches (22.9 cm) |
| Finished height | Approximately 5.5 inches (14 cm) |
| Finished depth | Approximately 4 inches (10.2 cm) |
| Main fabric | Medium-weight woven cotton |
| Main fabric quantity | 1/2 yard (0.46 m), 44 to 45 inches (112 to 114 cm) usable width |
| Lining fabric | 1/2 yard (0.46 m) |
| Interfacing | 1/2 yard (0.46 m), lightweight woven fusible |
| Needle | Universal 80/12 |
| Thread | All-purpose polyester |
| Seam allowance | 1/2 inch (1.3 cm) |
| Closure | One 14-inch (35.6 cm) zipper |
Materials and Notions
- 1/2 yard (0.46 m) medium-weight cotton for the outer fabric.
- 1/2 yard (0.46 m) cotton fabric for the lining.
- 1/2 yard (0.46 m) lightweight fusible interfacing.
- One 14-inch (35.6 cm) nylon coil or polyester zipper.
- Matching all-purpose polyester thread.
- Universal sewing machine needle, size 80/12.
- Fabric scissors or rotary cutter.
- Cutting mat and quilting ruler.
- Fabric clips or sewing pins.
- Seam ripper.
- Iron and ironing board.
- Fabric marking pen or tailor’s chalk.
- Point turner or blunt turning tool.
- Zipper foot for the sewing machine.
Sewing Terminology and Abbreviations
- RS: Right side of the fabric, meaning the printed or finished side.
- WS: Wrong side of the fabric.
- SA: Seam allowance, the distance between the raw fabric edge and stitching line.
- RST: Right sides together.
- WST: Wrong sides together.
- Backstitch: A short reverse stitch used to secure the beginning and end of a seam.
- Boxed corner: A three-dimensional corner created by flattening a seam intersection and stitching across it.
Seam allowance: Use a consistent 1/2-inch (1.3 cm) seam allowance throughout the pattern, including zipper attachment, side seams, bottom seams, and lining construction. The boxed-corner stitching line is measured separately from the pointed corner.
Complete Fabric Cutting List
Cut the outer and lining panels as rectangles measuring 14 inches wide × 8.5 inches high (35.6 × 21.6 cm). The dimensions are cutting dimensions, not finished measurements.
| Pattern Piece | Material | Quantity | Cut Dimensions | Grainline |
|---|---|---|---|---|
| Outer panels | Printed cotton | 2 | 14 × 8.5 inches (35.6 × 21.6 cm) | Parallel to selvage along the width |
| Lining panels | Lining cotton | 2 | 14 × 8.5 inches (35.6 × 21.6 cm) | Parallel to selvage along the width |
| Interfacing panels | Fusible interfacing | 2 | 14 × 8.5 inches (35.6 × 21.6 cm) | Follow manufacturer’s grain guidance |
| Optional wrist loop | Outer fabric | 1 | 2 × 10 inches (5.1 × 25.4 cm) | Lengthwise |
The 14-inch zipper is purchased at its stated overall length. Its usable opening will be approximately 12.5 to 13 inches, depending on the end stops and installation.
How to Mark the Boxed Corners
The bottom corners create the depth of the finished bag. Each corner is marked and stitched 2 inches (5.1 cm) from its pointed seam intersection.
- Lay an outer panel flat with its wrong side facing upward.
- At each bottom corner, mark a point 2 inches (5.1 cm) along the side seam from the bottom seam intersection.
- Open the seam allowances and flatten the corner so that the bottom seam and side seam align directly over each other.
- Pinch the corner into a triangle, keeping the seam allowances open and centered.
- Measure 2 inches (5.1 cm) perpendicular to the seam from the pointed corner and mark a straight stitching line across the triangle.
- Repeat for the other bottom corner and both lining corners.
When stitched, each corner creates approximately 4 inches (10.2 cm) of depth. The finished base will be approximately 9 inches (22.9 cm) wide.
Prepare the Fabric Before Sewing
- Prewash the cotton fabrics according to their care recommendations, especially if the finished pouch will need regular washing.
- Dry and press the fabrics until smooth.
- Check the floral print direction and identify the front and back panels.
- Cut all rectangles using the dimensions in the cutting table.
- Fuse one interfacing panel to the wrong side of each outer panel. Follow the interfacing manufacturer’s temperature, pressing time, and cooling instructions.
- Allow the fused panels to cool completely before handling.
- Mark the center of each top edge and the bottom boxed-corner reference points.
Step-by-Step Makeup Bag Sewing Tutorial
Step 1: Prepare the Zipper and Outer Panels
Place one outer panel on your work surface with the right side facing upward. Position the zipper along its upper 14-inch edge with the zipper teeth facing the fabric. Align the zipper tape edge with the raw fabric edge.
Place one lining panel over the outer panel, right sides together, so the zipper tape is sandwiched between the two fabrics. Align the top edges carefully and secure the layers with clips.
Using a zipper foot, stitch along the top edge with a 1/2-inch (1.3 cm) seam allowance. Sew slowly and keep the stitches parallel to the zipper teeth. Stop before the zipper slider if necessary, lower the needle, raise the presser foot, and move the slider behind the foot.
Turn the lining and outer fabric away from the zipper. Press gently, keeping the seam allowance directed away from the zipper teeth.
Step 2: Attach the Second Side of the Zipper
Place the remaining outer panel right side up. Position the unattached zipper tape along its upper edge, keeping the zipper teeth facing the fabric.
Place the second lining panel on top, right sides together with the outer panel. Align the three layers carefully and clip them in place.
Sew along the zipper tape using the same 1/2-inch seam allowance and zipper foot. Move the zipper slider away from the presser foot when needed.
Open the fabric layers so that the two outer panels are on one side of the zipper and the two lining panels are on the other. Press the fabric away from the zipper teeth.
Step 3: Topstitch Around the Zipper
With the outer and lining fabrics spread away from the zipper, topstitch approximately 1/8 inch (3 mm) from the folded fabric edges alongside the zipper.
Use a straight stitch with a length of approximately 2.5 mm. This decorative and functional stitching keeps the fabric away from the zipper teeth and helps the finished opening look neat.
Check that both zipper sides lie flat and that the topstitching is reasonably even. Open the zipper approximately halfway before proceeding. This is essential for turning the finished pouch later.
Step 4: Make the Optional Wrist Loop
If you want to include a small carrying loop, prepare the 2 × 10-inch (5.1 × 25.4 cm) fabric strip.
- Fold the strip in half lengthwise with wrong sides together and press.
- Open the strip and fold both long raw edges toward the center crease.
- Fold the strip in half again so the raw edges are enclosed.
- Press and stitch approximately 1/8 inch (3 mm) from both long edges.
- Fold the finished strip in half to form a loop, bringing the short raw ends together.
- Place the raw ends together along one outer panel side edge, approximately 1 inch (2.5 cm) below the zipper seam. The loop should extend into the bag body, away from the seam allowance.
- Baste the raw ends within the 1/2-inch (1.3 cm) seam allowance.
The loop will be secured when the side seams are sewn. If you prefer a simple pouch, omit this step.
Step 5: Join the Outer Bag Panels
Separate the outer panels from the lining panels. Place the two outer panels right sides together, matching the zipper seam at the top and the bottom edges.
Make sure the wrist loop, if included, is positioned between the outer panels and that its raw ends align with the side seam. Keep the zipper tape and lining fabric away from the stitching area.
Pin the two side edges and bottom edge. Stitch both side seams and the bottom seam using a 1/2-inch (1.3 cm) seam allowance.
Begin and end each seam with a short backstitch. Reinforce the side seam containing the wrist loop with an additional row of stitching inside the seam allowance.
Leave the top zipper opening unsewn. Trim bulky seam allowances only where necessary, taking care not to cut through the stitching.
Step 6: Shape the Outer Bag with Boxed Corners
Flatten each lower corner so the side seam aligns directly with the bottom seam. Match the seams carefully and keep the seam allowances open where possible.
Measure 2 inches (5.1 cm) from the pointed corner along the perpendicular direction and mark a straight line across the triangle. Stitch directly along this line with a 2.5 mm straight stitch.
Backstitch at both ends to secure the seam. Repeat at the opposite lower corner.
Trim the triangular excess fabric to approximately 1/4 inch (6 mm) beyond the stitching line. Finish the raw edges with a zigzag stitch or serger if desired. Keep the stitching intact while trimming.
Turn the outer pouch right side out temporarily and check that the bottom corners are symmetrical. The bag should have a broad, dimensional base rather than pointed corners.
Step 7: Sew the Lining
Place the two lining panels right sides together, aligning their side and bottom edges.
