

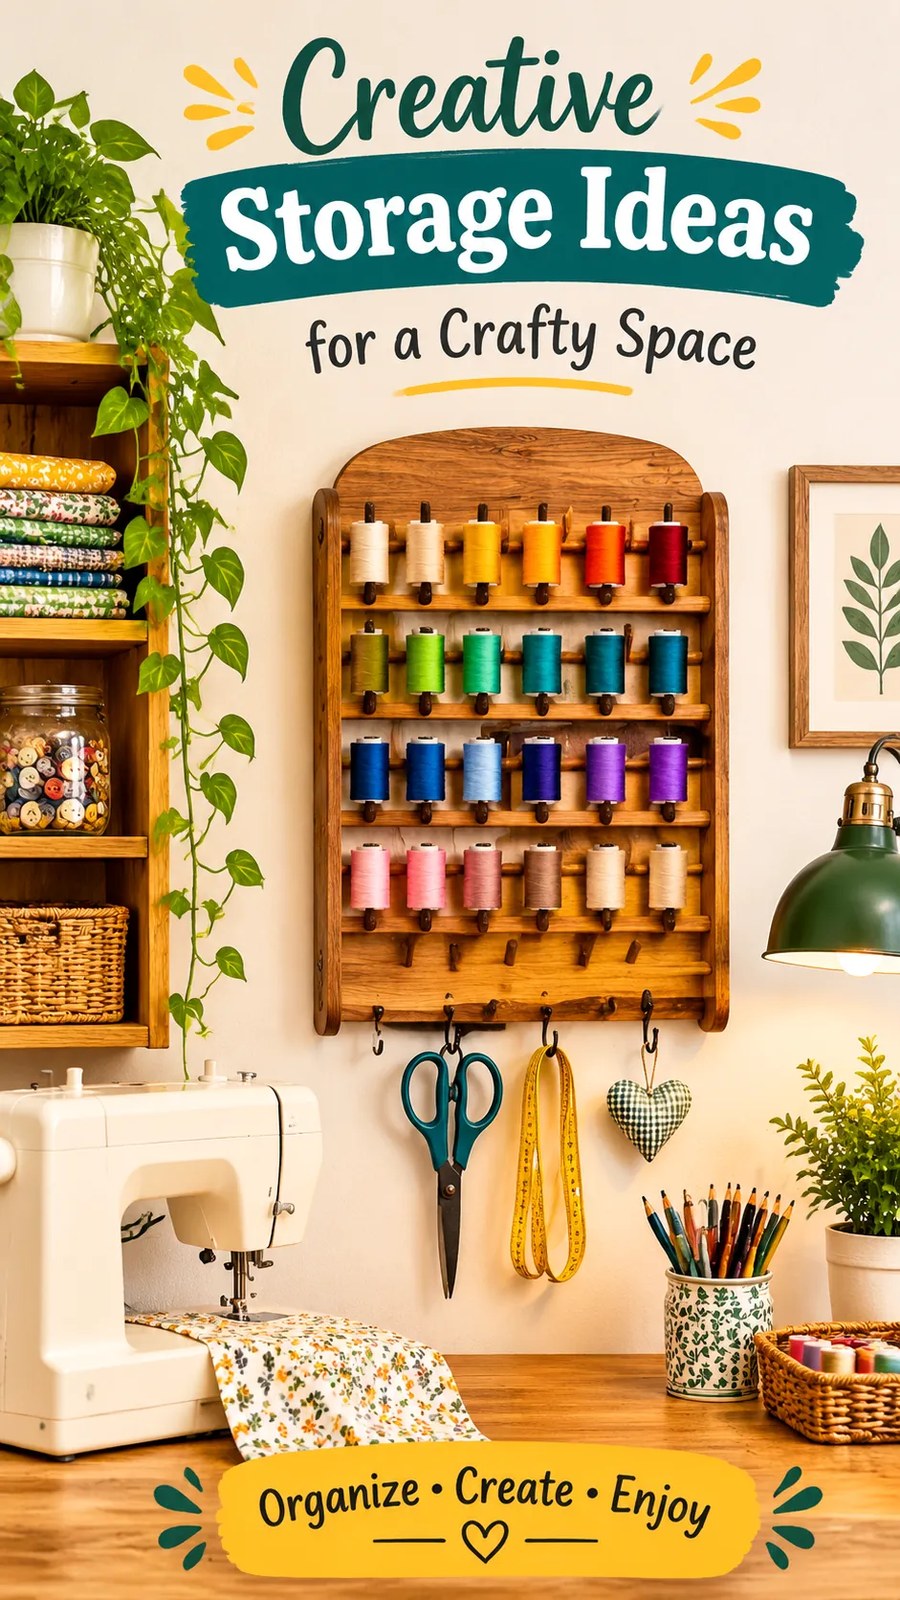
A well-organized sewing space makes every creative project more enjoyable. When colorful thread spools, scissors, measuring tapes, and small sewing accessories have a dedicated place, it becomes easier to find what you need and keep your worktable clear. A beautiful thread organizer can also become a decorative feature in your sewing room, especially when it combines warm wood tones, vintage details, and carefully arranged supplies.
This project takes inspiration from a traditional wall-mounted wooden thread rack and transforms its practical design into an original fabric sewing organizer. The result is a charming hanging thread and sewing supplies organizer featuring multiple individual pockets, a reinforced fabric body, and a simple wooden hanging dowel. It offers a practical alternative for anyone who enjoys sewing, quilting, embroidery, or other fabric crafts.
The original decorative inspiration features horizontal thread storage, an ornate wooden frame, and colorful spools. This sewing interpretation uses sturdy woven fabric, individual pockets, light padding, and a hanging sleeve to create a similar organized appearance without requiring woodworking skills.
Key Takeaways
Key Takeaways
- Create an attractive wall-mounted sewing organizer inspired by traditional wooden thread racks.
- Use sturdy woven cotton or canvas for a durable, structured finish.
- Make 30 individual pockets for thread spools and small sewing accessories.
- Practice straight stitching, pocket construction, topstitching, and fabric sandwich assembly.
- Customize the pocket arrangement, fabric colors, and hanging details to suit your sewing room.
- Keep frequently used sewing supplies visible and accessible while saving valuable tabletop space.
Understanding the Vintage Sewing Room Storage Design
The inspiration features a vertically mounted wooden organizer with several horizontal shelves holding colorful thread spools. Its rounded upper section has decorative engraved details, while the lower edge includes hooks for hanging scissors and other sewing tools.
The arrangement makes excellent use of vertical wall space. Thread colors remain visible, frequently used supplies are easy to reach, and the sewing table stays relatively uncluttered.
For this original sewing interpretation, the main design features are translated into a fabric wall organizer measuring approximately 24 inches wide by 30 inches high (61 × 76.2 cm).
Instead of wooden rails, the organizer uses five horizontal rows of individual fabric pockets. Each pocket can hold a thread spool, small measuring accessories, or lightweight sewing notions. A reinforced hanging sleeve at the back accommodates a wooden dowel.
Project Category and Construction Method
This project belongs to the home sewing and craft organization category. It is a soft wall-mounted storage accessory rather than a garment, quilt, or traditional bag.
The construction uses rectangular fabric panels, individual patch pockets, lightweight interfacing, and a simple hanging casing. No darts, gathers, pleats, shaped gussets, or complicated closures are necessary.
The visible wooden organizer has a rigid structure, but the fabric interpretation creates its own practical structure through interfacing, padding, layered construction, and a wooden hanging support.
Visible Details to Recreate
- Vertical layout: A tall rectangular arrangement that uses wall space efficiently.
- Organized rows: Repeated horizontal pocket placement creates a tidy display.
- Colorful supplies: Bright thread spools become decorative elements.
- Natural materials: Cotton, canvas, and wooden accessories create a warm craft-room appearance.
- Practical hanging storage: A reinforced hanging sleeve supports the organizer.
- Vintage-inspired styling: Decorative topstitching, contrasting fabrics, and wooden details provide a traditional sewing-room aesthetic.
Fabric and Construction Analysis for a Durable Sewing Organizer
Fabric selection is important because this organizer needs to hold its shape while supporting several small sewing supplies. Very lightweight cotton may sag, especially when the pockets are filled with thread spools.
Recommended Fabrics
Main fabric: Medium-weight cotton canvas, cotton duck, or sturdy quilting cotton is recommended. A fabric weight of approximately 6 to 9 ounces per square yard (203 to 305 gsm) provides a useful balance between flexibility and stability.
Pocket fabric: Quilting cotton, medium-weight cotton, or lightweight canvas works well. Choose coordinating colors, small vintage prints, or contrasting fabrics to make the pockets visually interesting.
Backing fabric: Use cotton canvas or sturdy quilting cotton to cover the back of the organizer and create a neat finish.
Interfacing: Fusible woven interfacing adds stability to the main front panel and individual pockets. Medium-weight interfacing is generally suitable for this project.
Optional padding: Thin cotton batting can add body and a softly padded appearance. Avoid thick padding because it makes the pocket openings more difficult to sew neatly.
Needle, Thread, and Sewing Machine Recommendations
A universal sewing machine needle in size 80/12 or 90/14 is a suitable starting point for medium-weight woven cotton. Choose the size according to the combined fabric thickness and your machine’s recommendations.
- Needle: Universal 80/12 for lighter cotton or 90/14 for canvas and layered sections.
- Thread: Good-quality all-purpose polyester thread or cotton-wrapped polyester thread.
- Stitch: Straight stitch for assembly and pocket attachment.
- Stitch length: Approximately 2.5 mm for regular seams and 3 mm for decorative topstitching.
- Presser foot: Standard all-purpose foot, with an edge-stitching foot optional.
Woven fabric is preferable because it provides stability and does not require stretch during pocket construction. Knit fabric is unnecessary for this project.
Fabric Selection Tip
Choose a firm fabric for the organizer body and a slightly lighter coordinating fabric for the pockets. This combination makes the individual compartments easier to sew while helping the finished organizer remain flat against the wall.
Free Sewing Pattern: DIY Wall-Mounted Thread Organizer
Free Sewing Pattern
Project name: Vintage-Inspired Fabric Thread and Sewing Supplies Organizer
This original pattern creates a rectangular wall organizer with 30 individual pockets arranged in six columns and five rows. The compartments are designed for lightweight thread spools, small sewing accessories, and similar notions.
The finished organizer has a simple, structured appearance and can be customized with decorative fabrics, contrast stitching, and wooden hanging details.
| Pattern Detail | Specification |
|---|---|
| Skill level | Confident beginner |
| Estimated sewing time | 3 to 5 hours |
| Finished width | 24 inches (61 cm) |
| Finished height | 30 inches (76.2 cm), excluding hanging hardware |
| Pocket quantity | 30 individual pockets |
| Finished pocket size | 3.5 × 4.5 inches (8.9 × 11.4 cm) |
| Main fabric | Medium-weight woven cotton or canvas |
| Fabric quantity | 1 yard (0.91 m) of 44-inch (112 cm) usable width |
| Pocket fabric | 1 yard (0.91 m) of 44-inch (112 cm) usable width |
| Backing fabric | 1 yard (0.91 m) of 44-inch (112 cm) usable width |
| Interfacing | 1 yard (0.91 m) of 44-inch (112 cm) usable width |
| Batting | 1 yard (0.91 m), optional |
| Needle | Universal 80/12 or 90/14 |
| Seam allowance | 1/2 inch (1.27 cm) |
| Pocket top hem | 1/2 inch (1.27 cm) double fold |
| Hanging support | Approximately 1/4-inch (6 mm) wooden dowel |
Pattern Materials and Notions
- 1 yard (0.91 m) main woven fabric.
- 1 yard (0.91 m) coordinating pocket fabric.
- 1 yard (0.91 m) backing fabric.
- 1 yard (0.91 m) medium-weight fusible woven interfacing.
- 1 yard (0.91 m) lightweight cotton batting, optional.
- Approximately 25 inches (63.5 cm) of 1/4-inch (6 mm) wooden dowel.
- Matching all-purpose polyester thread.
- Three small metal hooks, optional, for lightweight accessories.
- Fabric clips or pins, measuring tape, ruler, fabric marker, and scissors.
- Iron and ironing board.
The quantities above include practical cutting allowances for a single organizer. The main panel, backing, and interfacing can be cut from one yard lengths with suitable layouts. Pre-shrink washable fabrics before cutting.
Sewing Terminology and Abbreviations
- RS: Right side of the fabric.
- WS: Wrong side of the fabric.
- SA: Seam allowance.
- WOF: Width of fabric.
- Topstitch: Visible stitching placed on the finished surface.
- Turn of cloth: The extra fabric needed when folding material around an edge or seam.
All pattern measurements are provided in inches first, with approximate metric conversions in parentheses. Use inches as the primary measurement system for consistent cutting and spacing.
Complete Cutting List
The organizer uses rectangular pieces, so no complicated pattern drafting is necessary. The measurements below are cut dimensions, not finished dimensions. Unless otherwise stated, all dimensions include the required seam allowances.
| Piece | Material | Quantity | Cut Dimensions | Notes |
|---|---|---|---|---|
| Main panel | Main fabric | 1 | 25 × 31 in (63.5 × 78.7 cm) | Straight grain |
| Backing panel | Backing fabric | 1 | 25 × 31 in (63.5 × 78.7 cm) | Straight grain |
| Pocket pieces | Pocket fabric | 30 | 4.5 × 6 in (11.4 × 15.2 cm) | Same direction for all pieces |
| Hanging sleeve | Main fabric | 1 | 25 × 5.5 in (63.5 × 14 cm) | Cut width across panel |
| Main interfacing | Fusible interfacing | 1 | 24 × 30 in (61 × 76.2 cm) | Applied within seam allowance |
| Pocket interfacing | Fusible interfacing | 30 | 3.5 × 4.5 in (8.9 × 11.4 cm) | Centered on pocket body |
| Batting | Cotton batting | 1 | 25 × 31 in (63.5 × 78.7 cm) | Optional |
Understanding the Pocket Measurements
Each pocket begins as a rectangle measuring 4.5 inches wide by 6 inches high (11.4 × 15.2 cm).
For the finished pocket width, turn both side edges under 1/2 inch (1.27 cm). This reduces the width by 1 inch, producing a finished width of 3.5 inches (8.9 cm).
For the pocket height, fold the top edge under 1/2 inch (1.27 cm) twice. This creates a clean 1-inch top hem. The remaining 1/2-inch bottom seam allowance is turned under during attachment. The finished pocket height is therefore 4.5 inches (11.4 cm).
Each pocket is attached individually, so there is no need to calculate complicated pleats or shared dividing seams.
Pocket Placement and Layout
The finished organizer body measures 24 × 30 inches (61 × 76.2 cm).
Arrange the 30 pockets in six columns and five rows. Each pocket measures 3.5 × 4.5 inches (8.9 × 11.4 cm), with a 1/2-inch (1.27 cm) horizontal and vertical gap.
- Horizontal pocket group: 23.5 inches (59.7 cm).
- Left and right margins: 1/4 inch (0.6 cm) each.
- Vertical pocket group: 24.5 inches (62.2 cm).
- Top and bottom margins: 2.75 inches (7 cm) each.
To mark the layout, measure 1/4 inch from the left finished edge and mark the first pocket position. Each following column begins 4 inches (10.2 cm) after the previous starting point. For the rows, begin 2.75 inches (7 cm) below the finished top edge. Each following row begins 5 inches (12.7 cm) below the previous starting point.
These measurements position the pockets evenly and provide a balanced finished appearance.
Step-by-Step Sewing Instructions
Step 1: Prepare the Fabric
Wash and dry the washable woven fabrics according to their care instructions before cutting. This reduces the chance of shrinkage after the organizer is completed.
Press the fabric flat and square the edges. Cut the main panel, backing panel, 30 pocket rectangles, and hanging sleeve according to the cutting table.
Apply fusible interfacing to the wrong side of the main panel and pocket pieces. Follow the interfacing manufacturer’s temperature and pressing recommendations.
Do not apply interfacing to the pocket seam allowances if it creates excessive bulk. Keep the interfacing centered on the pocket body.
Step 2: Prepare the Individual Pockets
Take one pocket rectangle and place it with the wrong side facing up.
- Fold the top edge toward the wrong side by 1/2 inch (1.27 cm) and press.
- Fold the same edge under another 1/2 inch (1.27 cm).
- Press the fold firmly and stitch approximately 1/8 inch (3 mm) from the inner folded edge.
- Turn both side edges under 1/2 inch (1.27 cm) and press.
- Turn the bottom edge under 1/2 inch (1.27 cm) and press.
- Repeat for all 30 pocket pieces.
The completed pockets should measure approximately 3.5 × 4.5 inches (8.9 × 11.4 cm). Check a finished pocket before preparing the remaining pieces.
Important: Measure the first completed pocket carefully. Small differences repeated across six columns and five rows can affect the overall alignment. Use the first pocket as your reference for the remaining 29 pieces.
Step 3: Prepare the Organizer Front
Place the main fabric panel right side up on a flat work surface.
Using a ruler and fabric marker, draw the horizontal and vertical placement guides for all 30 pockets. Measure from the finished panel edges rather than the original cut edges.
Position the first pocket in the upper-left area, aligning its side and bottom folded edges with the marked placement lines.
Pin or clip the pocket in place. Stitch along both side edges and the bottom edge using a 1/8-inch (3 mm) topstitching distance from the folded edges. Reinforce the upper corners with short backstitches.
Leave the top edge open so the pocket can hold a spool or sewing accessory.
Continue across the first row, maintaining the 1/2-inch (1.27 cm) spacing. Repeat the same process for all five rows.
Step 4: Reinforce the Pocket Openings
Thread spools are relatively light, but repeated handling can weaken pocket corners over time.
