

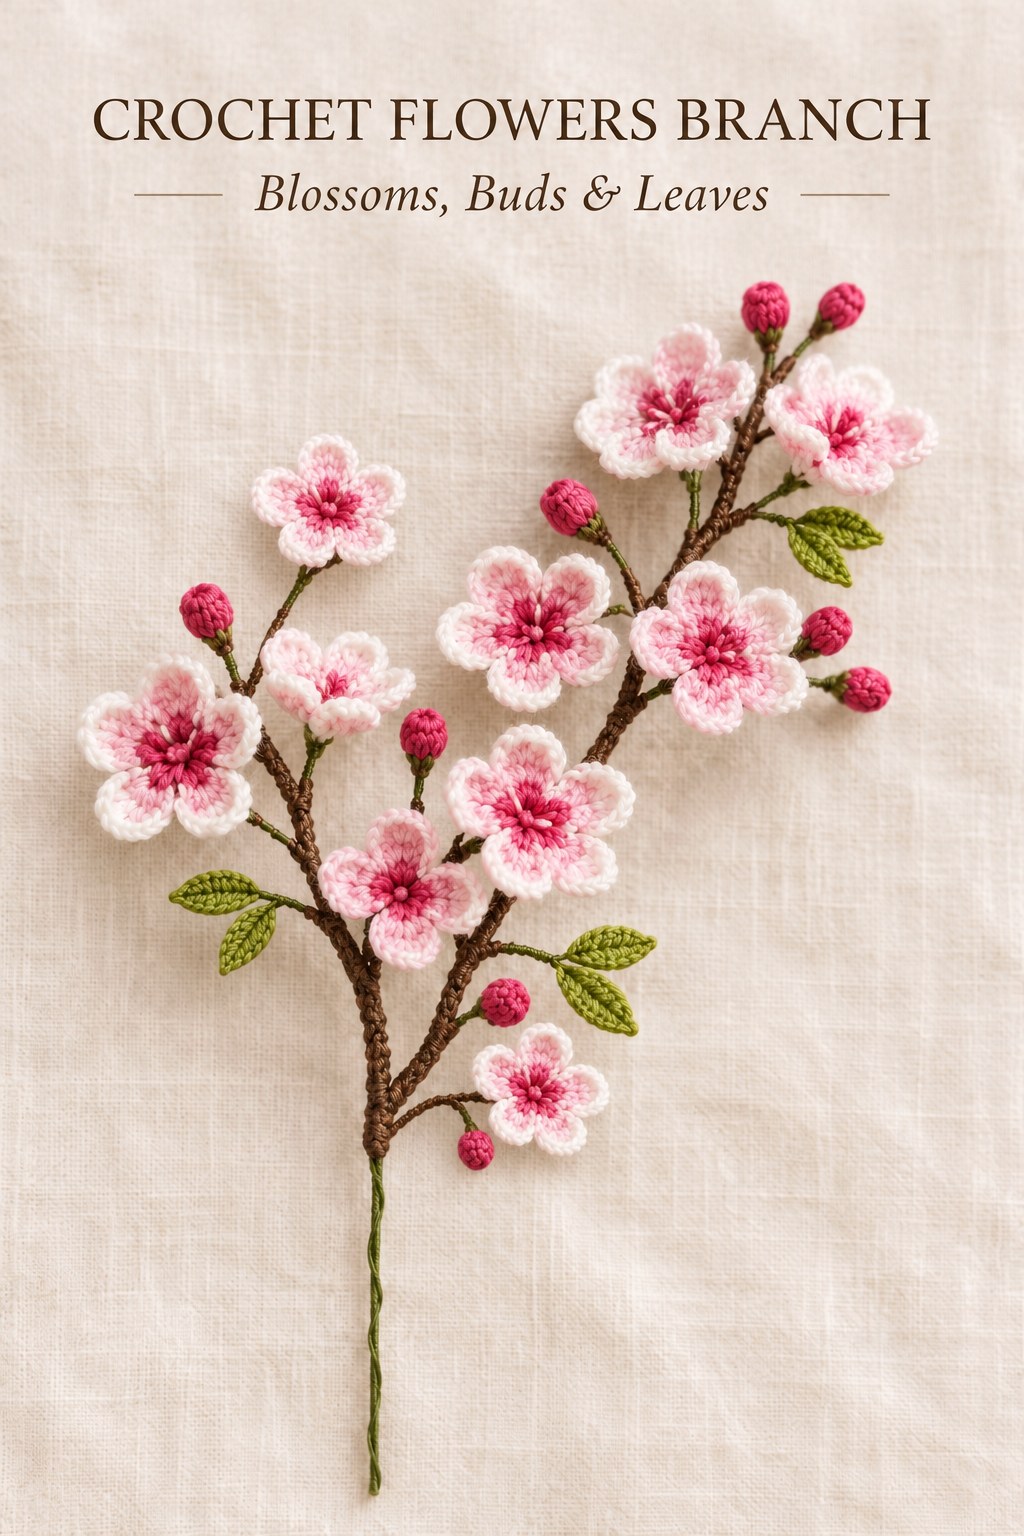
This crochet Flowers Branch pattern brings together five-petal blossoms, little closed buds, paired green leaves and a narrow brown crocheted branch. The source design appears on PDF pages seventy-nine and eighty of the supplied collection. Its appeal comes from the combination of open flowers and small unfinished-looking buds, with fine wire allowing the sprig to curve naturally. This illustrated guide retains the separate component sequences and the source assembly method, so the branch is built from crocheted parts rather than from a decorated ready-made twig.

Key Takeaways
- Make ten or more flowers and five or more buds, as directed by the source.
- Use cotton yarn, a 1.90 mm hook and two wire thicknesses: 0.6 mm for small elements and 0.8 mm for the main branch.
- The leaf is one connected pair, made with two short chain foundations.
- In this collection, two stitches together means two complete stitches in one anchor; it is an increase.
- Read the original charts beside the written rounds and follow the actual assembly photographs below.
CROCHET FLOWERS BRANCH PATTERN
Project: A wire-supported brown cotton branch carrying five-petal pink-and-white flowers, compact buds and connected green leaf pairs.
| Yarn and hook | Cotton in white, pink, dark pink, brown and green; 1.90 mm hook. Yarn weight and quantity are not supplied. |
|---|---|
| Wire and scale | Green wire 0.6 mm for the elements and 0.8 mm for the branch. Gauge, finished dimensions and cutting lengths are not supplied. |
| Terminology | US: ch chain, sc single crochet, hdc half double crochet, dc double crochet, tr treble crochet, sl st slip stitch. Source ST means sl st; MD matches the two-bar tr chart symbol. Two SC together means 2 sc in one original stitch. |
| Flower rounds 1–3 | Magic ring. R1: ch3, 5 dc into ring; tighten, sl st join. R2: 5 sc. R3: repeat sc, ch3 to make 5 arches; sl st join. |
| Flower round 4 | In each arch: sl st, ch3, dc, 2 tr, dc, ch3, sl st. Repeat in all 5 arches. |
| Flower round 5 | Repeat for each petal: 2 sl st, sc, 2 sc in one stitch, 2 sc in next stitch, sc, 2 sl st; continue with 1 sl st. Cut and secure. Make 10 or more flowers. |
| Bud | Magic ring. R1: ch3, 10 dc; tighten, sl st join. R2 and R3: 10 sc each. R4: repeat skip1, sc = 5 sc. Tighten with sl st, lock ch2, cut and secure. Make 5 or more. |
| Connected leaf pair | First lobe: ch7+1; 2 sc, hdc, 2 dc, hdc, sc along working chains. Second lobe: ch7+1 and repeat. Work sl st all around the paired outline. Lock ch2, cut. Quantity is not specified. |
| Branch | Magic ring. R1: ch3, 5 dc; tighten, sl st join. R2: ch3, 5 dc, sl st join. Repeat R2 to desired height. Sl st join, lock ch2, cut. |
| Wire and assembly | Bend one end of 0.8 mm wire, insert into branch and lock at base. Insert 0.6 mm wire at element bases and twist. Wrap elements around branch and twist the stems into position. Follow the actual source photographs for placement and support. |
Materials and the Shape of the Finished Sprig
The materials list specifies cotton yarn in white, pink, dark pink, brown and green. The finished photograph uses pink shades toward the flower centers, white at the outer edges, green for the leaves and brown for the branch. The written flower rounds do not assign every individual color change, so use that photograph and the color-coded chart as the visual guide rather than treating an invented color schedule as a printed instruction.
Use the listed 1.90 mm crochet hook. The source supplies neither a yarn weight nor a yardage allowance, and it does not give a finished flower diameter, branch length or gauge. Those details depend on the cotton selected and the maker’s tension. Keep the same yarn thickness across the small components if you want their relative scale to resemble the original sprig.
The two wire sizes have different jobs. The thicker 0.8 mm support runs inside the brown branch tube. The finer 0.6 mm wire supports flowers, buds and leaves and forms their small attachment stems. No exact cutting lengths are printed. Compare the relevant assembly photograph before cutting so there is enough length for the demonstrated insertion, bend and twist.
Understand the Collection’s Stitch Language
CH means chain, SC means single crochet, HDC means half double crochet, DC means double crochet and ST means slip stitch. These names are used in US terminology throughout this guide. The magic ring is the adjustable starting loop used for both the flower and the bud. Pulling its loose tail closes the small central opening after the first round has been worked.
The collection legend is especially important here: the expression two SC together describes two complete single crochets worked into the same original stitch. It is an increase, not sc2tog. In the flower edging, the two adjacent increases widen the upper part of each petal. Replacing them with decreases would reduce that edge and change the shape shown by the chart.
The flower prose also uses MD for the two tall central petal stitches. The corresponding symbols on its chart have two diagonal bars, matching the collection’s Triple Crochet symbol. They are therefore rendered here as US treble crochets. Make each treble as a complete stitch; the two trebles in the arch are not a joined cluster. The surrounding double crochets and chain sections remain separate.

Chart checkpoint: The tall two-bar symbols are US trebles. The edging’s paired single crochets share anchors and are increases, not decreases.
Crochet the Five-Petal Flowers
Rounds One and Two: The Small Center
Start with a magic ring. Into it, work chain three and five double crochets. Pull the loose yarn end to tighten the circle and join with a slip stitch. The source names the starting chain separately from the five double crochets, so retain that wording rather than adding an extra double crochet or changing the ring into a larger foundation.
Work five single crochets for round two. This small round provides the five locations used by the next set of arches. Keep those stitch tops visible as you work around the center. The open center and the petal-support arches are different structures: tighten the ring itself while preserving the intended chain spaces in the next round.
Round Three: Make Five Chain Arches
Repeat one single crochet followed by chain three around the center to create five arches, then join with a slip stitch. The source expressly identifies five arches. These spaces are the foundations for the five petals, so check the arch count before beginning the taller stitches. Each arch should remain open enough to receive its complete petal group.
A useful way to read this construction is center, support ring, then petals. Do not make individual petals separately and sew them around a disk. All five petals belong to the same flower motif and are worked into the arches created in this round. The chart shows the relationship clearly, including the entry and exit slip stitches at each arch.
Round Four: Fill Each Arch
Into each chain arch work slip stitch, chain three, one double crochet, two treble crochets, one double crochet, chain three and slip stitch. Repeat that complete group in all five arches. The taller pair sits in the middle of the petal and the chain-three sections flank its sides, producing the rounded, open flower shape seen in the source photograph.
Both central trebles are worked into the same arch as the other stitches in that petal group. Keep them as two finished stitches, with each stitch completed before starting the next. The slip stitches secure the lower sides of the petal. Moving on before the second slip stitch would leave the petal group incomplete and make the next arch harder to identify.
Round Five: Finish the Petal Edges
For each petal, work two slip stitches, one single crochet, two single crochets in one stitch, two single crochets in the next stitch, one single crochet and two slip stitches. Continue with one slip stitch before repeating the sequence for the next petal. Follow the chart around the complete flower, then cut the yarn and secure the end.
Notice the difference between the two groups of two single crochets and the other single crochets in that edging. Each increase group shares one anchor. The plain single crochets occupy their own positions, while the slip stitches form the lower transitions. Keep this sequence consistent across all five petals instead of widening one side more than the other.
The source asks for ten or more flowers. Work the first flower all the way through its edging before batching the rest. That complete sample lets you compare the center, arch count and petal outline with the source photograph. It also establishes how large the flower will be with your particular cotton, without claiming a finished measurement the book does not provide.
Make the Small Closed Buds
Begin each bud in a magic ring. Work chain three and ten double crochets into the ring, pull the tail to tighten it and join with a slip stitch. Rounds two and three each contain ten single crochets. These two steady rounds form the small bud body before the final narrowing step, rather than opening into petal arches as the flower does.
For round four, repeat skip one stitch, one single crochet around to obtain five single crochets. This reduction is accomplished by skipping alternate originals; it is not the same operation as the two-in-one increases used on the flower edges. Tighten the circle with one slip stitch, lock with two chains, then cut and secure the yarn.
Make five or more buds. The instructions do not call for stuffing, an embroidered center or an added sepal on this small component. Keep the bud as the simple closed form given here. Once several are complete, place them beside the open blossoms so their compact shape provides the same contrast shown in the finished branch photograph.
