

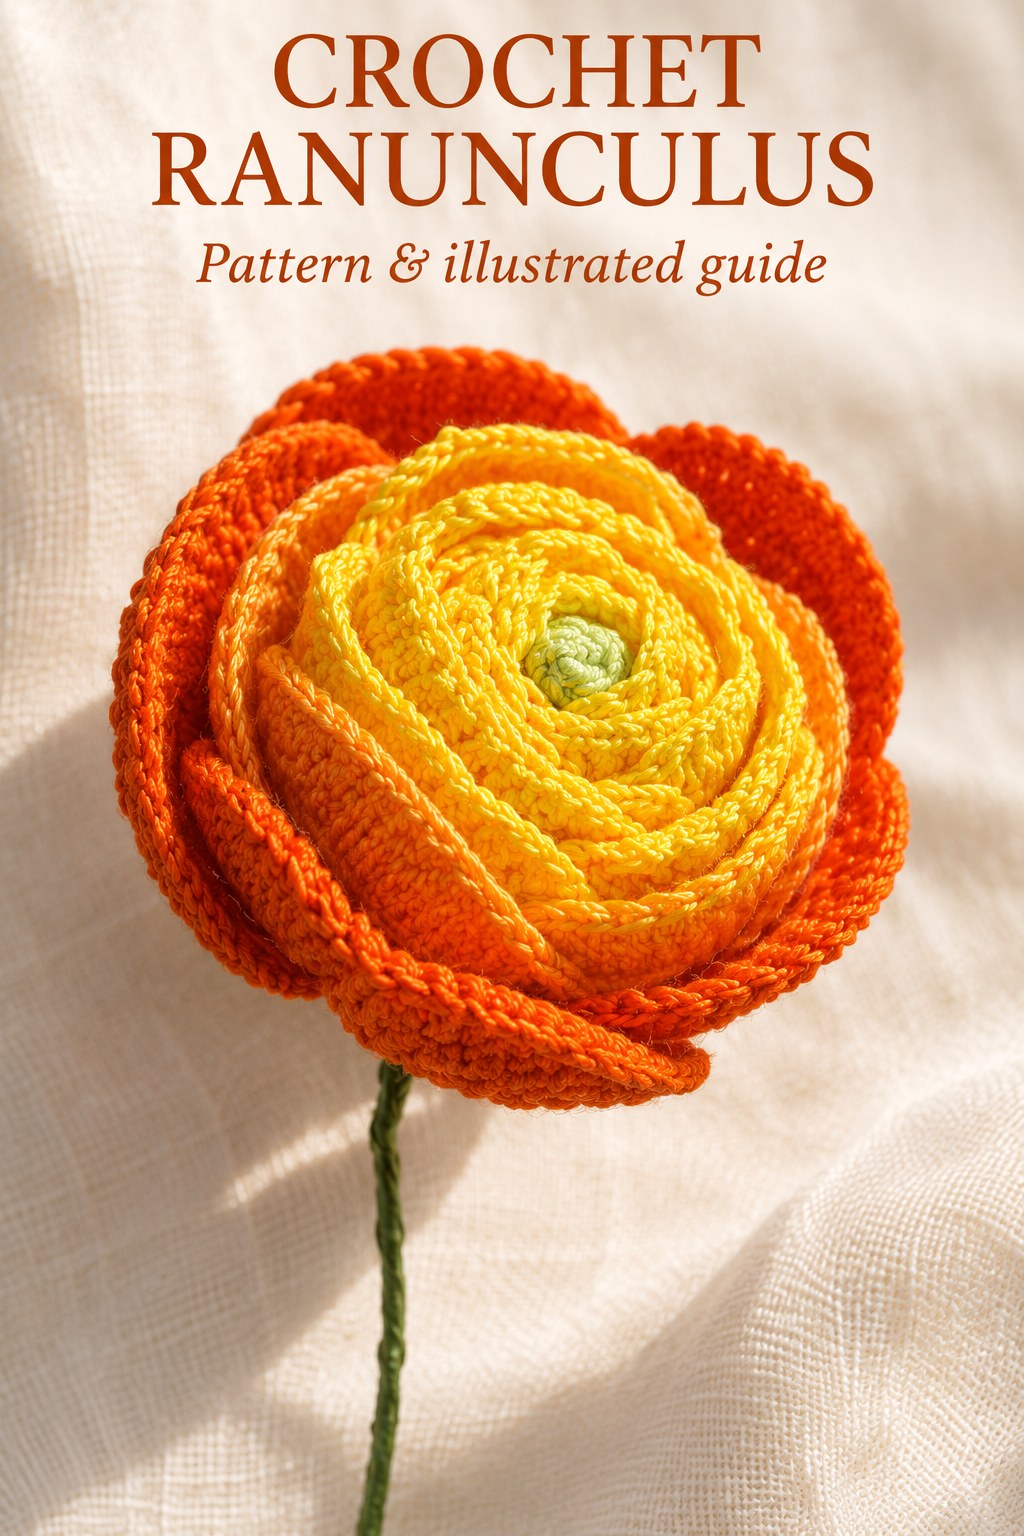
This crochet Ranunculus pattern builds its layered flower around a stuffed circular core with yellow surface petals spiraling across the front. Separate round petals add the light-orange and orange outer layers, while a small green crocheted center sits inside the spiral. The design appears on PDF pages 119 through 122 of the supplied collection. This guide retains every base round, the complete surface sequence, both petal types and the original assembly method, with actual source charts and photographs beside the relevant stages.

Key Takeaways
- Use cotton in yellow, light orange, orange and light green, with a 1.90 mm hook.
- The source specifies 0.8 mm wire, stuffing and green floral tape.
- The base starts with ten half doubles, expands to forty and closes after stuffing.
- Back-loop construction reserves the loops used by the full surface-petal spiral.
- Make five or more Petals A and five or more wired Petals B.
- Seat the small green center, join the petal groups, twist the wires and tape the stem.
CROCHET RANUNCULUS FLOWER PATTERN
Project: A layered yellow-and-orange flower made from a stuffed spiral core, five or more petals of each separate type, and a small light-green center.
| Skill level | No difficulty label is supplied. Uses spiral back-loop work, circular increases, stuffing, surface crochet, wired petals and layered assembly. |
|---|---|
| Materials | Cotton yarn in yellow, light orange, orange and light green; 1.90 mm hook; 0.8 mm wire; stuffing; green floral tape. Yarn weight, quantities and wire-cut lengths are not supplied. |
| Gauge and dimensions | No gauge, finished diameter, petal dimensions or final stem length is stated. |
| US terminology | ch = chain; sc = single crochet; hdc = half double crochet; dc = double crochet; ss = slip stitch, source ST. Two stitches together means 2 complete stitches in the same original, following the source increase legend. |
| Base foundation and round 1 | Magic ring. Ch2, 10 hdc into the ring; tighten. Do not ss to join. Continue in a spiral, working in back loops. |
| Base round 2 | 2 hdc in each original. 20 hdc. |
| Base round 3 | 10 times. 30 hdc. |
| Base round 4 | 10 times. 40 hdc. |
| Base round 5 | 40 sc in back loops. End back-loop-only processing after this round. |
| Base rounds 6–10 | 40 sc in each of 5 rounds. 200 sc worked across the section; 40 remain around each round. |
| Base round 11 | 10 times. 30 sc. |
| Base round 12 | 30 sc. Add stuffing. |
| Base round 13 | 10 times. 20 sc. |
| Base round 14 | 20 sc. |
| Base round 15 | 10 times. 10 sc. |
| Base round 16 | 5 times. 5 sc. Tighten the opening with 1 ss, ch2 to lock and cut the yarn. |
| Surface round 17, first section | Join yarn in the first reserved loop. Work ss, 5 dc, 3 ss, 5 dc, 3 ss, 7 dc, 3 ss, 7 dc, 3 ss, 9 dc, 3 ss, 9 dc, 3 ss, following the reserved-loop spiral shown by the chart. |
| Surface round 17, final section | Repeat the following full group 3 times: 5 times, then 3 ss. Cut the yarn and hide the end inside as shown. |
| Petal A, make 5 or more: round 1 | Magic ring. Ch3, 10 dc into the ring. Tighten and ss to join. |
| Petal A round 2 | 2 complete dc in each original. 20 dc. Ss to join. |
| Petal A round 3 | 2 complete dc in each original. 40 dc. Ss to join. |
| Petal A round 4 | Ch9 plus 1 height chain; work 9 sc along the extension. Continue with 40 sc around the circular petal, then 9 ss along the extension as charted. Ch2 to lock and cut the yarn. |
| Petal B, make 5 or more: rounds 1–3 | Repeat Petal A rounds 1–3 in full: magic ring, ch3 and 10 dc; then 20 dc; then 40 dc, joining each round with ss. |
| Petal B round 4 | 40 sc incorporating wire. |
| Petal B round 5 | 2 sc; 9 times; 2 sc. Ss to join, ch2 to lock and cut the yarn. This uses 40 originals and produces 49 stitches. |
| Pistil | Ch3 and ss to form a ring. Work 25 sc into the ring. Insert wire at the back. |
| Assembly | Insert the pistil at the center of the base, twist its wire and seat it inside the core. Join Petals A at the base and secure with yarn. Join Petals B, twist their wires and cover the stem with green floral tape. |
Plan the Core and the Two Separate Petal Sets
The stuffed base supplies the central volume. Its reserved loops then carry the yellow surface spiral, which creates the close inner ruffles visible from above. Petals A are separate circular pieces with narrow crocheted extensions; Petals B are separate larger pieces with wire incorporated around their border.
The source asks for five or more of each petal type, so prepare the two sets separately. Their first three rounds match, but their fourth rounds do not. Labeling the groups while working helps prevent accidentally adding wire to a Petal A extension or omitting the shaped fifth round on Petal B.
Use the Named Palette and Support Materials
The material list names yellow, light orange, orange and light-green cotton, a 1.90 mm crochet hook, 0.8 mm wire, stuffing and green floral tape. The source palette marks the base orange and its surface spiral yellow. The finished photo shows light and deeper orange around those inner yellow ruffles.
No brand, formal cotton weight, yardage, wire length, gauge or finished diameter is printed. Keep those details unspecified rather than inferring measurements from the hands in the process photographs. The center is the small green piece; no separate leaf pattern, bead ring or glue treatment belongs to this entry.
Construction checkpoint: Complete the stuffed base and its surface spiral before surrounding it with the two separately made petal sets. Five or more of each petal type is the printed instruction.
Read the Increases as Separate Complete Stitches
The collection’s general legend uses together for complete stitches made in the same original. The base’s two half doubles together therefore means an increase, as confirmed by ten becoming twenty. The same convention applies to the double-crochet pairs in the surface spiral and circular petals.
Finish each stitch completely before beginning its partner in the same original. Do not substitute a joined-top decrease or cluster. The narrowing sections explicitly use skipped originals, giving a different operation and a different direction of shaping. Keeping that local convention clear is essential to retaining the source flower.

Base Round 1: Begin the Continuous Spiral
Make a magic ring, chain two and work ten half double crochets into it. Tighten the circle. The source explicitly says not to join with a slip stitch. Continue the base in a spiral, using back loops for the early section, rather than adding a joining seam after each round.
Keep the ten half doubles separate from the starting height chain when counting. The next round doubles ten working originals to twenty. A removable marker can help track your own round boundary, but it is a practical handling choice and not an additional stitch or a change to the source spiral.
Base Rounds 2–4: Expand from Twenty to Forty
In round two, work two complete half doubles in every original to obtain twenty. In round three, repeat two half doubles in one original and one half double in the next ten times, giving thirty. In round four, repeat an increase followed by two ordinary half doubles ten times, giving forty.
Work these rounds in back loops as specified. Each increase adds one live stitch, and each of the final two rounds contains ten increases. The progression is ten, twenty, thirty and forty, not a doubling to eighty. Count the completed tops at the end of each circuit before continuing into the single-crochet section.
Base Round 5: Finish the Reserved-Loop Section
Work forty singles in back loops for round five. The source then ends back-loop-only processing. This fifth round secures the preceding forty-position circuit while preserving the front loops needed for the visible spiral surface work. Those reserved loops are a separate working path from the new live circumference.
The reserved path comprises the ten, twenty, thirty and forty positions of the first four rounds, totaling one hundred. Do not crochet a new loose chain across the stuffed base to imitate the spiral. The actual chart and working photograph show the surface stitches attached to the loops created by this construction.
Base Rounds 6–12: Build Volume and Add Stuffing
Work forty singles in each of five rounds, numbered six through ten. The printed two hundred is the combined number worked across that section; the circumference stays forty. Round eleven repeats three singles and skip one ten times, giving thirty. Round twelve works thirty ordinary singles.
Add stuffing after round twelve. The source supplies no weight or volume. Assess the filling in your own component while the thirty-position opening remains accessible, keeping the reserved surface loops intact. The stuffed shape supports the later ruffles and outer petals, rather than acting as a separate exposed finished flower.
Keep totals separate: Two hundred singles are worked across five forty-stitch rounds. The live base never becomes two hundred stitches wide, and its first narrowing round must begin with forty originals.
Base Rounds 13–16: Close the Stuffed Core
Round thirteen repeats two singles followed by skip one ten times, taking thirty originals to twenty. Work twenty singles for round fourteen. Round fifteen repeats one single and skip one ten times, leaving ten; round sixteen repeats the same single-and-skip unit five times, leaving five.
Tighten the final opening with a slip stitch, chain two to lock and cut the yarn. Keep this closure separate from the later surface round numbered seventeen. The source finishes the stuffed body before joining yellow yarn into the first reserved loop, so no further body increase is implied by that new number.
Begin Surface Round 17 in the Reserved Loops
Join yarn in the first reserved loop and follow the chart’s spiral path. Work one slip stitch, five doubles, three slips, five doubles, three slips, seven doubles, three slips, seven doubles, three slips, nine doubles, three slips, nine doubles and three slips. Ordinary doubles and slips each occupy their next reserved original.
This first sequence uses sixty-one reserved originals. The small slipped sections separate the rising petal groups, while the longer runs of doubles enlarge the ruffles outward. Keep the five-, seven- and nine-double groups in the printed order rather than replacing the spiral with identical scallops around one outer circumference.
Complete the Three Expanded Surface Groups
The remainder of the surface round repeats a longer group three times. Each group works an increase of two complete doubles in one original followed by a double in the next original, five times, then three slip stitches. That group uses thirteen originals and produces eighteen stitches.
Three groups use the final thirty-nine reserved originals, completing the one-hundred-position path after the initial sixty-one. This checks the whole printed sequence against the saved loops. Cut the yarn and hide its end inside as shown by the actual source photograph, leaving the stuffed core enclosed beneath the ruffles.
