

Using your pastel accent yarn, make two identical arms.
- Rnd 1: Make a magic ring and work 6 sc into the ring. (6 sts)
- Rnd 2: Sc in each stitch around. (6 sts)
- Rnd 3: Sc in each stitch around. (6 sts)
- Rnd 4: Sc in each stitch around. (6 sts)
- Rnd 5: Sc in each stitch around. (6 sts)
- Rnd 6: Sc in each stitch around. (6 sts)
Fasten off, leaving a long sewing tail. Add a tiny amount of fiberfill if desired, keeping the arms flexible rather than firmly stuffed.
Flatten the open end of each arm so the stitches from the front and back align. Using the working yarn, work 3 sc through both layers to close the opening. The resulting flat edge will make sewing easier.
Make the second arm using exactly the same instructions.
Part 4: Assemble the Crochet Ghost
Before attaching the arms, place the ghost on a flat surface and identify the front and back. The face should be centered, with the arms positioned symmetrically on either side.
- Place the first arm on one side of the body, approximately between Rounds 13 and 16.
- Angle the flattened end slightly downward or outward to create a welcoming pose.
- Pin the arm temporarily and check the placement from the front.
- Thread the yarn needle with the remaining sewing tail.
- Sew the flattened arm edge securely to the body using small stitches through the attachment edge and body stitches.
- Repeat with the second arm on the opposite side.
- Check that both arms are positioned at approximately the same height.
- Secure the yarn ends inside the body and trim the excess.
The arms should extend slightly outward rather than pointing straight down. This creates the cute floating appearance of the finished ghost.
Part 5: Final Details and Shaping
Once the arms are attached, inspect the facial features and scalloped border. Adjust any uneven sections with your fingers and make sure all loose yarn ends are hidden.
If you want a more expressive ghost, you can embroider a slightly wider smile or use a smaller curved line for a shy expression. Keep the facial features simple so the soft body and pastel details remain the main focus.
Gently shape the head into a rounded dome and arrange the lower scallops evenly around the body. The ghost should sit or stand with a soft, floating silhouette rather than looking like a tightly packed ball.
Your crochet ghost amigurumi is now complete!
Customization Ideas and Size Adjustments
One of the best things about this crochet ghost pattern is how easy it is to personalize. The basic construction stays the same, but small changes to the colors, facial features, and body proportions can create completely different characters.
Choose Your Favorite Pastel Colors
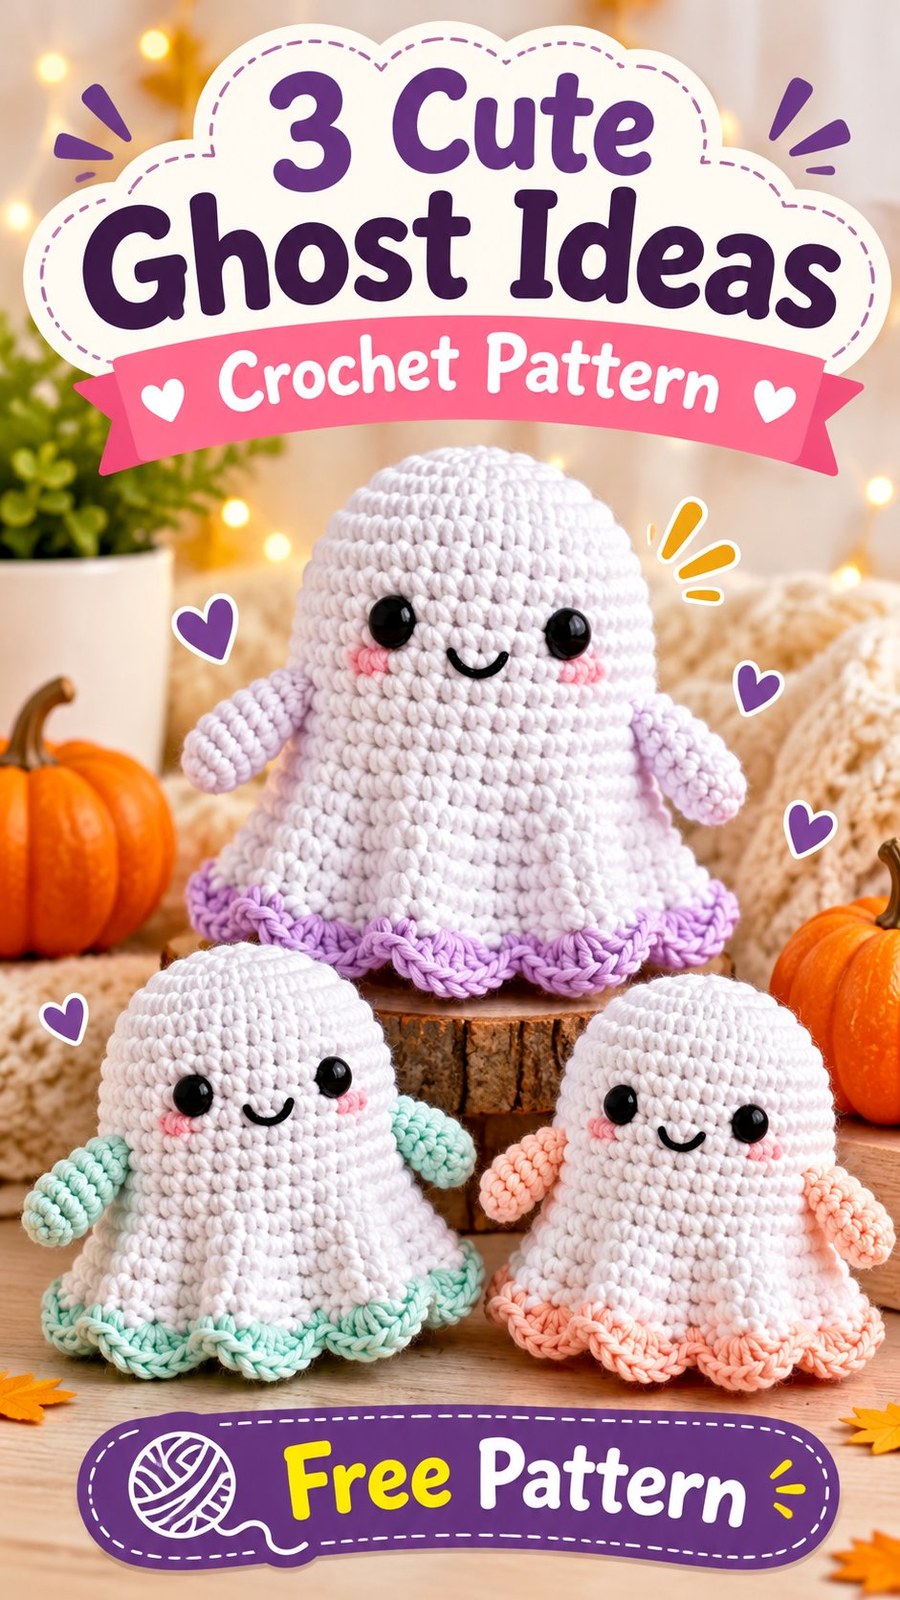
The contrasting arms and scalloped border can be made in almost any color combination. For a look similar to the pictured collection, try these combinations:
- Lavender ghost: White body with pale purple arms and hem.
- Mint ghost: White body with soft mint-green details.
- Peach ghost: White body with warm pastel peach accents.
- Classic Halloween ghost: White body with black or charcoal-gray details.
- Autumn ghost: White body with rust, burnt orange, or muted mustard accents.
Make a Smaller Ghost
For a miniature version, use finer yarn and a smaller crochet hook while following the same stitch counts. A light fingering-weight cotton yarn with an appropriately smaller hook can produce a compact decoration.
Keep your stitches tight enough to prevent stuffing from showing. The finished size will depend on your yarn and tension, so measure the result as you work rather than expecting the same dimensions as the base pattern.
Create a Larger Ghost
To make a larger version, choose a heavier yarn and a compatible hook. You can also add extra straight rounds after Round 18 to make the body taller.
For a wider ghost, add another increase round before beginning the flared lower section. For example, work an additional evenly distributed increase round from 48 to 54 stitches, then adjust the subsequent shaping so the lower body remains balanced.
When changing the stitch count, remember that the scalloped border requires a multiple of four stitches for the repeat used in this pattern. If your final body round does not have a multiple of four stitches, adjust the increase sequence or distribute the remaining stitches with plain slip stitches at the border.
Personalize the Face
The expression can change the personality of your ghost. Try small oval eyes for a sweet character, wider embroidered eyes for a surprised expression, or a tiny curved smile for a gentle appearance.
You can also use different embroidery colors, but black gives the clearest contrast against the white body. For projects intended for young children, embroidered features are preferable to detachable plastic parts.
Common Crochet Ghost Mistakes and How to Fix Them
Even a simple amigurumi project can present a few challenges. Paying attention to stitch tension, shaping, and assembly will help create a neat finished character.
Visible Gaps Between Stitches
If the stuffing is visible through the body, your stitches may be too loose. Try using a smaller crochet hook while keeping your yarn weight the same. You should be able to insert the hook comfortably without stretching the loops excessively.
The Body Looks Uneven
Uneven shaping often happens when increases are accidentally skipped or repeated twice. Check the stitch count at the end of every increase round. A stitch marker is particularly useful because it helps you identify the beginning of each round.
The Ghost Looks Too Round
If the body resembles a ball rather than a floating ghost, make sure you complete the two lower increase rounds. These expand the base from 48 to 60 stitches and create the flared silhouette.
You can also add one or two plain rounds after the increases if you prefer a longer, dress-like shape.
The Scallops Curl Too Much
Excessive curling may indicate tight tension or overly small double crochet stitches. Relax your tension slightly and check that all five double crochet stitches are worked into the same base stitch.
If the scallops look uneven, count the four base stitches used for each repeat. There should be 15 complete scallops around the 60-stitch edge.
The Arms Look Different
Make sure both arms have the same number of rounds and use similar stuffing amounts. Before sewing them permanently, pin both arms in place and compare their angles and heights from the front.
Finishing, Shaping, and Caring for Your Crochet Ghost
Finishing gives your amigurumi a polished appearance. Once all components are attached, use a yarn needle to hide loose ends inside the body. Avoid leaving long strands or loose knots on the outside.
Gently arrange the stuffing with your fingers so the crown remains rounded and the body flares naturally. If the lower edge looks uneven, lightly adjust the scallops individually until they form a balanced circle.
Blocking and Shaping
Traditional wet blocking is usually unnecessary for a stuffed amigurumi toy. Instead, use your hands to smooth the body and arrange the decorative border.
If the scalloped edge needs a little reshaping, lightly mist it with water and gently arrange the shells. Allow the ghost to dry completely in a well-ventilated area without compressing the stuffing.
Always check the yarn care instructions before applying moisture or heat. Avoid using high temperatures that could damage synthetic fibers or distort the crocheted stitches.
Washing and Storage
For routine cleaning, remove dust with a soft, dry cloth or a gentle brush. If the yarn permits washing, clean the ghost carefully by hand using cool water and a mild detergent.
Do not wring or twist the project. Press excess water out with a clean towel and allow it to air-dry completely. Reshape the body and scalloped edge while it is still slightly damp.
When the Halloween season is over, store your crochet ghosts in a clean, dry container away from direct sunlight. Avoid placing heavy decorations on top of them, as this may flatten the rounded head or crush the scalloped border.
Creative Ways to Display Your Crochet Ghosts
These little ghosts are wonderful seasonal decorations because they are small, lightweight, and easy to arrange. Their pastel details also make them suitable for softer Halloween decorating styles.
- Halloween shelf display: Arrange three ghosts together with small pumpkins and autumn decorations.
- Seasonal centerpiece: Place them on a decorative tray surrounded by fabric leaves and miniature pumpkins.
- Handmade gift: Make a ghost in someone’s favorite color for a thoughtful seasonal present.
- Craft fair collection: Create several versions with coordinated colors and different embroidered expressions.
- Desk decoration: Place one beside a notebook or craft supplies for a cheerful seasonal touch.
For a coordinated collection, keep the white body color consistent and change only the accent yarn. This gives every ghost its own personality while maintaining a matching appearance.
Crochet Ghost Pattern at a Glance
- Best yarn choice: Smooth DK-weight cotton or cotton-blend yarn for defined stitches and a neat finish.
- Skill level: Confident beginner with basic amigurumi experience.
- Key technique: Continuous single crochet rounds with evenly distributed increases.
- Signature detail: Contrasting five-double-crochet scallops around the flared lower edge.
- Size adjustment: Change yarn weight, add body rounds, or adjust the increase sequence while maintaining a balanced shape.
Make Your Own Cute Crochet Ghost Collection
This cute crochet ghost amigurumi is a lovely way to bring handmade charm to your Halloween decorations. Its rounded white body, tiny arms, friendly embroidered face, and colorful scalloped hem create a character that is both playful and easy to personalize.
The simple construction makes this an enjoyable project for anyone who loves small crochet creations. Once you understand the continuous rounds and basic increases, you can experiment with different yarn colors, facial expressions, and body lengths to make every ghost unique.
Before starting, choose your yarn, check your tension, and read through the complete pattern so you understand how the body, arms, and decorative edging fit together. Take your time with the facial details and assembly because these small finishing touches make a big difference to the final appearance.
Whether you make one lavender ghost, a mint-green character, or a whole family of pastel Halloween friends, this free crochet ghost pattern is a fun addition to your seasonal crochet projects. Gather your favorite yarn and crochet hook, and enjoy creating your own adorable handmade ghosts!
Tags
Crochet Ghost
Ghost Amigurumi
Halloween Crochet
Free Crochet Pattern
Cute Amigurumi
Crochet Halloween Decorations
Pastel Crochet
Crochet Ghost Toy
