

Round 2: 2 hdc in the first st (inc). Hdc in each st along the side of the sole until you reach the 3 hdc you worked in the last chain. (2 hdc in next st) 3 times (inc for the toe end). Hdc in each st along the other side until you reach the 2 hdc at the heel end. (2 hdc in next st) 2 times (inc for the heel end). Move stitch marker to the first st of the current round.
Round 3: (2 hdc in next st) 2 times (inc). Hdc in each st along the side. (2 hdc in next st, hdc in next st) 3 times (inc for the toe end). Hdc in each st along the other side. (2 hdc in next st, hdc in next st) 2 times (inc for the heel end). Move stitch marker to the first st of the current round.
Check your sole length against the Sizing Chart. Adjust hook size or add/remove initial chains/rounds if needed.
Sl st to the first hdc of your last sole round to join. Fasten off and weave in ends for one sole. For the second sole, do not fasten off; you’ll continue with the upper.
Part 2: Building the Boot Body
Using Main Color (MC – Yellow), continuing from the second sole:
Round 1 (Creating the “Wall”): Ch 1. Sc in the BLO of each st around. Sl st to the first sc to join. This round creates a nice, defined edge that makes the boot stand up.
Round 2 (Solid Body Round): Ch 2 (counts as hdc). Hdc in each st around. Sl st to the first hdc to join.
Round 3 (Toe Shaping – First Decrease Round): Ch 2. Hdc in the first (approx. 10-12) stitches (for the heel/instep area; adjust based on your sole size). Mark the center toe stitch. You’ll be working decreases symmetrically around this point. Now, for the toe decreases: (hdc2tog) 5-6 times across the front of the boot. Hdc in the remaining stitches around the heel/instep. Sl st to the first hdc to join. This round begins to pull the toe inwards.
Round 4 (Further Toe Shaping & Opening): Ch 2. Hdc in the first (approx. 8-10) stitches (slightly fewer as the front has narrowed). (hdc2tog) 3-4 times across the front of the boot (over the previously decreased section). Hdc in the remaining stitches around the heel/instep. Sl st to the first hdc to join. The opening for the foot should now be well-defined.
Round 5: Ch 2. Hdc in each st around the entire opening of the boot (including the decreased toe section). Sl st to the first hdc to join. This round creates a smooth transition to the cuff.
Part 3: The Ribbed Cuff
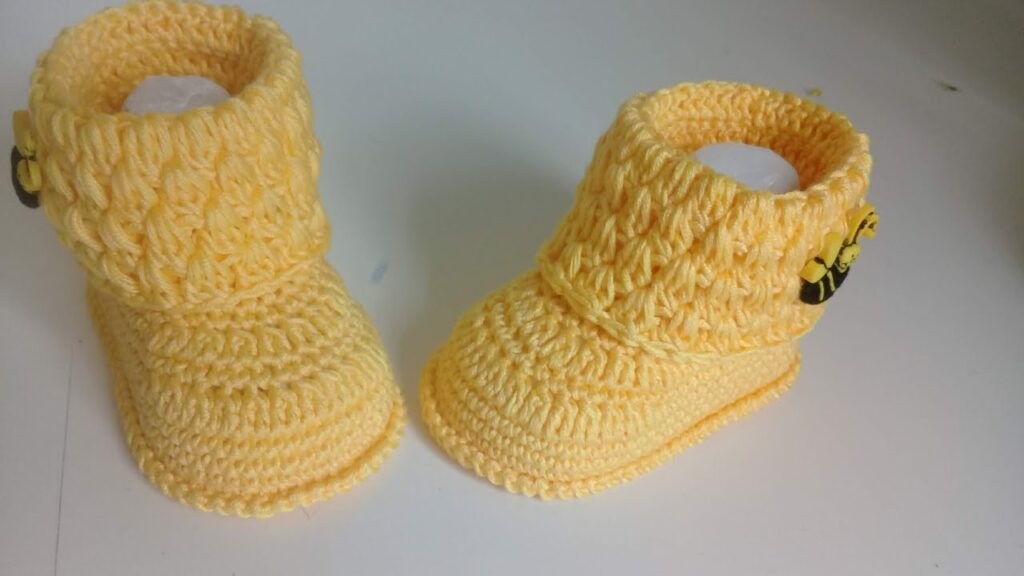
The picture shows a textured, ribbed cuff. This is typically achieved using front post and back post stitches.
Using Main Color (MC – Yellow):
Round 1 (Ribbing): Ch 2 (does not count as st). *FPhdc around next st, BPhdc around next st.* Repeat from * to * around. Sl st to the first FPhdc to join. This round creates the ribbed texture.
Repeat Round 1 of Ribbing for 3-4 more rounds, or until the cuff reaches your desired height. The picture shows a fairly tall cuff that is folded down.
Final Cuff Edge (Optional – for a neat top): Ch 1. Sc in each st around. Sl st to join. Fasten off MC.
Part 4: Finishing
- Weave in all remaining yarn ends securely.
- Make sure both boots are as identical as possible.
- Attach Bee Buttons: Sew one bee button onto the side of each boot, on the cuff, as seen in the picture. Ensure they are very securely attached for baby safety.
- Optional: For added grip, apply non-slip puffy paint or sew on non-slip pads to the bottom of the soles if the baby will be walking.
