

390 shares
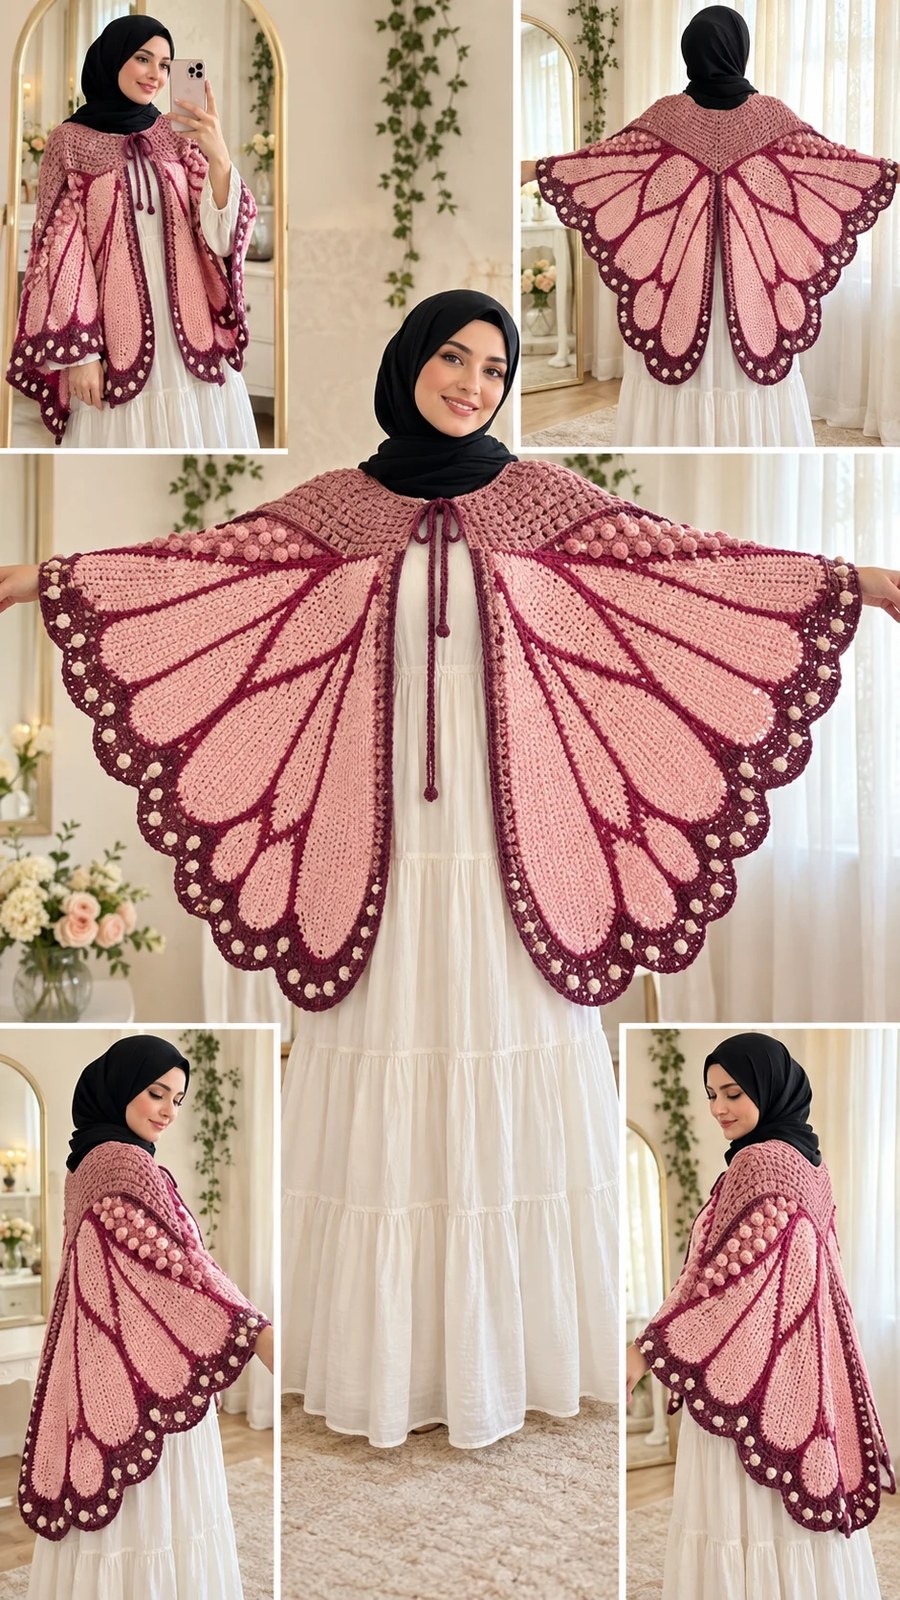
Go dig through your yarn stash right now. I know you have been saving those beautiful blush and berry skeins for something special. This is that project.
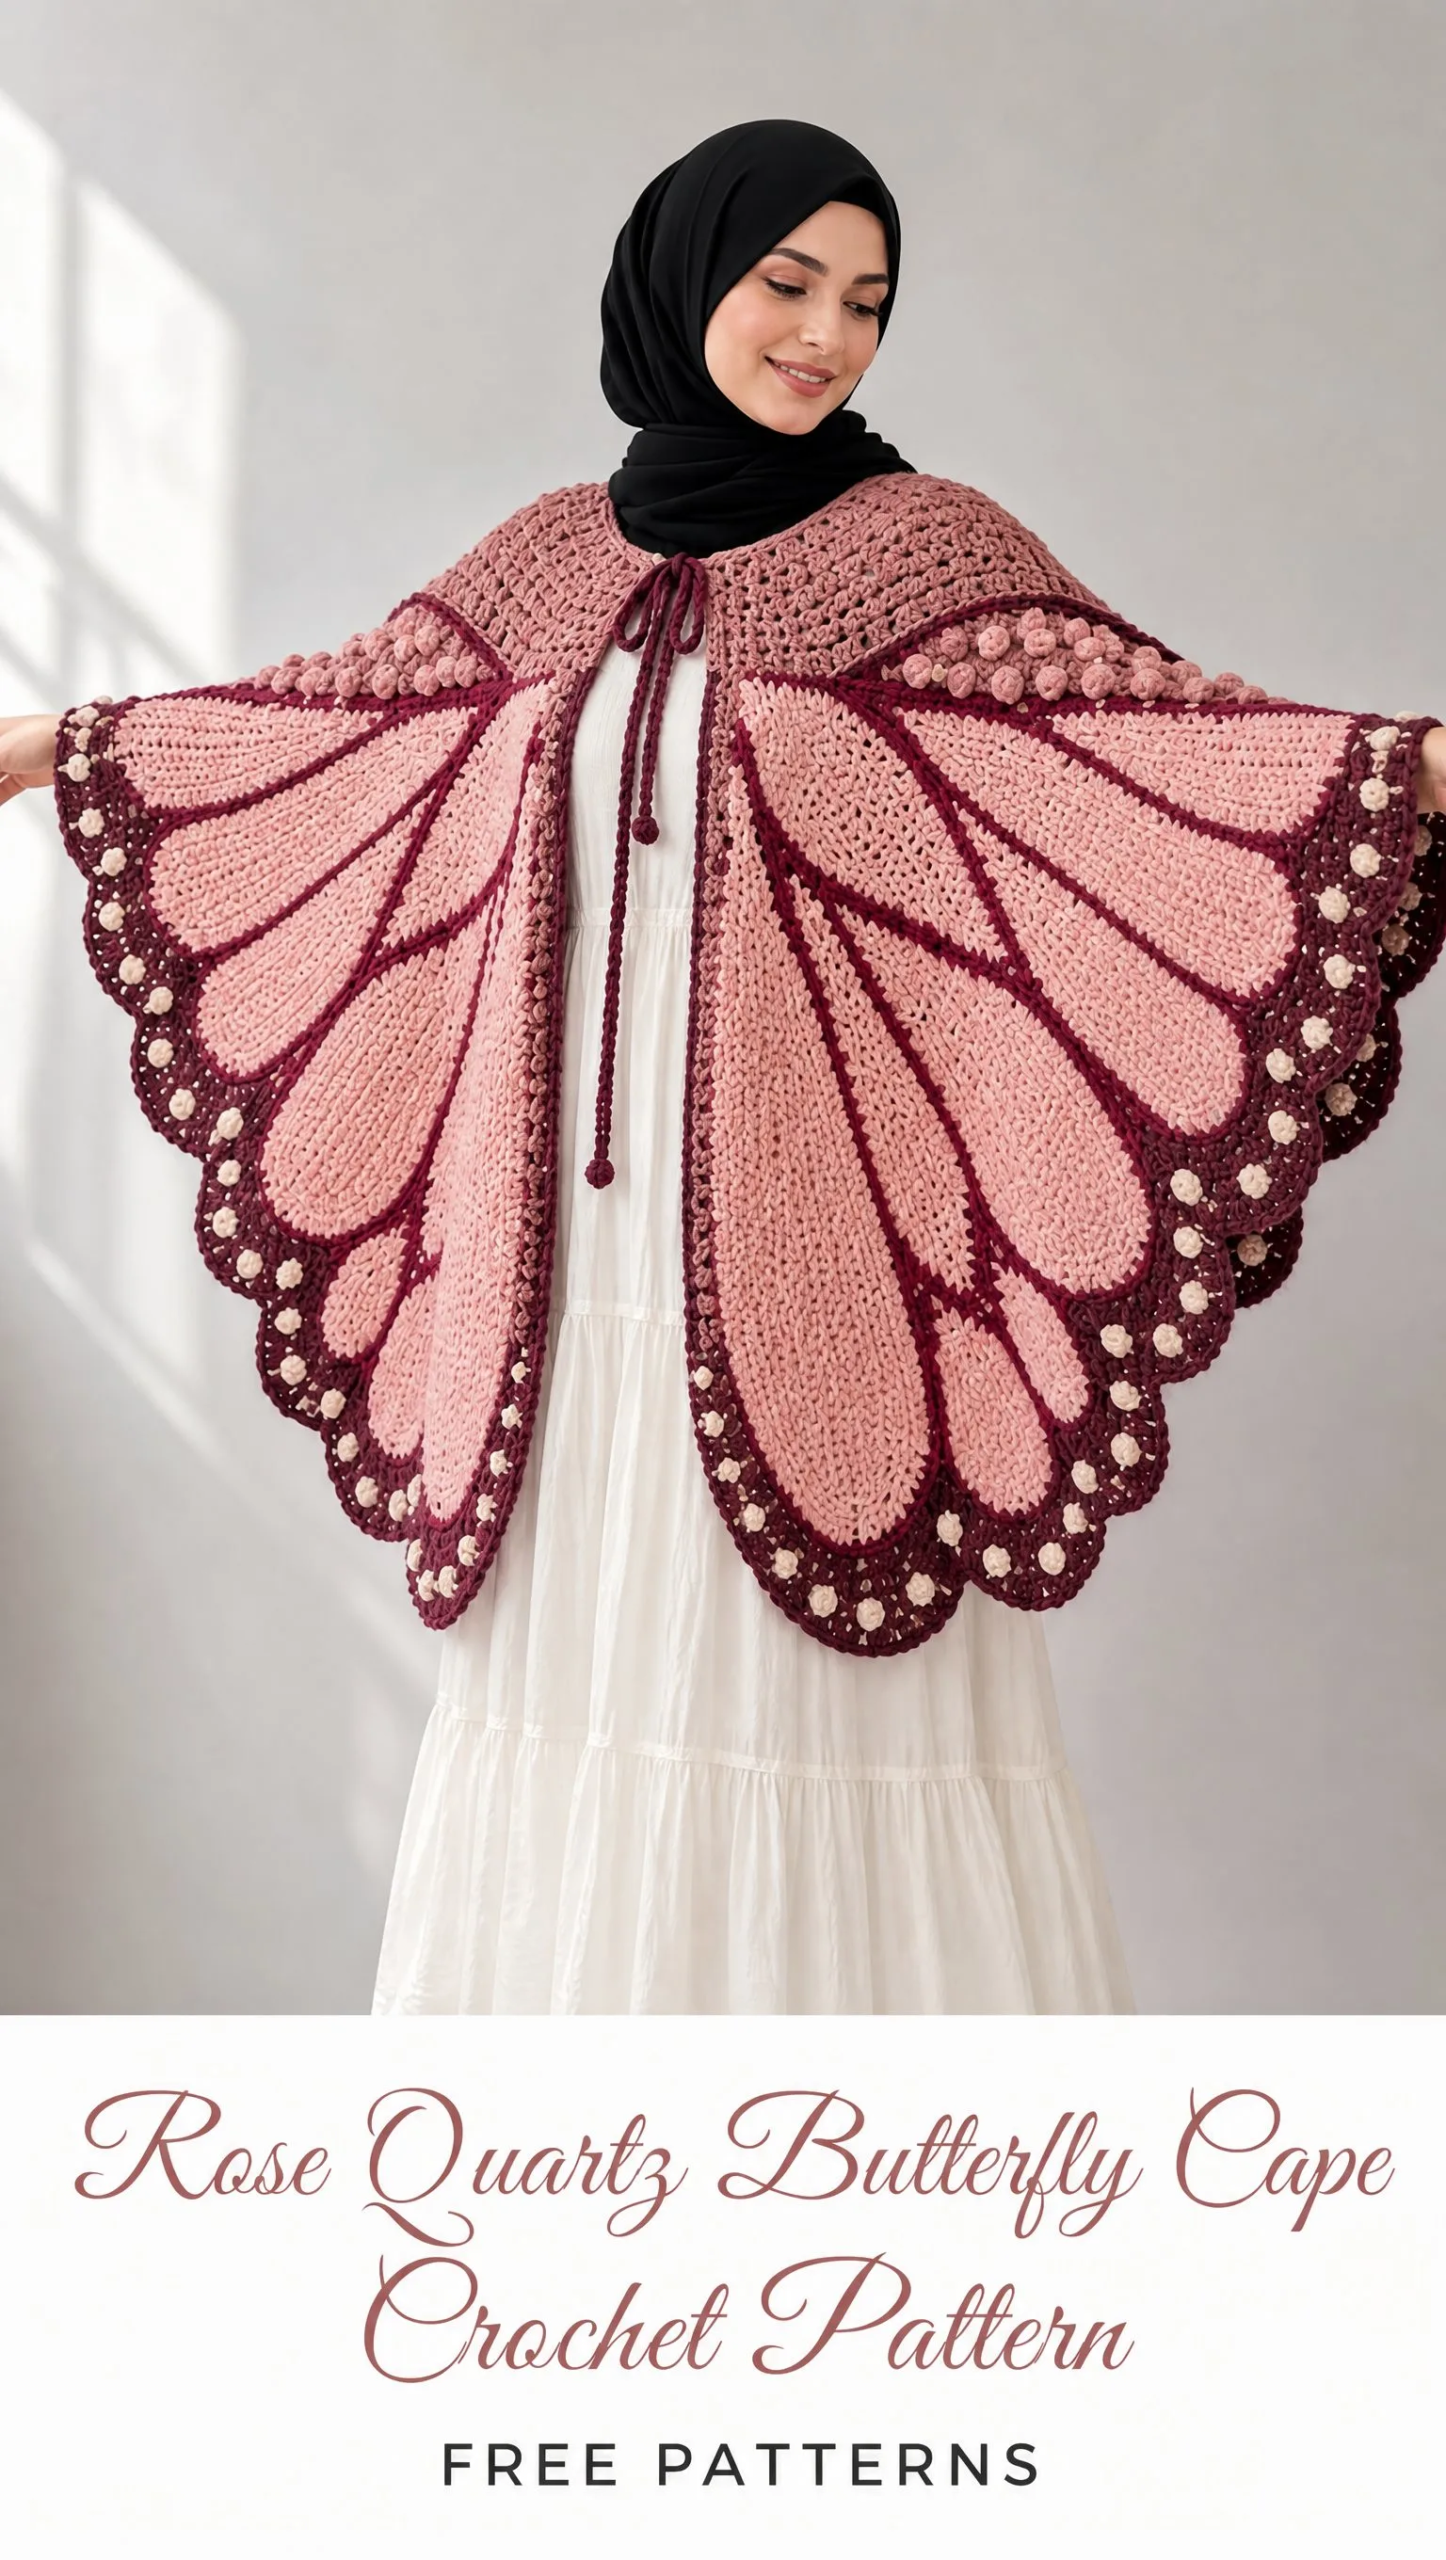
This butterfly cape is a showstopper, and the construction is more interesting than you might expect. You will work a top-down yoke, then build two mirrored wing panels that taper into elegant teardrop shapes. The raspberry veins are added afterward with surface crochet, so the wings stay one solid piece of fabric while looking like intricate stained glass. It is an intermediate to advanced project, and I will not pretend otherwise.
But here is the thing. If you can single crochet, increase, decrease, and follow a shaping sequence, you can absolutely make this cape. The complexity comes from patience and symmetry, not from impossible techniques.
Pattern Overview
This hip-length cape creates a dramatic butterfly silhouette when you spread your arms. The finished piece measures approximately 31 inches from neck to hem and spans 66 to 70 inches across the total wingspan. It fits adult sizes small through extra large through natural drape, with resize notes included for adjustments.
The construction follows a logical sequence. First, you crochet a dusty rose shoulder yoke from the neckline down. Then you pick up stitches along the lower yoke edge and work each wing panel downward. The wings start broad at the top and taper into long lower teardrop lobes through controlled decreases. After both wings are complete, you add raspberry surface crochet veins, a dusty plum scalloped border, and tiny cream dot accents.
Important note from the pattern: This design has not been physically test crocheted. Work a gauge swatch and compare your measurements as you go, especially before completing the second wing.
Materials You Will Need
Yarn (DK weight or light worsted, #3):
Hooks:
Notions:
Yarn tip: Choose a smooth, matte cotton or cotton-acrylic blend with enough body to hold the wing shape. Avoid very fuzzy yarn because crisp color boundaries are important for the butterfly cell effect.
Gauge
Main fabric gauge: 18 single crochet (sc) stitches and 20 rows equals 4 inches (10 cm) after blocking with a 4.0 mm hook.
Surface crochet gauge: Work loosely enough that the wing remains flat. Your surface slip stitches must not shorten or bunch the fabric.
Take the time to swatch. This project requires significant yardage and shaping precision, so matching gauge will save you heartache later.
Finished Measurements
| Area | Target Measurement | How to Adjust |
|---|---|---|
| Neck opening | 21 to 23 inches | Add or subtract yoke foundation stitches in multiples of 4 |
| Yoke depth | 7 to 8 inches | Add or subtract yoke rows before wing pickup |
| Each wing width | 31 to 33 inches | Change wing starting count in multiples of 6 |
| Wing length | 24 to 25 inches from under yoke | Repeat or omit straight rows before lower shaping |
Abbreviations
Before You Begin
A few important notes will help you succeed with this pattern:
Part 1: Dusty Rose Shoulder Yoke
Foundation: With 4.0 mm hook and CC3 (dusty rose), chain 97. This creates a rounded open-front neckline. For a smaller or larger neck, change the chain in multiples of 4 while keeping an odd total stitch count.
Row 1 (RS): Sc in 2nd ch from hook and across. 96 sc. Turn.
Row 2: Ch 1, sc 12, inc, sc 22, inc, sc 24, inc, sc 22, inc, sc 12. 100 sc. Turn.
Row 3: Ch 1, sc across. Turn.
Row 4: Ch 1, sc 13, inc, sc 23, inc, sc 26, inc, sc 23, inc, sc 13. 104 sc. Turn.
Rows 5 through 14: Repeat the increase logic every even-numbered row. Add 1 sc immediately before and after each of the four shaping points. Work odd rows even in sc.
Rows 15 through 28: Continue in sc, increasing at the same four points every 3rd row rather than every 2nd row. Stop when yoke depth is 7 to 8 inches and front edges lie flat without pulling.
Yoke fit checkpoint: Drape the piece over your shoulders. The lower edge should reach just below the shoulder caps. If it sits too high, add plain sc rows. If it flares excessively, remove the last increase row.
Mark the Wing Pickup Zones
Lay the yoke flat with the RS facing you. Mark the exact center back.
From center back, count approximately 38 to 42 stitches toward each front edge and place markers. These are the outer limits of the left and right wing pickup zones. Leave the front 12 to 16 stitches on each side unworked as the open-front bands.
Each wing should pick up approximately 70 to 76 stitches across the lower yoke edge. If your yoke count differs, divide the usable back-and-shoulder edge evenly so both wings have the same count.
Part 2: Left Rose Quartz Wing Panel
Setup row: With MC (blush) and RS facing, join at the left front pickup marker. Work 1 sc evenly in each marked yoke stitch to the center back, then continue across the left half of the back pickup zone to the opposite boundary for this wing. Target: 72 sc. Turn.
Rows 1 through 6: Ch 1, sc across. At the end of Rows 2, 4, and 6, inc in the first and last stitch. After Row 6 you will have 78 sc.
Rows 7 through 16: Ch 1, sc across. Inc at both edges on Rows 8, 11, and 14 only. End with approximately 84 sc. This creates the broad upper wing.
Rows 17 through 24: Work even in sc. The fabric should now measure about 8 to 9 inches below the yoke.
Rows 25 through 34: Begin outer-edge shaping only. On every 2nd row, dec once at the outer edge while keeping the center-front/inner edge straight. Work the alternate rows even.
Rows 35 through 44: Dec at outer edge every row. On Rows 38, 41, and 44 also dec once at the inner edge. The wing starts to taper into the lower long cell area.
Rows 45 through 54: Dec at both edges on every 2nd row. Work even on alternate rows.
Rows 55 through 62: Dec at both edges every row until 26 to 30 stitches remain.
Rows 63 through 68: Work even in sc or until total wing length from pickup is approximately 24 to 25 inches.
Lower tip shaping: Next row, dec, sc to last 2 sts, dec. Repeat this row until 8 stitches remain. Next row, dec 4 times. Fasten off.
Shape rather than count rigidly. The cape is intentionally garment-sculptural. If your gauge differs slightly, prioritize the target dimensions and the smooth teardrop silhouette. Keep a written record of every shaping row so the second wing can match exactly.
