

Trace around the crocheted sole to make a paper template. Use the template to cut two matching plastic insoles.
Photo 4 shows the crocheted sole.
Round 4: 24 sc in BLO. (24)
Round 5: 24 sc. (24)
Round 6: 5 sc, (2 sc, dec) × 3, 7 sc. (21)
Round 7: 5 sc, (sc, dec) × 3, 7 sc. (18)
Insert the plastic insole.
Round 8: 5 sc, 3 dec, 7 sc. (15)
Stuff the shoe. If your stitches are sufficiently tight, you can leave the rest of the leg completely unstuffed.
Photo 5 shows how to work into the back loops of the sole. Photo 6 shows the raised shoe shape.
Change to brown yarn.
Round 9: (Sc, dec) × 5 in BLO. (10)
Rounds 10–19: 10 sc (10 rounds). (10)
Round 20: 5 dec. (5)
Round 21: 5 inc. (10)
Rounds 22–32: 10 sc. (10)
Round 33: Flatten the opening and work 4 sc through both sides.
Leave a yarn tail for sewing the leg to the pumpkin.
Photo 7 shows both long legs with the green shoes attached.
Ami_kare 300×250

Gaiters — Make 2
Work with orange yarn.
Ch 17 and join into a ring with 1 sl st.
At the beginning of each round, work ch 2 instead of the first dc. At the end of each round, join with 1 sl st into the second ch of the beginning ch-2.
Round 1: 16 dc. (16)
Rounds 2–5: Work 1×1 ribbing by alternating 1 FPdc and 1 BPdc around. (16)
Finish with 1 sl st. Cut the yarn and fasten off.
Slide the finished gaiters onto the legs from top to bottom.
Photo 8 shows a gaiter fitted over one leg. Photo 9 shows the completed pair of legs with both gaiters in place.
Ami_esnek (yatay)
Arms — Make 2
Start with brown yarn.
Round 1: 5 sc in MR. (5)
Round 2: 5 inc. (10)
Round 3: 10 sc. (10)
Round 4: 5 dec. (5)
Change to orange yarn.
Rounds 5–20: 5 sc (16 rounds). (5)
Leave a yarn tail for sewing.
Photo 10 shows the two finished arms, with brown rounded hands and long orange sections.
Curly Wig
Make 1 with brown yarn. Work in continuous spiral rounds without a turning chain.
Round 1: 8 sc in MR. (8)
Round 2: 8 inc. (16)
Round 3: (sc, inc) × 8. (24)
Round 4: (2 sc, inc) × 8. (32)
Round 5: (3 sc, inc) × 8. (40)
Round 6: (4 sc, inc) × 8. (48)
Round 7: (5 sc, inc) × 8. (56)
Round 8: (6 sc, inc) × 8. (64)
Next, crochet curls of different lengths. The wig has 32 strands in total. Each curl occupies two stitches of the circular wig base.
Ami_esnek (yatay)
Round 9 — Curls:
- (Ch 5, work 3 dc along the chain, attach with 1 sl st to the base, then work 1 more sl st) × 13.
- (Ch 12, work 10 dc along the chain, 2 sl st along the base) × 1.
- (Ch 11, work 9 dc along the chain, 2 sl st along the base) × 5.
- (Ch 9, work 7 dc along the chain, 2 sl st along the base) × 1.
- (Ch 7, work 5 dc along the chain, 2 sl st along the base) × 1.
- (Ch 5, work 3 dc along the chain, 2 sl st along the base) × 4.
- (Ch 7, work 5 dc along the chain, 2 sl st along the base) × 1.
- (Ch 9, work 7 dc along the chain, 2 sl st along the base) × 1.
- (Ch 11, work 9 dc along the chain, 2 sl st along the base) × 5.
Leave a long yarn tail for sewing.
Photo 11 shows the circular wig base with all 32 curls extending from its edge.
Ami_esnek (yatay)
Pointed Hat
Make 1. Work the hat with 1×1 ribbing using post double crochet stitches.
Ch 37, leaving a long starting tail for sewing the hat to the head.
Join the foundation chain into a ring with 1 sl st.
At the beginning of each round, work ch 2 instead of the first dc. At the end of each round, join with 1 sl st into the second ch of the beginning ch-2.
Round 1: 36 dc. (36)
Rounds 2–6: (FPdc, BPdc) × 18. (36)
Round 7: 18 dc2tog. (18)
In the hat instructions, a decrease means working two double crochet post stitches together.
For the first decrease at the beginning of the round, work ch 2 in place of the first dc, leaving one loop on the hook. Yarn over, insert the hook around the post of the dc from the wrong side, pull up a loop, and work the pulled-up loop and yarn over together.
For the remaining decreases:
- With one loop on the hook, yarn over and insert the hook around the post of the next dc from the front.
- Pull up a loop and work this loop together with the yarn over. Two loops remain on the hook.
- Yarn over and insert the hook around the next dc post from the wrong side.
- Pull up a loop and work this loop together with the yarn over. Three loops remain on the hook.
- Work all three loops together to complete the decrease.
Round 8: 18 FPdc. (18)
Round 9: 9 dc2tog using front post stitches only. (9)
In Round 9, insert the hook around the post of each dc from the front side only.
Rounds 10–11: 9 FPdc. (9)
Cut the yarn. Gather the stitches at the top of the hat and pull them tightly closed.
The hat is finished.
Photo 12 shows the pointed hat positioned above the pumpkin head.
Ami_esnek (yatay)
Assembly
- Attach the wig: Position the wig on the pumpkin head. Insert the first sewing pin through the MR of the wig and the MR of the head, then pin around the circumference. Sew the wig to the head approximately along Rounds 5–6, working every other stitch. Make each stitch about one sc high, bring the needle through the head to the third stitch, and continue. Sew through the center MR, bring the needle out near the final round of the wig, and continue around the perimeter. See Photo 13.
- Arrange the curls: Leave the curls loose so they extend in different directions. If desired, carefully roll the longer curls near the face into small tubes.
- Add the face: Glue the two half-bead eyes onto the pumpkin. Embroider eyelashes and a mouth if desired. See Photo 14.
- Attach the limbs: Sew both legs and both arms to the pumpkin body. The legs are secured to the underside of the pumpkin. See Photo 15.
- Attach the hat: Sew the hat to approximately Round 5 or 6 of the wig.
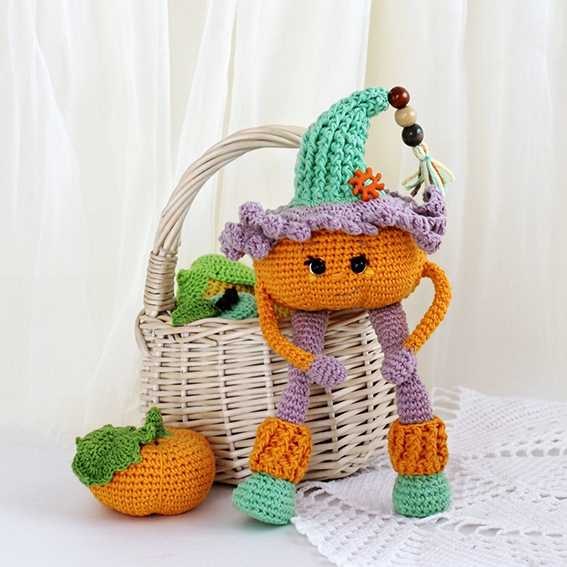
- Add decorations: Decorate with beads and a button as desired. See Photo 16 for the completed pumpkin doll.
Copyright & Credits
The crochet pattern, design, and photos belong to Natalia Balyk. The written instructions and photos on this page may not be copied, republished, translated, or used for commercial purposes without permission. Please credit Natalia Balyk when sharing finished items.
Pick Your Favorite & Pin It
CONTENT END 1
