

Spine and Rib Bones
Make 1 connected piece with ivory cream yarn.
Leave an 8 in (20 cm) starting tail. Ch 13.
Work around both sides of the foundation chain, forming the six rib branches directly from the spine.
Round 1 – First Side
Ami_kare 300×250
Starting in the second ch from the hook:
3 sc, ch 4, 2 sc in the second ch from the hook, sl st in the next 2 ch, sl st into the top of the spine sc just completed.
3 sc, ch 5, 2 sc in the second ch from the hook, sl st in the next 3 ch, sl st into the top of the spine sc just completed.
3 sc, ch 4, 2 sc in the second ch from the hook, sl st in the next 2 ch, sl st into the top of the spine sc just completed.
3 sc. (12 spine sc, 3 ribs)
Ami_esnek (yatay)
Round 1 – Opposite Side
Rotate the work around the far end of the foundation chain. Continue into the unused underside loops:
4 sc, ch 4, 2 sc in the second ch from the hook, sl st in the next 2 ch, sl st into the top of the spine sc just completed.
3 sc, ch 5, 2 sc in the second ch from the hook, sl st in the next 3 ch, sl st into the top of the spine sc just completed.
3 sc, ch 4, 2 sc in the second ch from the hook, sl st in the next 2 ch, sl st into the top of the spine sc just completed.
2 sc. Join with a sl st to the first spine sc. (12 spine sc, 3 ribs)
Ami_esnek (yatay)
Total: 24 spine sc and 6 rib branches. The sl sts used to attach the ribs do not count as spine stitches.
Fasten off, leaving an 8 in (20 cm) finishing tail. The end beside the first and last spine stitches is the head end; the opposite end is the tail end.
Arrange the ribs into three matching pairs, with the middle pair slightly longer. Keep the small rounded rib tips facing outward.
Blue Split Tail
Make 1 with pale blue yarn.
Ch 6.
Row 1: Starting in the second ch from the hook, 5 sc. (5)
Row 2: Ch 1, turn, inc, 3 sc, inc. (7)
Row 3: Ch 1, turn, sc, 2 hdc, sl st in next st, 2 hdc, sc. (7)
Fasten off, leaving an 8 in (20 cm) tail for reinforcement.
The central sl st in Row 3 forms a shallow notch between two raised lobes. Keep the tail flat and unstuffed.
Ami_esnek (yatay)

Assembly
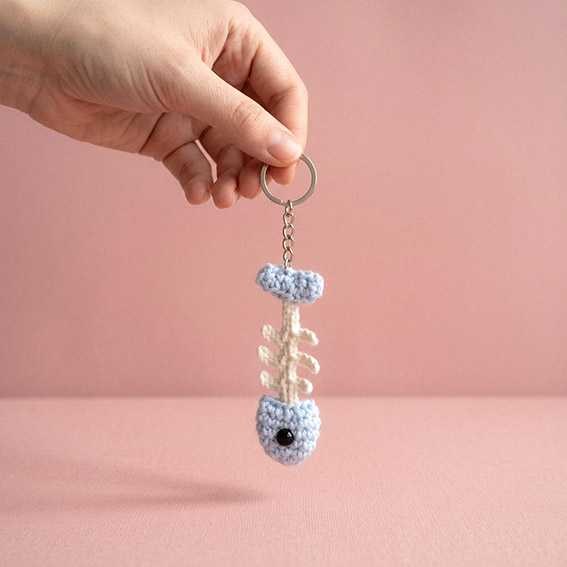
- Head: Insert the lower spine end about two spine stitches deep into the 12-stitch opening and sew it securely inside the head. Stuff lightly, gather the opening around the spine using the remaining blue yarn tail, and close.
- Tail: Sew the upper spine end to stitches 2–4 of Tail Row 1. Using the blue tail yarn, reinforce stitches 3 and 5 of Row 3 through neighboring Row 2 stitches with 2–3 sewing passes.
- Hardware: Pass the 6 mm jump ring beneath both reinforced tail stitches and through the last link of the metal chain. Close it completely and connect the chain to the split key ring. Secure all yarn ends and check the attachments.
This decorative keychain contains small metal parts and a plastic safety eye and is not suitable as a toy for young children.
Copyright & Credits
This crochet pattern and all accompanying photos belong to Blog.AmigurumiAllFreePatterns.com. The written instructions and photos may not be copied, redistributed, translated, republished, or used for commercial purposes without permission. Finished items made from this pattern may be sold in small quantities with credit to Blog.AmigurumiAllFreePatterns.com.
Ami_esnek (yatay)
Pick Your Favorite & Pin It
CONTENT END 1
