

image
content
Craft. Ideas_02
Granny squares are one of the most iconic techniques in crochet. Not only are they simple to learn, but they are also incredibly versatile.
With just a few basic stitches, you can create beautiful motifs that later become blankets, bags, pillows, and many other handmade projects.
Craft. Ideas_03
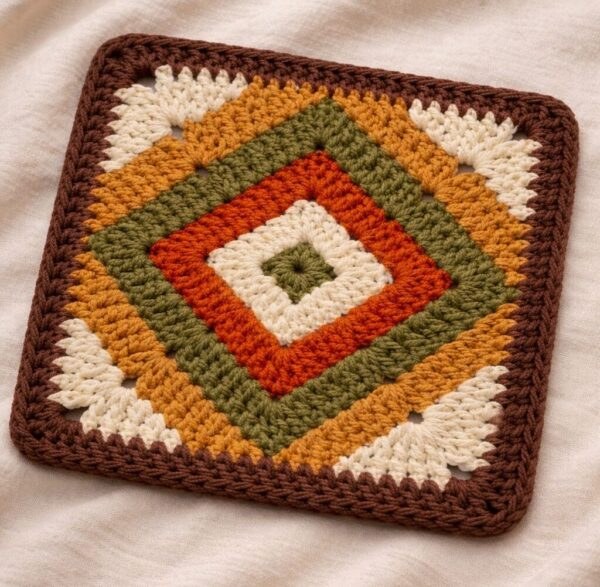
Among the many variations available, the Diamond Granny Square crochet pattern stands out because of its layered colors and geometric look.

The diamond shape in the center gives the square a modern yet vintage appearance, which makes it perfect for both classic and contemporary crochet projects.
Even better, this pattern is very beginner friendly. Because the stitches repeat from round to round, it quickly becomes relaxing and easy to memorize. As a result, many crocheters enjoy making dozens of squares in a single day.
In this tutorial, you will learn how to crochet a colorful diamond granny square step by step, using simple stitches and clear instructions.
Materials for the Diamond Granny Square
Before starting your crochet project, gather the following materials:
-
Medium weight yarn (cotton or acrylic)
-
Crochet hook size 4 mm – 5 mm
-
Yarn needle
-
Scissors
For the colorful layered look shown in the pattern, you can use:
-
Cream or off-white yarn
-
Orange yarn
-
Green yarn
-
Mustard or beige yarn
-
Brown yarn for the border
Of course, you can always customize the colors to match your own crochet blanket, pillow, or bag project.
Crochet Abbreviations (US Terms)
To make the crochet pattern easier to follow, here are the abbreviations used throughout the tutorial.
-
CH – Chain
-
SC – Single Crochet
-
DC – Double Crochet
-
SL ST – Slip Stitch
-
ST – Stitch
-
SP – Space
These basic crochet stitches are perfect for beginners who are learning how to make granny squares.
How to Crochet a Diamond Granny Square
Now that your materials are ready, let’s begin the step-by-step crochet instructions.
Round 1 – Creating the Center Circle
First, start with a magic ring. This technique creates a tight and adjustable center, which is ideal for granny square patterns.
Into the magic ring:
-
Chain 2
-
Work 8 double crochets (DC) inside the ring
Next, pull the ring closed and join the round with a slip stitch.
At this point, you will have a small crochet circle that forms the base of the square.
Round 2 – Expanding the Center
After finishing the first round, attach the cream yarn.
Chain 2 to begin the round. Then crochet 2 DC in each stitch around. This step increases the stitch count and helps the square grow evenly.
Once the round is complete, join with a slip stitch.
As a result, the circle will become larger and start forming the base for the diamond shape.
Round 3 – Adding the First Color Layer
Next, change to the orange yarn.
Chain 2 and work 1 double crochet in each stitch around.
