

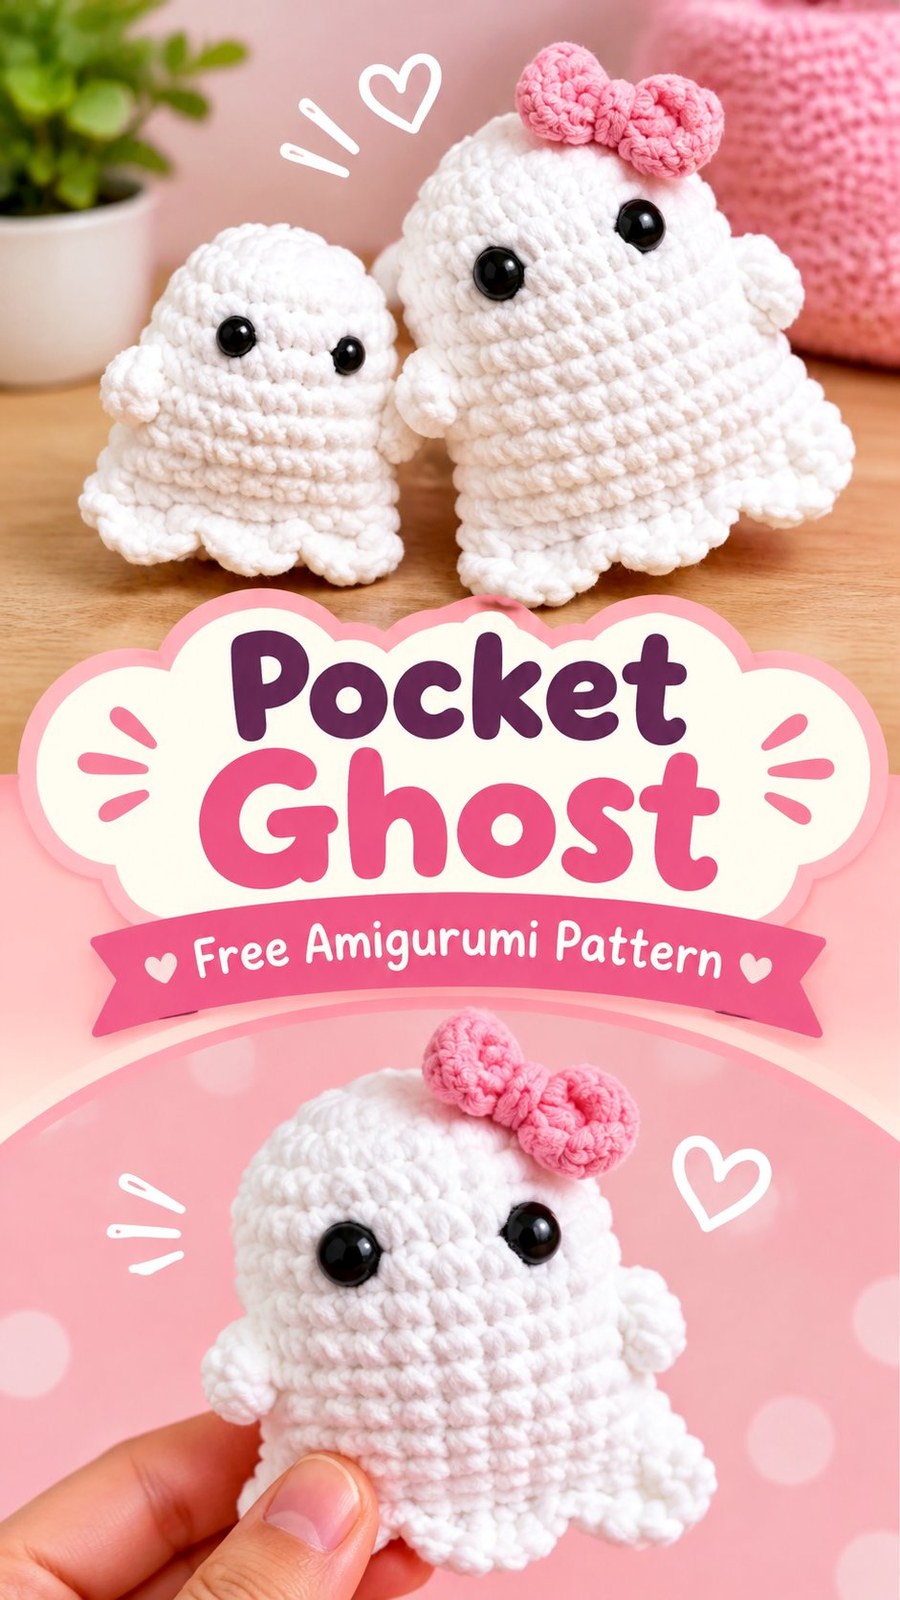
Part 3: Crochet the Tiny Arms
Make two identical arms using white chenille yarn. These small rounded pieces are attached to the sides of the ghost body.
Round 1: Make an MR and work 6 sc into the ring. (6 sts)
Round 2: Sc in each stitch around. (6 sts)
Round 3: Sc in each stitch around. (6 sts)
Fasten off, leaving a long tail for sewing. Do not stuff the arms heavily. A small pinch of fiberfill is optional, but leaving them mostly flat makes them easier to attach securely.
Flatten each arm gently. Position one on each side of the ghost, approximately between Rounds 9 and 12. Sew the open edge of each arm to the body with small, secure stitches. Make sure both arms sit at a similar height.
Part 4: Create the Ghost’s Face
The face is one of the most important details because it gives the little ghost its friendly personality. Two small black eyes are positioned on the front of the upper body.
For the recommended 8 mm safety eyes, place them approximately between Rounds 9 and 11, leaving about 5 to 6 stitches between their centers. Adjust the spacing slightly according to the proportions of your finished ghost.
If using safety eyes, insert them before closing the body completely and secure the backs according to the manufacturer’s instructions. Make sure the eyes are firmly attached.
For a baby-safe or child-safe alternative, use black embroidery thread. Make two small rounded eyes with several neat stitches, securing the thread inside the body. Avoid leaving long loose strands or detachable parts.
Optional cheeks can be embroidered with a little pink yarn. Keep them small and symmetrical so the face remains simple and cute.
Part 5: Crochet the Optional Pink Bow
A small pink bow gives the ghost a sweet decorative detail. Use pink chenille yarn and the same 4.0 mm (US G/6) hook.
Bow foundation: Ch 9.
Row 1: Starting in the second chain from the hook, work 8 sc across. (8 sts)
Row 2: Ch 1, turn. Work 8 sc across. (8 sts)
Rows 3-5: Ch 1, turn. Work 8 sc across each row. (8 sts per row)
Fasten off, leaving a long tail. Fold the small rectangle into a bow shape by bringing its short ends together at the back. Pinch the center of the rectangle to form two rounded loops.
Wrap the yarn tail several times around the pinched center, pulling gently to define the bow. Secure the yarn on the back and weave in the end.
For a softer, fuller bow, gently shape the loops with your fingers. Sew the bow securely to the top of the ghost’s head, slightly toward one side.
Part 6: Final Assembly
- Check that the body is evenly stuffed and the bottom opening is securely closed.
- Arrange the ruffle around the lower body so all 14 scallops are visible.
- Position the two arms on opposite sides and sew them securely in place.
- Check the eye placement and adjust the expression if necessary before finishing any embroidery.
- Attach the pink bow near the top of the head if using it.
- Weave in all remaining yarn ends and inspect the finished ghost for loose stitches.
Your little crochet pocket ghost is now complete. Gently shape the head and body with your fingers to create a smooth, rounded appearance.
How to Customize Your Crochet Ghost
One of the best things about a small crochet ghost is how easily the design can be personalized. The basic body pattern provides a simple starting point, while small changes to the yarn, face, bow, and proportions can create completely different characters.
Make a Smaller or Larger Pocket Ghost
The recommended pattern creates a ghost approximately 4.5 inches (11.5 cm) tall. You can change the finished dimensions by selecting a different yarn weight and adjusting the hook accordingly.
- Miniature version: Use lightweight DK yarn and a 2.5 to 3.0 mm hook. The finished ghost will be considerably smaller.
- Standard plush version: Use the recommended bulky chenille yarn and 4.0 mm hook.
- Larger version: Use super bulky plush yarn with a 4.5 to 5.0 mm hook, adjusting the hook to maintain tight stitches.
When changing yarn weight, remember that the finished dimensions, stuffing requirements, and amount of yarn will also change. Always check that the stitches remain dense enough to conceal the fiberfill.
Experiment With Different Ghost Colors
White is a classic choice, but pastel shades create an equally charming collection. Try pale pink, lavender, mint, cream, or light gray. You can also use two colors, keeping the body white and changing the ruffle or bow to a contrasting shade.
For a Halloween collection, consider making several ghosts with different expressions. One can have surprised eyes, another can have a sleepy face, and a third can have tiny embroidered cheeks.
Change the Facial Expression
Facial details make a significant difference in the personality of amigurumi. Keep the eyes close together for a shy expression or move them slightly farther apart for a more playful appearance. You can also embroider a tiny smile using black thread.
For a sleepy ghost, use short curved embroidery stitches instead of round eyes. For a surprised character, choose slightly larger embroidered eyes and add a small oval mouth.
Customization Tip
- Use pastel chenille yarn for a soft, kawaii-inspired collection.
- Try different bow sizes to change the character’s appearance.
- Make the arms slightly longer for a waving ghost.
- Add a small hanging loop if you want to use the ghost as a seasonal ornament.
Common Crochet Ghost Mistakes and How to Fix Them
Although this is a relatively simple amigurumi pattern, plush yarn can make some parts more challenging. Understanding the most common issues will help you maintain an even shape and create a neat finished toy.
Visible Gaps Between Stitches
Large spaces between stitches can allow the stuffing to show through the body. This usually happens when the hook is too large or the crochet tension is too loose.
Try a smaller hook and maintain consistent tension. Do not pull so tightly that the yarn becomes difficult to handle, but make sure the finished fabric is dense enough to hold its stuffing securely.
The Body Looks Uneven
Uneven shaping can result from accidentally skipping an increase or working more stitches than required. Count the stitches at the end of every round, particularly during the increase and decrease sections.
Use a stitch marker to identify the first stitch of each round. If the body begins leaning, check that you have not accidentally added or removed stitches.
The Stuffing Shows Through
Too much stuffing can stretch the crochet fabric and make the white fiberfill visible between the stitches. Add stuffing in small portions instead of filling the entire body at once.
Use your fingers to distribute the fiberfill toward the sides and top of the body. The finished ghost should feel soft and rounded rather than extremely firm.
The Scalloped Edge Curls Inward
If the ruffle curls toward the body, the chain stitches may be too tight. Try using a slightly relaxed tension when making the chain-2 spaces. Make sure each scallop is worked into the correct chain space and that the attachment round has not been twisted.
The Arms Do Not Match
Small differences in arm placement can make the finished character look uneven. Before sewing the arms permanently, use removable stitch markers to hold them in position. Compare their height and angle from the front and sides.
Important: When working with chenille yarn, avoid repeatedly pulling out stitches because the yarn can fray or break. If you need to correct a mistake, undo only the necessary stitches slowly and inspect the yarn before continuing.
Finishing, Shaping, and Caring for Your Crochet Ghost
Finishing is an important step because it helps the ghost retain its rounded shape and keeps the small details securely attached.
Shape the Body
Once the body has been stuffed and closed, gently massage the fiberfill through the fabric to distribute it evenly. Smooth the upper section into a rounded head and adjust the lower body so it has a slightly wider appearance.
Arrange the scalloped edging with your fingers. The individual waves should spread evenly around the lower body without pulling the ghost out of shape.
Secure Every Attached Piece
Check the arms, bow, and facial features before considering the project finished. Secure all yarn ends inside the body and make sure there are no loose loops or exposed stuffing.
If the ghost is intended as a decorative item, you can add a small hanging loop made from matching yarn. Attach it firmly to the top of the head and test the attachment before displaying the ornament.
Washing and Storage
Always follow the care instructions provided with the yarn. Many polyester chenille yarns can tolerate gentle cleaning, but the appropriate method depends on the specific fiber and construction.
- Remove surface dust with a soft, clean cloth.
- Spot-clean small marks gently when appropriate for the yarn.
- If machine washing is permitted by the yarn label, use a gentle cycle and a suitable laundry bag.
- Avoid high heat, which can damage synthetic plush fibers.
- Allow the ghost to dry completely before storing it.
- Keep decorative crochet toys in a clean, dry place away from excessive moisture.
Do not aggressively stretch, twist, or wring the finished ghost. Gentle handling helps preserve the plush surface and keeps the small details in place.
At a Glance: Easy Crochet Pocket Ghost
- Best yarn: Soft white chenille or plush polyester yarn.
- Skill level: Advanced beginner, with basic amigurumi experience recommended.
- Key technique: Single crochet in continuous rounds with increases and invisible decreases.
- Size adjustment: Change yarn weight and hook size to create miniature or larger versions.
- Finishing method: Gradual stuffing, securely sewn arms, embroidered or safety eyes, and a scalloped lower edge.
Create Your Own Adorable Crochet Pocket Ghost
This crochet pocket ghost is a delightful little project for anyone who enjoys making cute amigurumi characters. Its rounded white body, fluffy chenille texture, tiny arms, and decorative scalloped edge create a charming handmade design that is easy to personalize.
The original free crochet ghost pattern combines simple single crochet stitches with basic increases and decreases to create a soft three-dimensional shape. Once you understand the body construction, you can experiment with different yarn colors, facial expressions, bows, and decorative details to make every ghost unique.
Before beginning, choose your preferred plush yarn, check your tension, and read through the complete pattern so you understand the shaping and assembly steps. Take your time when working with chenille yarn, especially around the face and lower edging, and remember to add stuffing gradually for a smooth result.
Whether you make one tiny ghost as a seasonal decoration or create an entire collection of colorful amigurumi characters, this easy crochet pocket ghost is a fun way to enjoy handmade creativity. Gather your yarn and crochet hook, choose a cute expression, and give your little ghost its own personality!
Tags
Crochet Ghost Pattern
Pocket Ghost Amigurumi
Free Amigurumi Pattern
Halloween Crochet
Easy Crochet Projects
Chenille Yarn Crochet
Cute Crochet Plushies
Beginner Amigurumi
