

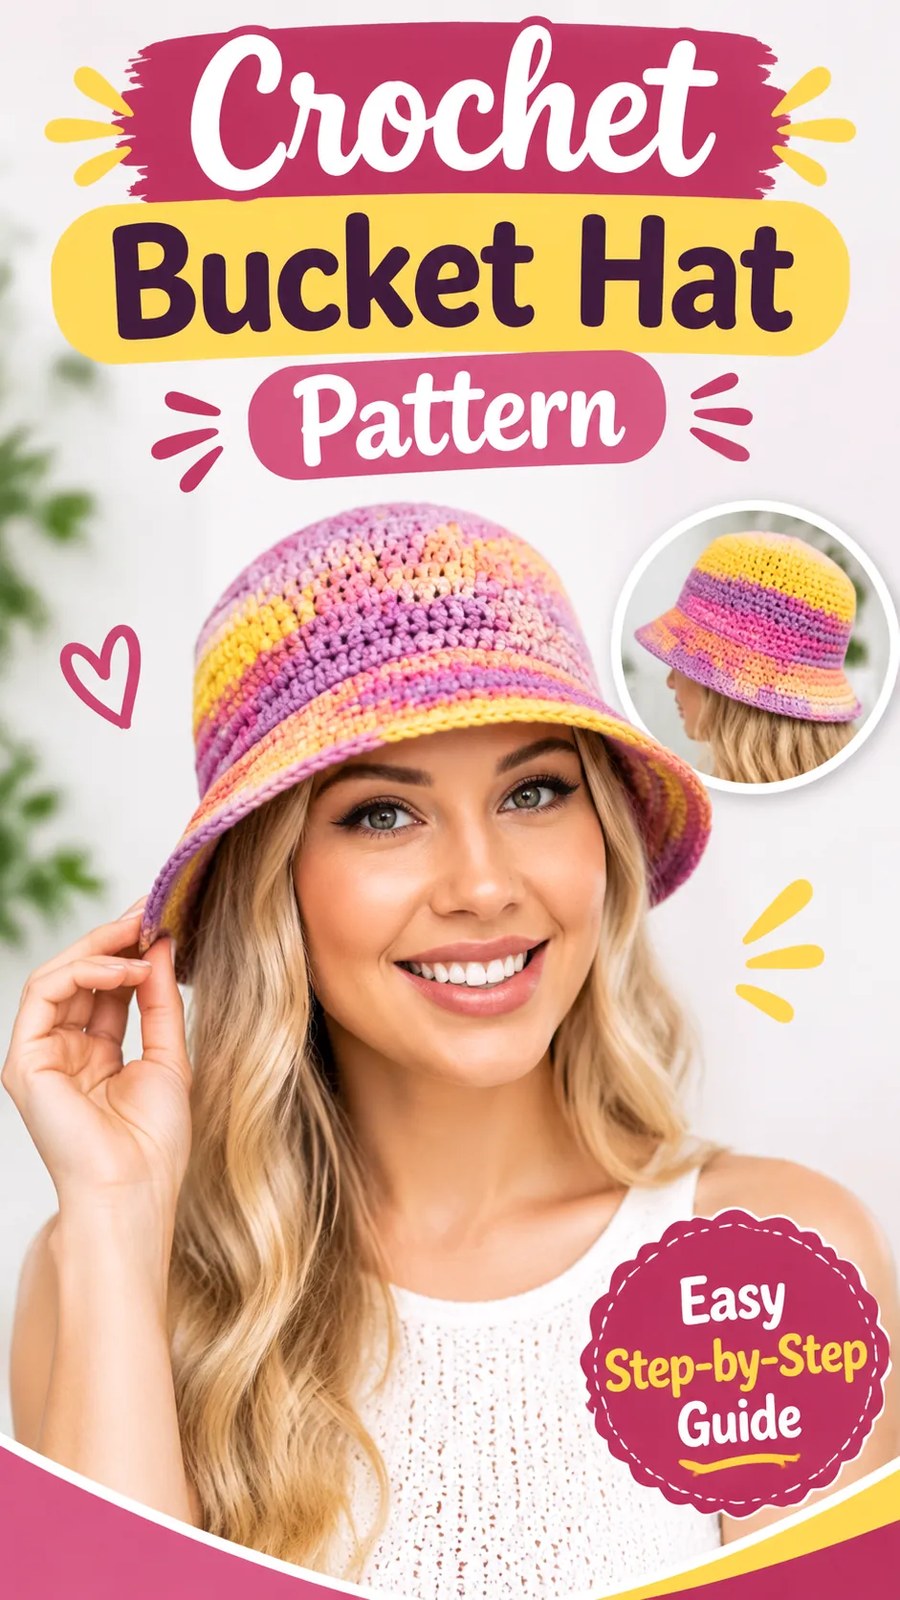
The completed adult medium hat should have a circumference of approximately 22.4 inches (57 cm), a crown diameter of approximately 7.1 inches (18 cm), and a softly flared brim.
Crochet Bucket Hat Sizes and Adjustments
The pattern above creates an adult medium hat. You can adapt the crown circumference by stopping the increase sequence earlier or continuing it for additional rounds.
Because each increase round adds six stitches, the crown grows in predictable increments. The following measurements are approximate and assume the same gauge of 15 single crochet stitches per 4 inches (10 cm).
| Size | Crown rounds | Stitches | Approx. circumference |
|---|---|---|---|
| Child | 12 | 72 | 19.2 in (48.8 cm) |
| Teen / Small Adult | 13 | 78 | 20.8 in (52.8 cm) |
| Adult Medium | 14 | 84 | 22.4 in (56.9 cm) |
| Adult Large | 15 | 90 | 24 in (61 cm) |
Important: These are approximate finished circumferences, not universal age-based sizing guarantees. Measure the intended wearer’s head around the widest part of the forehead and the fullest part of the back of the head. Choose a finished circumference that provides a comfortable fit.
How to Adjust the Crown
To make a smaller hat, stop the crown increases at the appropriate stitch count. For a child-sized version, finish after Round 12 with 72 stitches. For a teen or small adult, stop after Round 13 with 78 stitches.
For a larger adult hat, continue to Round 15 by working (13 sc, inc) six times. This creates 90 stitches.
The basic formula is to add six stitches in each increase round. For any size, the increase sequence follows the same mathematical structure:
- Round 1 begins with 6 stitches.
- Round 2 increases to 12 stitches.
- Each additional increase round adds another six stitches.
- The final stitch count is six multiplied by the increase-round number.
When changing sizes, adjust the body and brim to match the new crown circumference. The brim increase rounds should add one increase for every seven stitches in the first increase round and one increase for every eight stitches in the second increase round, provided the stitch count is divisible by the required repeat.
For the smaller sizes in the table, the same brim shaping can be calculated using evenly spaced increases rather than automatically copying the adult stitch counts. For example, a 72-stitch child crown can increase by 12 stitches to 84, then by 12 stitches to 96. This keeps the brim balanced and avoids unnecessary fullness.
How to Adjust the Hat Depth
The body depth is determined by the number of rounds worked after completing the crown. The suggested adult pattern uses 16 body rounds, which produces approximately 4 inches (10 cm) at the recommended gauge.
- For a shorter, shallow bucket hat, work 12 to 14 body rounds.
- For a standard adult fit, work 16 body rounds.
- For a deeper hat, work 18 to 20 body rounds.
Always try the hat on before starting the brim when possible. This is the easiest way to decide whether the sides need additional length.
How to Customize the Brim Width
The brim can be adjusted to create different styles. A narrow brim gives the hat a more fitted appearance, while a wider brim creates a more relaxed sun-hat silhouette.
- Narrow brim: Complete only one increase round and add two or three even rounds.
- Standard brim: Follow both increase rounds and complete the remaining even rounds.
- Wider brim: Add extra even rounds after the two increase rounds.
If you want a more dramatic flare, add another increase round with the increases distributed evenly around the brim. Avoid adding too many increases at once because excess fabric can produce an unwanted wavy edge.
Common Crochet Bucket Hat Mistakes and How to Fix Them
Although this is an easy crochet project, small differences in tension and stitch placement can affect the final shape. The following troubleshooting tips can help you achieve a smoother, more comfortable hat.
1. The Crown Looks Wavy
A wavy crown usually means there are too many stitches for the amount of fabric being created. Check your increase count and make sure you have added exactly six stitches in each increase round.
Also check your tension. Very loose stitches can make the crown appear uneven even when the stitch count is correct. Try a smaller hook if necessary.
2. The Crown Curls Upward
If the crown resembles a shallow bowl instead of a flat circle, there may not be enough increases. Confirm that you have completed the required increase sequence and that you have not accidentally skipped stitches.
A hook that is too small can also contribute to excessive curling. Test a larger hook on a small section before continuing.
3. The Hat Feels Too Tight
A tight hat may result from working with smaller stitches than the suggested gauge or choosing a crown circumference that is too small.
Measure the crown and compare it with the intended size. If the circumference is too small, unravel the last few rounds and increase the crown by one additional increase round when appropriate.
4. The Brim Looks Too Wavy
A wavy brim usually indicates too many increases or loose tension. Make sure the increase stitches are distributed evenly. If the brim is already too wide, remove the last increase round and replace it with an even round.
5. The Brim Curls Inward
An inward-curling brim may need more width or a looser hook. Check that both increase rounds are completed correctly. If the edge still curls, try adding a small amount of extra width through another evenly distributed increase round.
6. The Color Changes Look Uneven
When using separate colors, color changes may look uneven if the new yarn is introduced halfway through a stitch or if the yarn tails are not secured properly.
Complete the final single crochet of the old color with the new color on the last yarn-over. This creates a cleaner transition. Weave the ends through the inside of the fabric without pulling them tightly.
Finishing, Blocking, and Caring for Your Crochet Hat
Finishing makes a noticeable difference to the overall appearance of a handmade crochet bucket hat. Once all the yarn ends are secured, gently shape the crown and brim using your hands.
Shaping the Crown and Brim
Place the hat on a clean, rounded surface that is close to the intended head circumference. You can use a suitable hat form or a clean household object with a similar shape.
Arrange the crown so that it sits flat, then gently smooth the sides downward. Spread the brim evenly around the lower edge to create a balanced silhouette.
If the yarn allows wet blocking, lightly dampen the hat according to the yarn care instructions. Shape it gently and allow it to dry completely before wearing.
Expert Tip: Avoid stretching the brim aggressively during blocking. The goal is to encourage an even circular shape, not to enlarge the hat. Cotton can lose its shape if it is stretched excessively while wet.
How to Make the Brim More Structured
If you prefer a firmer brim, use a slightly smaller hook for the final two or three rounds. Keep the stitches even and avoid pulling them so tightly that the edge becomes uncomfortable.
Another option is to work a relaxed slip-stitch finishing round. This provides a defined edge while maintaining the soft handmade character of the hat.
For everyday wear, a naturally flexible brim is often the most comfortable choice. The hat does not need to be completely rigid to hold its bucket shape.
Washing and Storage
Follow the care instructions for your selected yarn. Cotton and many cotton-blend hats can usually be hand-washed in cool water with a gentle detergent, although the yarn label should always guide the final decision.
- Wash gently without twisting or wringing the hat.
- Press excess water out using a clean towel.
- Reshape the crown and brim while damp.
- Allow the hat to air-dry completely on a suitable rounded surface.
- Store it in a dry place away from excessive heat and direct sunlight.
Avoid hanging the hat by its brim for long periods because the weight may stretch the crochet fabric. Storing it flat or gently shaped helps preserve its original silhouette.
Creative Ways to Customize Your Handmade Bucket Hat
One of the best features of a simple crochet bucket hat pattern is how easy it is to personalize. The basic construction can remain exactly the same while yarn colors and finishing details create completely different looks.
Experiment With Pastel Colors
Soft pink, lavender, pale yellow, and cream create a delicate spring-inspired palette. These shades work beautifully together, especially when arranged in wide stripes or blended through variegated yarn.
For a more vibrant style, choose brighter shades of pink, orange, turquoise, and purple. A colorful combination can make the hat a standout accessory for summer festivals and casual outings.
Create a Striped Crochet Bucket Hat
Instead of using variegated yarn, introduce a new color every two or three rounds. You can create evenly spaced stripes or alternate narrow and wide sections for a more playful design.
For a subtle appearance, use different shades from the same color family. For a bold accessory, combine contrasting colors and let the brim feature a shade that appears elsewhere in the hat.
Try Different Brim Shapes
A small brim creates a compact, fitted bucket hat. A wider brim provides a more dramatic sun-hat appearance. You can also shape the brim slightly upward at the sides after blocking to create a softer silhouette.
Make a Matching Crochet Set
Use leftover yarn to create matching accessories such as a small crochet bag, a simple scarf, or a colorful hair accessory. Keeping the same color palette across several handmade items creates a coordinated summer collection.
At a Glance: Easy Crochet Bucket Hat
- Best yarn: Medium-weight cotton or cotton-blend yarn for a breathable fabric with good stitch definition.
- Skill level: Easy to confident beginner, with basic single crochet and increase techniques.
- Key technique: Continuous single crochet rounds worked from the crown down to the brim.
- Size adjustment: Change the number of crown increase rounds and body rounds to customize the fit.
- Finishing method: Secure yarn ends, gently shape the crown, and block the brim if necessary.
Final Thoughts on This Crochet Bucket Hat Free Pattern
This colorful crochet bucket hat is a fun and practical handmade accessory that combines a classic shape with cheerful yarn colors. Its rounded crown, comfortable sides, and gently flared brim create a versatile design that works beautifully with casual spring and summer outfits.
The simple single crochet construction makes this project approachable for confident beginners while still offering plenty of opportunities for experienced crocheters to experiment with color, sizing, and texture. You can follow the suggested pink, yellow, and purple palette or choose a completely different combination to suit your personal style.
Before beginning, choose a suitable yarn, check your gauge, measure the intended head circumference, and read through the complete pattern. Taking a little time to prepare will help you create a more comfortable fit and a balanced finished shape.
Whether you make one for yourself, create a thoughtful crochet gift, or add several colorful versions to your handmade accessory collection, this easy crochet bucket hat pattern is a lovely project to keep in your crochet plans. Grab your favorite yarn and crochet hook, enjoy the process, and make a bucket hat that reflects your creativity!
Tags
Crochet Bucket Hat
Free Crochet Pattern
Easy Crochet Hat
Summer Crochet Projects
Beginner Crochet Pattern
Handmade Summer Accessories
Colorful Crochet
DIY Crochet Hat
