

Round 2: Ch 1. Work 3 hdc in the middle sc of the first corner group. Hdc in each stitch until the middle sc of the next corner group. Work 3 hdc in that middle corner stitch. Repeat this instruction around all four sides. Join with a sl st in the first hdc. (180 sts)
The first two hdc in each corner group belong to the preceding and following sides. The three hdc worked into the middle corner stitch create the extra width needed to keep the square flat.
Fasten off the dusty pink yarn. Weave in the end on the wrong side.
Part 4: Third Border Round with Sage Green Shell Stitches
Color C: Sage Green
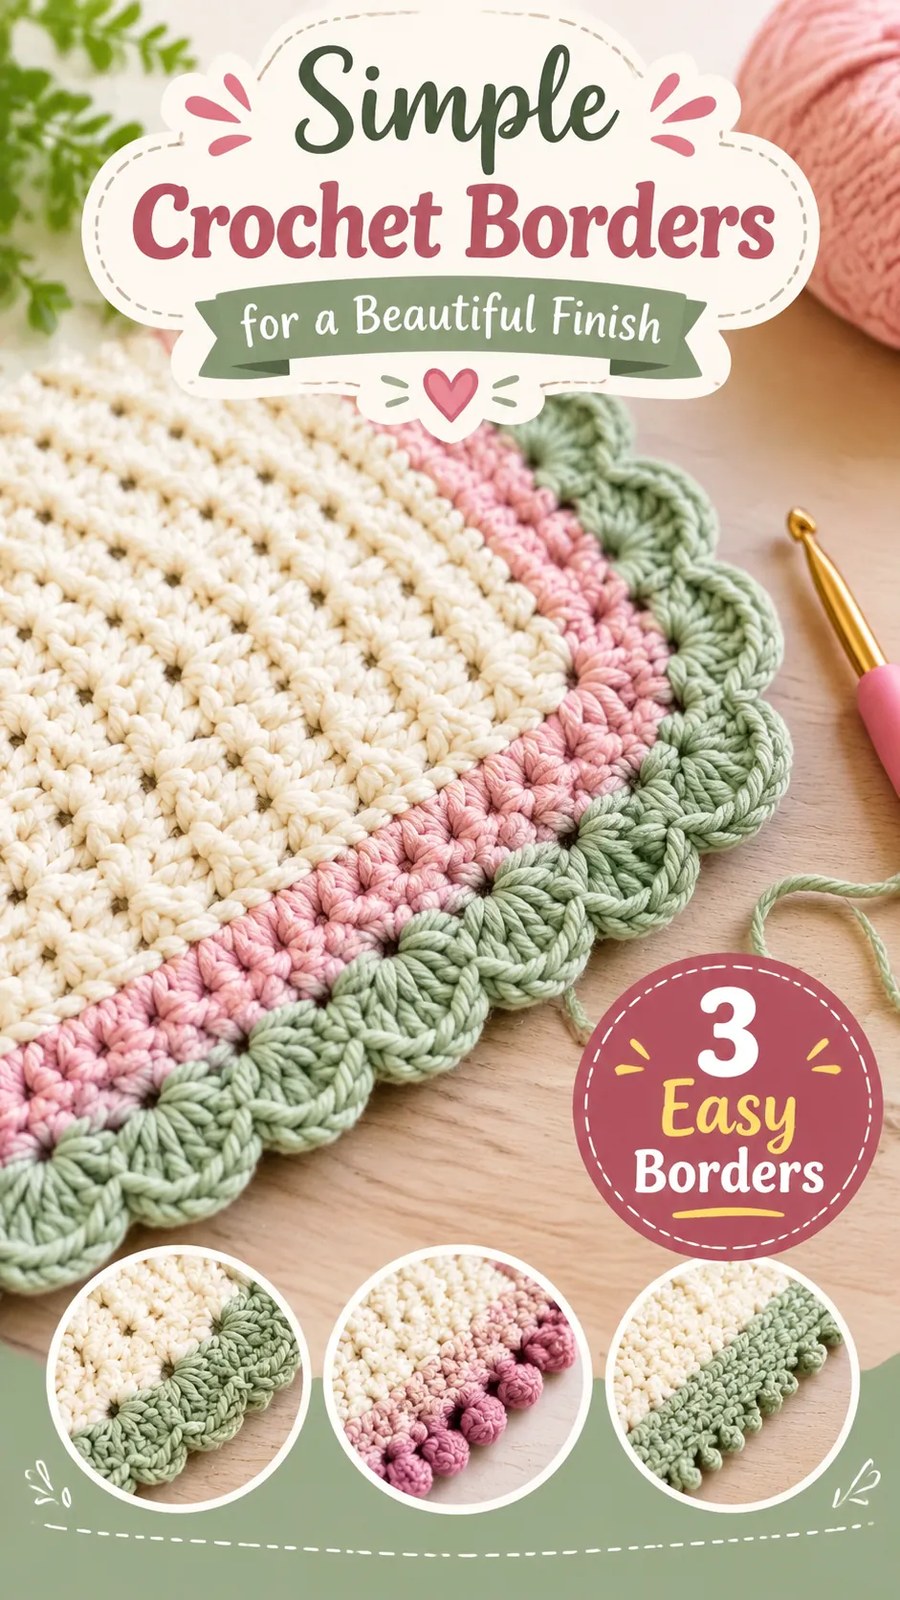
The final round creates the scalloped appearance. The shells should be evenly distributed along each side, with one larger shell positioned at each corner.
Join sage green yarn with a slip stitch in the middle hdc of any corner group.
Round 3: Ch 1, work 7 dc in the middle hdc of the first corner group to form a corner shell. Along the next side, work 8 five-dc shells, spacing them evenly. To distribute the stitches, skip five stitches in five of the spaces between shells and skip four stitches in the remaining three spaces. Work 7 dc in the middle hdc of the next corner group. Repeat this arrangement along the remaining three sides, making 8 interior shells and one 7-dc corner shell per side. Join with a sl st in the first dc. Fasten off.
Finishing count: The edging contains 36 interior shells and 4 corner shells, for 40 shells in total. Each shell has five or seven double crochet stitches according to its position.
The interior shells create the rounded scallops, while the slightly larger corner shells help the decorative edge turn neatly around the square.
Final Finishing Instructions
- Cut the sage green yarn, leaving a tail long enough to weave in securely.
- Pull the yarn through the final loop to secure the last stitch.
- Thread the yarn needle and weave the tail through several stitches on the wrong side.
- Repeat for any remaining loose yarn ends.
- Check that all four corners are flat and the shells are evenly arranged.
- Lightly block the square to improve its shape.
Customizing the Crochet Edging and Borders
One of the best features of this pattern is its flexibility. You can change the dimensions, colors, yarn, or number of textured rows to suit different projects. The three-round border is particularly useful because it can be adapted to many square and rectangular crochet pieces.
How to Make a Larger Square
To increase the width, adjust the foundation chain. The suggested base uses 42 chains to create 41 stitches. For a wider square, add an even number of chains while keeping the foundation stitch count compatible with the texture pattern.
For example, a foundation chain of 50 creates 49 stitches. This gives you 24 puff stitches and 25 single crochet stitches in each textured row. Keep the first and last stitches as single crochet stitches to maintain a neat edge.
To increase the length, add more alternating puff and single crochet rows. For the neatest result, maintain an even number of rows so the panel ends with a plain single crochet row.
Adapting the Pattern for Rectangular Projects
The same construction can be used for a rectangular placemat or table runner. Simply make the center panel longer than it is wide. Work the single crochet foundation border around the entire rectangle, adding three stitches at each corner as described.
For a long rectangular project, check the side edges before beginning the decorative shell round. If necessary, adjust the number of skipped stitches between shells so the fans remain evenly spaced.
Alternative Color Combinations
Although cream, pink, and sage green create a soft garden-inspired appearance, this pattern looks lovely in many other combinations.
- Neutral style: Ivory center, beige middle band, and warm taupe edging.
- Fresh spring palette: White center, pale yellow band, and mint green shells.
- Romantic palette: Blush center, dusty rose band, and cream edging.
- Coastal palette: Natural cotton center, pale blue band, and navy scallops.
- Autumn palette: Oatmeal center, terracotta band, and olive green edging.
Customization Tip:
For a coordinated home decor collection, make several squares using the same border colors but vary the center shades. This creates a matching handmade set without making every piece look identical.
Common Crochet Border Mistakes and How to Fix Them
Even simple crochet edging can become uneven if the stitch placement or tension changes from one side to another. Fortunately, most problems are easy to correct before the final round is complete.
1. The Corners Are Curling Up
When the corners curl upward, the border may not have enough stitches to turn around the square. Check that you worked three stitches into each middle corner stitch during the first and second rounds.
If the curling appears after adding the shell round, the decorative fans may be too tight. Try loosening your tension or spacing the shells more evenly.
2. The Border Looks Wavy
A wavy border usually indicates that too many stitches were added along the edges. This can happen when you accidentally work more than one stitch into a row end or corner.
Count the single crochet stitches along each side before moving to the second round. If the border is already rippling, remove the affected section and repeat it with the correct stitch placement.
3. The Shells Look Uneven
Uneven shells can result from inconsistent spacing or different stitch heights. Try to keep each double crochet the same height and make sure all five stitches in an interior shell are worked into the same base stitch.
Use stitch markers to divide each side into sections before beginning the final round. This makes it easier to distribute the shells evenly, especially on larger projects.
4. The Square Is Not Completely Flat
A square that bends or twists may have uneven row tension. The puff stitches can also pull the fabric inward if they are made too tightly.
Check your gauge and make sure the puff loops are pulled up to a consistent height. Light blocking can improve small irregularities, but it cannot completely correct a significantly distorted foundation.
5. The Color Changes Look Untidy
Color changes should be made at the joining point of a round. To create a cleaner transition, finish the final stitch of the previous round with the new yarn when appropriate, then join carefully.
Keep the yarn tails on the wrong side and weave them through several stitches. Avoid pulling the ends too tightly because this can distort the border.
Finishing, Blocking, and Caring for Your Crochet Square
Finishing is an important part of creating a neat crochet project. Once the border is complete, take a few minutes to inspect the edges and secure every loose yarn end.
Weaving in Yarn Ends
Use a blunt yarn needle to weave each tail through the backs of several stitches. Change direction at least once to help secure the end. Trim the excess yarn carefully without cutting into the fabric.
Pay particular attention to the points where the cream, pink, and green yarns meet. Secure color changes neatly so the finished piece remains attractive from both sides.
How to Block the Finished Square
Blocking helps relax the stitches and gives the square a more regular shape. For cotton yarn, gently wet the project with cool or lukewarm water and remove excess moisture without twisting the fabric.
- Place the damp square on a clean towel.
- Press gently to remove excess water.
- Lay the project flat on a suitable blocking surface.
- Adjust the corners and sides until the square looks even.
- Shape the scallops individually so the shells remain rounded.
- Allow the project to dry completely before removing it.
Always follow the yarn manufacturer’s care recommendations. Avoid excessive heat, especially if you are using a cotton blend or synthetic fiber.
Washing and Storage
If you use cotton yarn, gentle machine washing may be suitable depending on the yarn’s care instructions. A laundry bag can help protect the shell edging from snagging. Lay the project flat or reshape it after washing if needed.
For decorative pieces, store them flat in a dry place. Keeping the scalloped edges untangled will help maintain their shape.
Creative Ways to Use Your Finished Crochet Square
The textured center and decorative border make this project useful for more than one purpose. Its compact size and simple construction also make it a practical way to practice new stitches and experiment with color combinations.
Decorative Table Mat
Use the finished square as a small table mat for a vase, decorative bowl, or centerpiece. The scalloped edge adds a soft handmade detail, while the textured center creates an attractive surface.
Handmade Gift Idea
A set of matching crochet squares makes a thoughtful handmade gift. Choose colors that coordinate with the recipient’s home and use consistent edging on each piece.
Blanket Square or Cushion Accent
You can also adapt the design into a decorative blanket square. Make several larger panels and join them using a simple crochet seam. For a cushion project, create two matching squares, join three sides, insert a suitably sized cushion pad, and close the final side securely.
When adapting the square for a cushion, make sure the fabric is dense enough to prevent the insert from showing through.
At a Glance: Easy Crochet Edging and Borders
- Best yarn: Worsted-weight cotton or a cotton blend for defined stitches and a structured finish.
- Skill level: Beginner to easy intermediate, with basic crochet stitches and a simple puff stitch.
- Key technique: Three joined border rounds using single crochet, half double crochet, and shell stitches.
- Size adjustment: Change the foundation chain for width and the number of rows for length.
- Finishing method: Weave in the yarn ends, gently block the square, and shape each scallop.
Create a Beautiful Handmade Finish with Simple Crochet Borders
This easy crochet edging and borders project demonstrates how a few simple rounds can make a handmade piece look more detailed and polished. The textured cream center, dusty pink band, and sage green shell edging work together to create a soft decorative design that suits many home accessories.
The three-round border is particularly useful for crocheters who want to practice neat edges without learning a complicated stitch pattern. Single crochet creates a stable foundation, half double crochet adds a little height, and the final shell stitches provide the decorative scalloped finish.
Before starting, choose your yarn colors, check your gauge, and read through the complete pattern so you understand the construction. Take your time with the corners and distribute the shells evenly along each side. Small adjustments to tension and spacing can make a noticeable difference to the finished result.
Whether you make a small decorative mat, a handmade washcloth, a placemat, or a collection of matching crochet squares, this pattern offers plenty of room for creativity. Experiment with different color combinations, adjust the dimensions, and use the shell border to give your next crochet project a charming finishing touch.
Tags
Easy Crochet Edging
Crochet Borders
Shell Stitch Border
Beginner Crochet Pattern
Crochet Square
Crochet Home Decor
Puff Stitch Crochet
Crochet Blanket Edging
