

- Place the original paper pattern over the quilted pumpkin.
- Align the centerline and upper and lower indentations.
- Check that the decorative quilting does not interfere with the intended outline.
- Trim away the excess batting and backing so all three layers match the orange top exactly.
- Use small scissors around the curves and avoid cutting into the stitched channels.
- Remove any remaining temporary marking lines according to the marking product instructions.
At this stage, the pumpkin should measure approximately 9.5 x 8 inches (24.1 x 20.3 cm) before binding.
Step 7: Prepare the Bias Binding
- Cut a 2.5-inch (6.4 cm) wide bias strip with a total length of at least 40 inches (101.6 cm).
- If necessary, join several strips with diagonal seams to create one continuous piece.
- Press the joining seams open and trim away bulky seam corners.
- Fold the strip in half lengthwise with wrong sides together.
- Press along the entire length to create a center crease.
- Open the strip and fold each long raw edge toward the center crease.
- Press both folds.
- Fold the strip along the original center crease again, enclosing both raw edges.
- Press thoroughly.
This creates double-fold bias binding that can wrap around the curved pumpkin perimeter. The folded strip should have a finished width of approximately 5/8 inch (1.6 cm).
Step 8: Attach the Binding and Stem
- Locate the upper center of the pumpkin and identify the placement for the stem loop.
- Position the loop so its two raw ends overlap the pumpkin edge by approximately 1/2 inch (1.3 cm).
- Temporarily baste the stem ends in place, ensuring they remain within the binding area.
- Open one folded edge of the bias strip.
- Place the raw edge of the strip against the raw edge of the pumpkin with right sides together.
- Start near the lower side of the pumpkin and leave approximately 3 inches (7.6 cm) of binding free at the beginning.
- Stitch around the perimeter using a 1/4-inch (6 mm) seam allowance.
- Ease the bias strip around curves without stretching the pumpkin fabric.
- At tight inward curves, stop with the needle down, lift the presser foot, and gently reposition the binding.
- Overlap the binding ends by approximately 1 inch (2.5 cm), trim excess length, and join them securely.
- Finish stitching the binding attachment seam.
- Fold the binding over the raw edge toward the back of the mug rug.
- Hand stitch the folded edge to the backing or machine stitch close to the folded edge.
Check the stem before closing the binding completely. Both ends should be captured securely, with the loop standing above the pumpkin edge.
Step 9: Finish and Press
- Inspect the binding around the entire pumpkin shape.
- Check that the corners and inward curves are covered without puckering.
- Secure any loose hand stitches.
- Press the mug rug gently from the top using a pressing cloth if necessary.
- Use a low to medium iron temperature appropriate for the cotton fabrics and batting.
- Remove any remaining fabric markings.
- Trim loose threads and inspect the leaf, stem, quilting, and perimeter stitching.
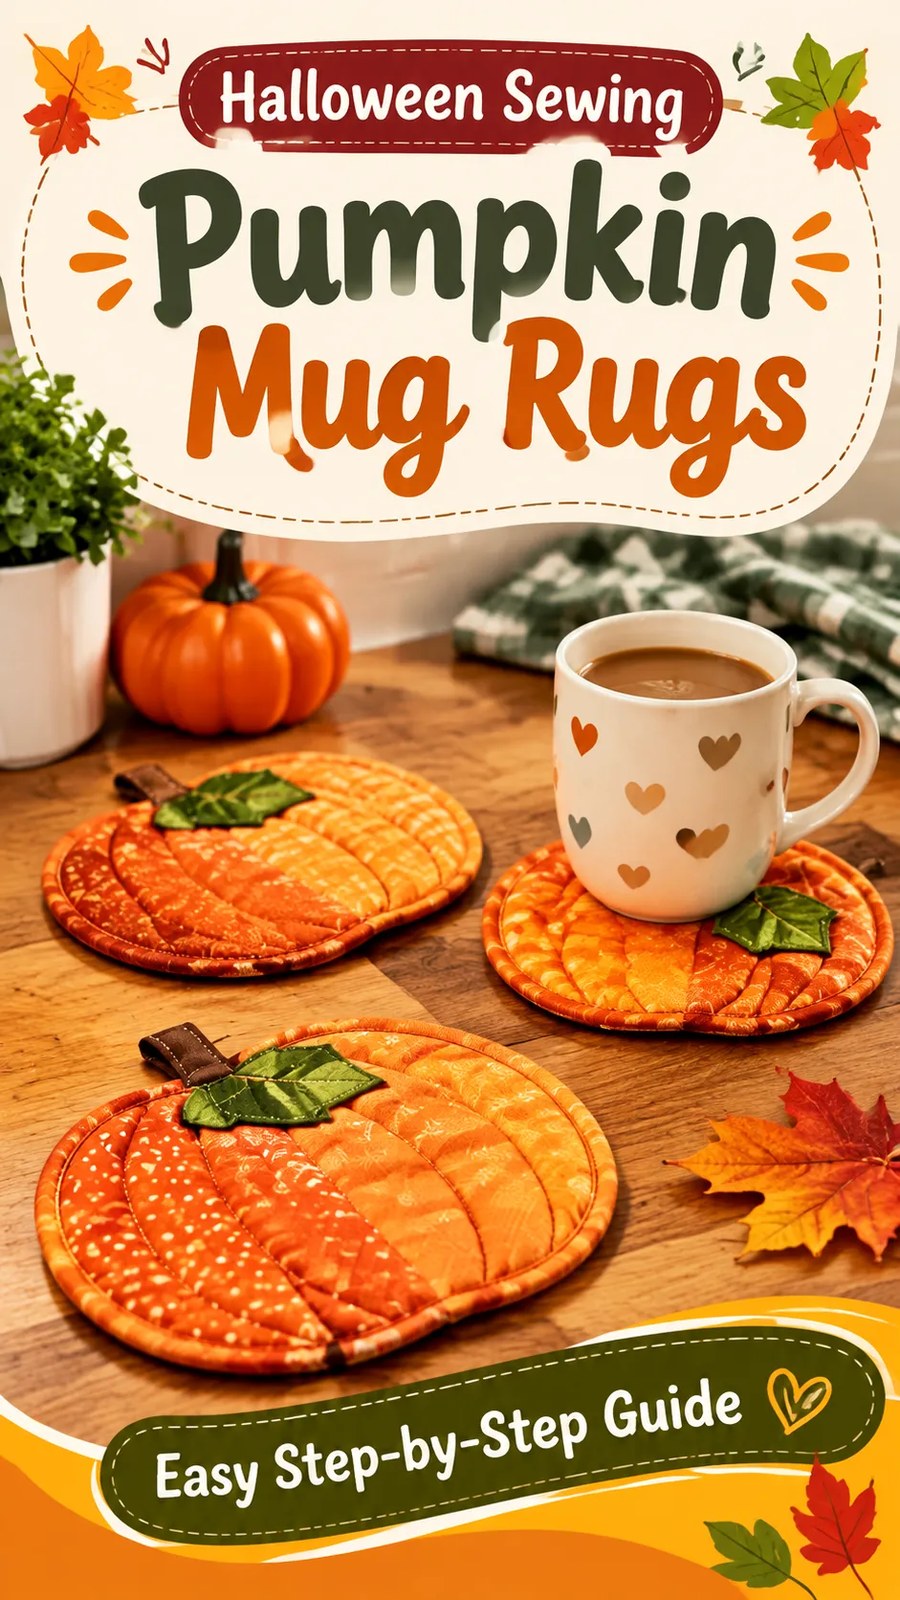
The finished pumpkin mug rug should lie reasonably flat on a tabletop, with the quilting evenly distributed and the binding neatly enclosing the raw edges.
Customizing Your Pumpkin Mug Rug Pattern
One of the best features of this pumpkin sewing pattern is how easily the design can be adapted. Once the basic silhouette and construction method are familiar, you can create several variations for different occasions and decorating styles.
Make Larger or Smaller Pumpkin Mug Rugs
To make a smaller pumpkin, reduce the paper pattern dimensions proportionally. For example, a pattern measuring 8 x 6.75 inches (20.3 x 17.1 cm) can create a compact coaster-style version.
For a larger design, increase the width and height while maintaining the same general pumpkin proportions. A larger version measuring approximately 11 x 9.25 inches (27.9 x 23.5 cm) offers more room for a wide mug or a small plate.
When changing the dimensions, remember to adjust the leaf and stem proportionally. Recalculate the binding length using the new perimeter and check that the batting remains evenly distributed.
Experiment with Autumn Colors
Traditional orange is a natural choice, but pumpkins come in many beautiful seasonal shades. Try combinations such as:
- Rust and sage: A muted autumn palette with a natural, understated appearance.
- Burnt orange and forest green: A rich combination for traditional fall décor.
- Mustard and cream: A warm palette that works well with neutral kitchen accessories.
- Terracotta and olive: An earthy combination for rustic farmhouse styling.
- Black and orange: A playful Halloween-inspired version.
- Soft peach and pale green: A gentle alternative for cozy autumn decorating.
Change the Leaf and Quilting Details
The leaf can be made in several shapes, including a simple rounded leaf, a pointed maple-inspired leaf, or a small heart-shaped variation. Keep the appliqué relatively flat so the mug rug remains practical for holding a cup.
For the pumpkin quilting, try using a darker orange thread for more visible definition. Alternatively, use a thread that closely matches the fabric for a subtle textured finish.
You can also experiment with double rows of stitching along selected channels or add a small decorative vein pattern to the leaf.
Make a Coordinating Mug Rug Set
A collection of matching pumpkin mug rugs creates a lovely seasonal table accessory. Make three or four pieces in complementary orange fabrics and vary the leaf placement slightly to give each one an individual appearance.
For a coordinated set, use the same backing and binding fabric across all pieces. This creates a consistent finish even when the pumpkin fronts use different prints.
For multiple mug rugs, multiply the cutting quantities by the number of finished pieces and allow extra fabric for directional prints, binding joins, and cutting mistakes.
Sewing Insight: Why the Quilting Direction Matters
Curved quilting lines are an important part of the pumpkin’s appearance. They help define the rounded lobes and give the flat fabric surface a more dimensional look.
- Begin quilting at the center to help stabilize the layers.
- Work outward in alternating directions to reduce shifting.
- Use consistent spacing to create balanced pumpkin segments.
Common Pumpkin Mug Rug Sewing Mistakes and How to Fix Them
Although this is a relatively small sewing project, a few construction details can affect the finished appearance. Taking time to prepare the layers and check the curves can make the process much easier.
1. Uneven Pumpkin Curves
Problem: The finished pumpkin looks asymmetrical or has noticeable bumps around the edges.
Solution: Fold the paper pattern along its vertical centerline and check that both sides match. Transfer the corrected outline carefully before cutting the fabric. Use small scissors around curved sections rather than forcing a rotary cutter through tight bends.
2. Puckered Quilting Lines
Problem: The orange fabric develops small wrinkles between quilting channels.
Solution: Make sure the quilt sandwich is properly basted. Use a walking foot if available and avoid pulling the fabric while sewing. Test the stitch length on a scrap sandwich before quilting the actual project.
3. Bulky Binding Around Curves
Problem: The binding folds awkwardly around the rounded pumpkin edges or creates thick areas near the top and bottom indentations.
Solution: Use bias-cut cotton binding because it follows curves more easily than straight-grain strips. Ease the binding gradually around the perimeter. At inward curves, stop frequently and reposition the strip rather than stretching it.
4. A Leaf That Looks Too Bulky
Problem: The green leaf becomes thick or develops uneven folded edges.
Solution: Keep the leaf small and use lightweight cotton. Trim excess turning allowance near pointed areas before turning and pressing. Avoid adding thick interfacing unless the leaf fabric is particularly soft.
5. A Stem Loop That Shifts
Problem: The stem becomes crooked or pulls away from the pumpkin edge.
Solution: Position both raw ends evenly before attaching the binding. Baste the ends securely within the edge area and check their alignment from the front and back before stitching the binding.
6. An Uneven Finished Edge
Problem: The backing or batting shows beyond the binding, or the binding width changes around the perimeter.
Solution: Trim all three quilt layers evenly before binding. Use clips to keep the folded binding in position and check the width regularly as you stitch around the pumpkin.
Pressing, Finishing, and Caring for Handmade Mug Rugs
Good pressing habits help keep the pumpkin shape smooth and give the binding a professional appearance. Press the fabric before cutting, press the folded stem before attaching it, and carefully press the bias binding before sewing it around the quilt sandwich.
During construction, use a moderate iron temperature appropriate for the selected fabric. Avoid pressing directly over thick folds without checking that the layers are flat.
Final Quality Checks
- Make sure all raw edges are completely enclosed by the binding.
- Check that the stem loop is securely caught in the upper binding.
- Inspect the leaf appliqué for loose edges or skipped stitches.
- Confirm that the quilting lines are secure and evenly spaced.
- Check the backing for loose threads and uneven fabric layers.
- Place the mug rug on a flat surface to check that it sits evenly.
How to Wash and Store Pumpkin Mug Rugs
For cotton versions, gentle washing is generally suitable when the selected fabrics, batting, and thread are washable. Follow the care recommendations for all materials used in the project.
- Wash with similar colors in cool or lukewarm water.
- Use a gentle detergent.
- Avoid harsh bleaching products that may affect the orange and green fabrics.
- Air-dry or tumble-dry on a low setting if the materials allow it.
- Press lightly if necessary to restore the pumpkin shape.
- Store flat or stack with other seasonal fabric accessories.
Because this is a fabric accessory rather than a heat-resistant pad, it should not be used under hot cookware, baking dishes, or items taken directly from the oven. Its intended purpose is to provide a decorative surface for ordinary mugs and small treats.
Care Reminder: Allow hot drinks to cool enough for safe handling before placing them on the mug rug. The fabric and batting are decorative cushioning materials, not certified heat-resistant protection.
Pumpkin Mug Rug Sewing Pattern at a Glance
- Best fabric: Medium-weight woven quilting cotton in orange, rust, or burnt pumpkin shades.
- Skill level: Confident beginner, with basic machine sewing and curved cutting experience.
- Key technique: Three-layer quilting, curved channel stitching, turned-edge appliqué, and bias binding.
- Finished size: Approximately 9.5 x 8 inches (24.1 x 20.3 cm).
- Finishing method: Double-fold bias binding around the complete pumpkin perimeter.
Create Your Own Cozy Autumn Pumpkin Mug Rugs
These pumpkin mug rugs are a delightful way to combine practical sewing skills with seasonal creativity. Their rounded pumpkin silhouettes, decorative quilted channels, little green leaves, and brown fabric stems create a charming autumn accessory that looks lovely on a kitchen counter, coffee table, or seasonal tea station.
The original pumpkin mug rug sewing pattern offers a straightforward construction method using basic woven fabrics, cotton batting, and double-fold bias binding. It is also a useful opportunity to practice several important sewing techniques, including shaped cutting, fabric appliqué, quilting, and neat edge finishing.
Before cutting your final fabric, read through the complete pattern, check the pumpkin measurements, and prepare all your materials. Prewash suitable fabrics, test the needle and stitch settings on scraps, and make sure the quilting layers are properly secured before sewing the decorative channels.
Once you are comfortable with the basic design, experiment with different orange fabrics, leaf shapes, thread colors, and pumpkin sizes. You can make a matching set for autumn entertaining, create small handmade gifts, or use leftover quilting cotton to make several coordinating seasonal accessories.
Choose your favorite fall colors, prepare your sewing machine, and enjoy creating these charming quilted pumpkin mug rugs. A little fabric, some careful stitching, and a few decorative details can turn a simple sewing project into a lovely handmade addition to your autumn home décor.
Tags
Pumpkin Mug Rugs
Free Sewing Pattern
Halloween Sewing
Quilted Coasters
Fall Sewing Projects
Fabric Appliqué
Beginner Sewing Ideas
Autumn Home Décor
