

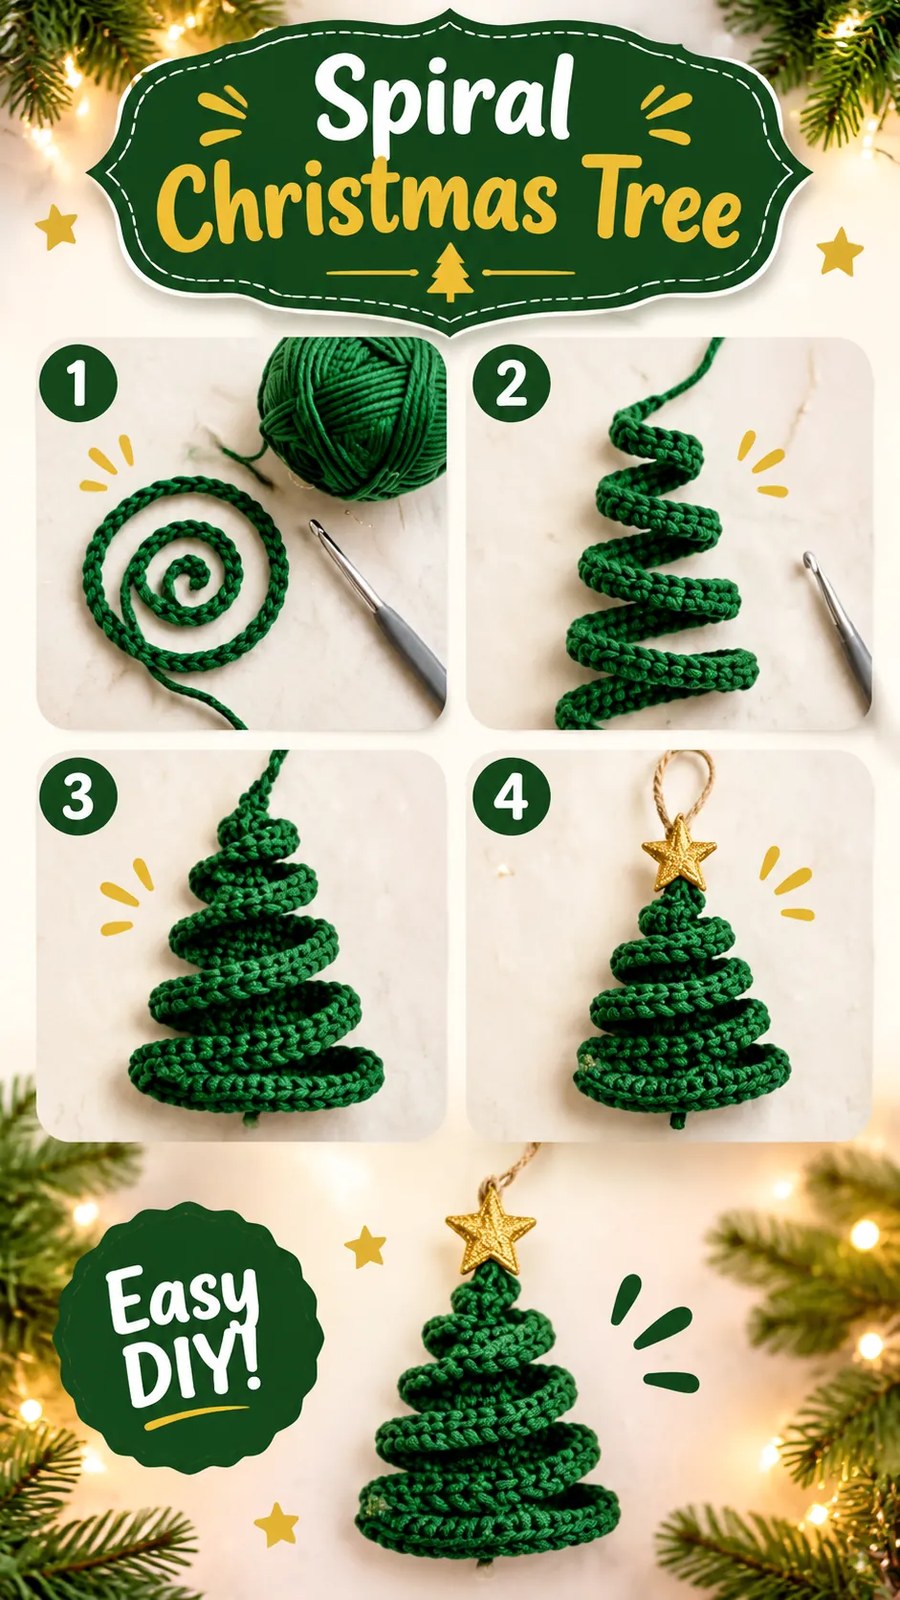
A small decorative star gives the tree a traditional Christmas finish. A lightweight wooden, felt, or crocheted star can be used.
- Choose a small star approximately 0.5 to 0.75 inches (1.3 to 1.9 cm) wide.
- Position it directly above the top tier.
- Attach it using matching sewing thread or a few small stitches through the back of the star.
- Check that the star is centered and does not pull the top of the tree out of position.
If you prefer an entirely crocheted decoration, make a small star using gold cotton yarn.
Optional Mini Crochet Star
- Ch 4 and join with a sl st to form a ring.
- Ch 1, then work 5 sc into the ring. Join with a sl st to the first sc. (5 sts)
- For each point, work ch 3, sl st in the second ch from the hook, sc in the next ch, skip the next sc of the center ring, and sl st into the following sc.
- Repeat the point sequence around the ring for a total of five points. After the fifth point, join neatly to the starting area.
- Fasten off, leaving a tail for attaching the star to the tree.
Weave in the loose ends and gently flatten the star with your fingers. If necessary, lightly shape it with rust-resistant pins before attaching it.
Part 5: Make a Hanging Loop
To turn the finished crochet Christmas tree into a hanging ornament, create a small loop at the top.
- Cut approximately 8 to 10 inches (20 to 25 cm) of coordinating yarn or decorative cord.
- Fold it in half to create a loop of your preferred length.
- Attach the two loose ends securely to the back of the top section.
- Reinforce the attachment with several small stitches.
- Check that the loop is centered and strong enough to support the lightweight decoration.
Alternatively, omit the loop and use the tree as a tabletop decoration, gift topper, or decorative piece for a Christmas display.
How to Customize Your Crochet Christmas Tree
One of the nicest features of this crochet Christmas tree pattern is how easily it can be adapted. You can change the cord length, yarn weight, color, and decorative details to create different versions.
Make a Smaller Miniature Tree
For a smaller ornament, work a shorter cord and reduce the number of tiers. A five-tier version can use the following approximate sections:
- Tier 1: 6 rounds.
- Tier 2: 10 rounds.
- Tier 3: 14 rounds.
- Tier 4: 18 rounds.
- Tier 5: 22 rounds.
Use four short connecting sections of approximately four rounds each. This creates a total of 86 rounds. Arrange the sections with the smallest at the top and the widest at the bottom.
Create a Larger Christmas Tree
For a larger decoration, increase the number of rounds in each tier while maintaining the gradual width progression. You can also add additional tiers below the original seven sections.
Remember that a larger tree requires more cord and additional securing stitches. Measure the completed cord before arranging it so you have enough length to create all the branches without stretching the yarn.
Experiment With Christmas Colors
Traditional forest green creates a classic evergreen appearance, but other colors can make the decoration feel fresh and modern.
- Sage green: Creates a soft, natural holiday style.
- Emerald green: Adds a rich and elegant appearance.
- Cream: Gives the tree a snowy winter-inspired look.
- White: Works beautifully for a minimalist Christmas display.
- Red and green: Creates a cheerful traditional holiday combination.
- Metallic gold: Adds a decorative festive accent.
You can also introduce a subtle color change at the beginning of a new tier. To do this, finish the final stitch of the previous color with the new yarn, then continue crocheting. Secure the yarn tails on the back of the finished cord before arranging the tree.
Common Crochet Mistakes and How to Fix Them
Although the project uses simple stitches, a few small issues can affect the finished appearance. Checking the cord as you work makes the assembly stage much easier.
The Crochet Cord Is Twisting Too Much
A slight natural twist is normal when working a narrow tube. However, excessive twisting can make the finished tree difficult to arrange.
Try relaxing your yarn tension and allowing the cord to rest flat before shaping it. Avoid pulling the cord tightly when attaching the tiers.
The Cord Looks Too Loose
Loose stitches can make the tube look uneven and reduce its ability to maintain a rounded shape. Try a smaller crochet hook or slightly firmer tension. Make sure the hook is appropriate for your yarn rather than forcing the stitches to become extremely tight.
The Tube Has More or Fewer Than Four Stitches
This usually happens when the beginning of the round is difficult to identify. Keep the stitch marker in the first stitch and count all four stitches before beginning the next round.
Important: Do not increase or decrease the four-stitch tube to correct its length. Its consistent stitch count is what creates the narrow, rounded cord. Adjust the finished length by adding or removing complete rounds instead.
The Tree Looks Uneven
An uneven tree usually means the tiers are not centered or the cord has been pulled too tightly in some places.
- Place the tree on a flat surface before securing it.
- Check that the bottom tier is centered beneath the upper sections.
- Keep the spaces between branches reasonably consistent.
- Use temporary pins to adjust the arrangement before sewing.
- Reposition any tier that pulls the overall silhouette to one side.
The Branches Keep Moving Apart
If the cord does not stay in position, add a few extra securing stitches at the back. Concentrate on the center of each tier and the points where neighboring sections meet. Use matching yarn so the stitches remain discreet.
Finishing, Shaping, and Caring for Your Ornament
Finishing is an important part of creating a neat crochet Christmas tree. Once the tiers have been arranged and secured, inspect the entire decoration before attaching the final embellishments.
Weave in All Loose Ends
Use a yarn needle to weave the remaining tails through the back of the cord or between the secured sections. Change direction once or twice to help prevent the ends from coming loose. Trim excess yarn only after checking that each tail is secure.
Shape the Branches
Arrange the branches with your fingers and gently adjust the curves. The upper tier should be narrow, while each lower tier should extend slightly farther outward. Keep the base broad enough to support the overall triangular appearance.
If the cord needs a little shaping, pin the decoration to a clean blocking mat and allow it to rest until the curves settle. Avoid excessive moisture, heat, or stretching, especially when using acrylic or blended yarn.
Attach the Decorative Star Securely
Position the star directly above the narrowest tier. Use a few small stitches to attach it firmly. If the decoration will be handled frequently, check the attachment periodically to ensure it remains secure.
For projects intended for young children, avoid small detachable stars, beads, buttons, and other loose embellishments. An embroidered star or securely stitched decorative detail is a more suitable option, although the finished ornament should still not be treated as a baby toy.
Cleaning and Storage
Follow the care instructions for the selected yarn. If the decoration becomes dusty, gently brush it with a soft, dry cloth or use a suitable low-suction vacuum attachment.
If washing is appropriate for the yarn and embellishments, use gentle hand washing and avoid twisting the cord. Reshape the tree while damp and allow it to dry completely on a flat surface.
Store the ornament in a clean, dry container between holiday seasons. Avoid placing heavy objects on top of it, as this may flatten the rounded cord and distort the branch arrangement.
Creative Ways to Display Your Handmade Crochet Tree
Once finished, this little crochet Christmas tree can be used in several ways. Its compact size makes it especially suitable for small seasonal displays and handmade gift projects.
- Christmas tree ornament: Add a hanging loop and display it among traditional holiday decorations.
- Gift topper: Attach the tree to a wrapped present for a personal handmade touch.
- Garland decoration: Make several trees in different green shades and attach them along a decorative cord.
- Tabletop accent: Position the tree beside candles, pine branches, or other seasonal decorations.
- Handmade gift: Create a collection of small crochet ornaments for friends and family.
- Holiday craft project: Use leftover bulky yarn to make several versions in different sizes.
For a coordinated display, make a collection of trees using the same pattern but vary the star colors, yarn shades, and finished dimensions.
Crochet Spiral Christmas Tree: At a Glance
- Best yarn choice: Super bulky yarn in forest green for a thick, rounded cord.
- Skill level: Confident beginner, with basic single crochet and continuous-round experience.
- Key technique: Work a four-stitch tube in continuous rounds and arrange it into seven graduated tiers.
- Size adjustment: Add or remove complete rounds to change the cord length and customize the tree width.
- Finishing method: Secure the tiers with matching yarn, weave in the ends, and attach a small decorative star.
Make Your Own Handmade Crochet Christmas Tree
This crochet spiral Christmas tree is a lovely way to bring handmade charm into your holiday decorating. Its simple tubular construction, textured green cord, and playful branch arrangement create a distinctive Christmas decoration without requiring complicated stitches or multiple large crochet pieces.
Choose a yarn that gives your cord enough body, select a suitable crochet hook, and check the round gauge before completing the full length. Read through the entire pattern before beginning, especially the tier arrangement and securing instructions, so you can plan the shape confidently.
Most importantly, have fun personalizing your decoration. Experiment with different shades of green, create a sparkling star, or make a collection of miniature trees for your holiday display. Whether used as a Christmas ornament, gift topper, or seasonal home accent, this handmade crochet tree is a delightful little project to enjoy throughout the festive season.
Tags
Crochet Christmas Tree
Spiral Crochet Pattern
Christmas Crochet
Crochet Ornaments
DIY Christmas Decor
Handmade Christmas Gifts
Easy Crochet Projects
Crochet Home Decor
