

Ami_esnek (yatay)
Wings
R1: 4 sc in MR (4)
R2: inc x4 (8)
R3: (1 sc, inc) x4 (12)
R4: (2 sc, inc) x4 (16)
R5: (3 sc, inc) x4 (20)
R6: (4 sc, inc) x4 (24)
R7: (5 sc, inc) x4 (28)
R8: (6 sc, inc) x4 (32)
R9: (7 sc, inc) x4 (36)
R10: (8 sc, inc) x4 (40)
R11: (9 sc, inc) x4 (44)
Fold flat and crochet through both layers:
5 sc, 1 hdc, 1 dc, 2 tr in one stitch, 1 dc, 1 hdc, sl st,
1 hdc, 1 dc, 2 tr in one stitch, 1 dc, 1 hdc, sl st,
1 hdc, 1 dc, 2 tr in one stitch, 1 dc.
Fasten off and hide yarn.
Ami_esnek (yatay)
Second wing:
Fold flat and crochet through both layers:
1 dc, 2 tr in one stitch, 1 dc, 1 hdc, sl st,
1 hdc, 1 dc, 2 tr in one stitch, 1 dc, 1 hdc, sl st,
1 hdc, 1 dc, 2 tr in one stitch, 1 dc, 1 hdc, 5 sc.
Fasten off, leaving a long tail for sewing.
Ami_esnek (yatay)
Ears
Important: ear increases are made with 3 sc in one stitch, not 2.
First part (orange)
R1: 9 sc in MR (9)
R2: (2 sc, inc) x3 (12)
R3: (4 sc, inc) x3 (18)
R4: (6 sc, inc) x3 (24)
R5: (8 sc, inc) x3 (30)
Second part (purple)
Work exactly the same.
Place both parts together with matching sides facing.
Pull yarn through the orange part and crochet sc evenly around to join.
Ami_esnek (yatay)
Pumpkin
R1: 6 sc in MR (6)
R2: inc x6 (12)
R3: (1 sc, inc) x6 (18)
R4: 18 sc (18)
R5: 18 sc (12)
R6: dec x6
Pull the opening closed, do not cut yarn.
Create indentations by pulling the yarn to the opposite side, tightening slightly, wrapping around the pumpkin, and returning through the original opening.
Repeat several times, then fasten off.
Ami_esnek (yatay)
Stem
Ch 3, starting from the second chain, sl st 2.
Cut yarn and sew to the center of the pumpkin.
Sew the pumpkin to the head.
Assembly
Sew upper arms between R24 and R25 with 8 sc between them.
Sew lower legs between R9 and R10, parallel to the upper arms.
Attach wings by the 5 sc section between R18 and R22, spacing about 7 sc.
Sew ears in a semicircle between R4 and R14 so they slightly lie down.
Ami_esnek (yatay)
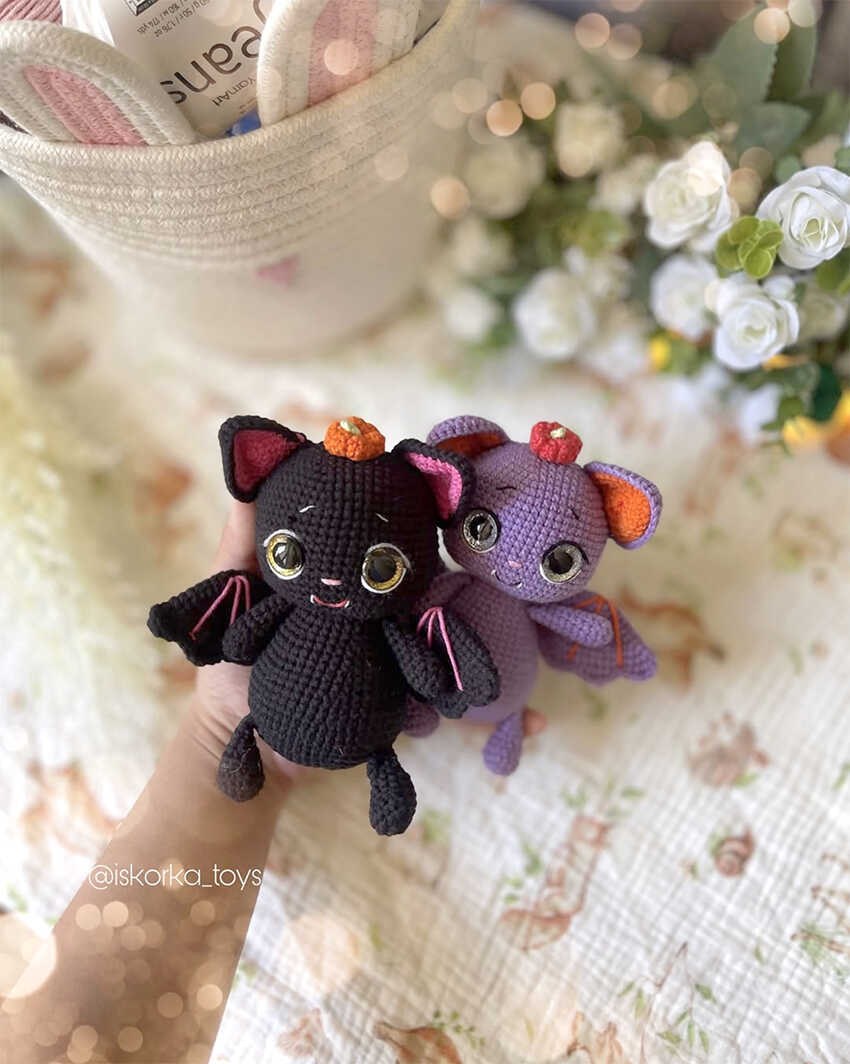
Embroider eyelashes and eye whites.
Embroider eyebrows at R12–R13 over 2 sc.
Embroider the mouth at R22–R23 in a small V shape.
Embroider fangs.
Embroider the nose between R20–R21 over 2 sc.
Add decorative lines on the wings.
Copyright & Credits
This pattern is designed by iskorka_toys. You may sell finished toys made from this pattern; however, the pattern itself may not be published, redistributed, copied, translated, or shared in any form without the designer’s prior permission. When sharing photos of your finished work, please credit the designer by tagging @iskorka_toys and linking to their social media.
Crochet bats are a fun and playful addition to any amigurumi collection. Their tiny wings, round shapes, and charming expressions make them perfect for seasonal decor, handmade gifts, or cute desk companions for crochet lovers.
Ami_esnek (yatay)
Cute Amigurumi Bat Designs for Your Next Crochet Project
CONTENT END 1
